
AvidJack
Contributing Member-
Content count
45 -
Joined
-
Last visited
Posts posted by AvidJack
-
-
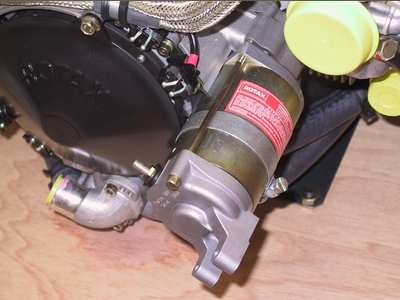
Well drat. Just found this thread. I have the 912 uls and am now on my third firewall iteration, fighting those lugs on the starter.
I was wondering whether the lugs were essential to anything hidden inside, and Paul's solution has just made my life a lot easier. Off with the lugs. On the bright side, I've gained a lot of practice on sheet metal work. This is not my engine, but the lugs seem to be the same.
Jack Austin TX

-
I'm workinig on a kifox, so don't often look to see what's happening in the catalina world. Mine has a hirth f30, 100hp on it. Started out with a clutch, but the hirth clutches do NOT like sudden drops in power, (eg: about to take a buzzard strike!!). While several builders solved the tail-heavy CG by pouring lead in the nose, I put a pipe flange on the passenger-side floor, and install a 25 pound barbell weight when flying solo. With 100 hp, I have no problems getting off the water at gross, and can easily hit vne in flight. This one's mine.. http://youtu.be/v8N8fQ803iA And, if possible, a clutch makes water operations much more manageable.
The hirth engines are not as well supported as the rotax, as far as technical information and parts go. I'm going with a 912 uls in the kitfox.
-Jack
Austin, TX
1 person likes this -
I asked santa so nicely back in 2019 (according to this thread) for a paypal donation button on the home page, but I guess I was naughty that year, 'cause it didn't happen. I've been better (?) this year, and I did just send a paypal your way, but gosh darn it would be so much easier if santa would check his list twice (and maybe send out a yearly reminder that he was compiling his naughty list)..
Thanks for everyone's support.
Jack
1 person likes this -
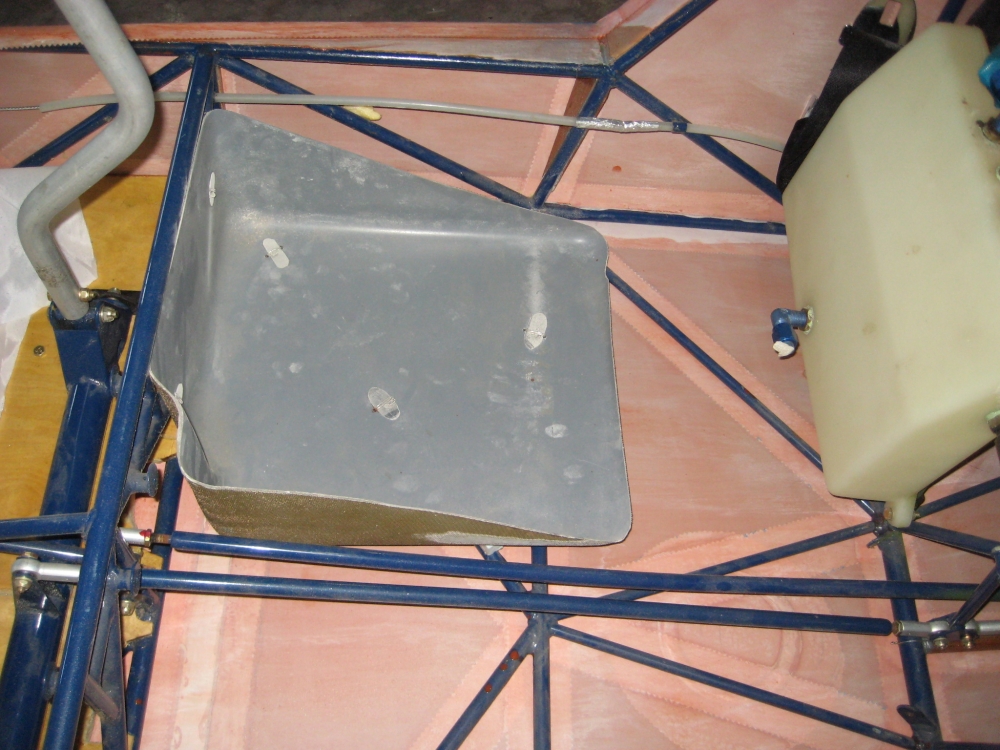
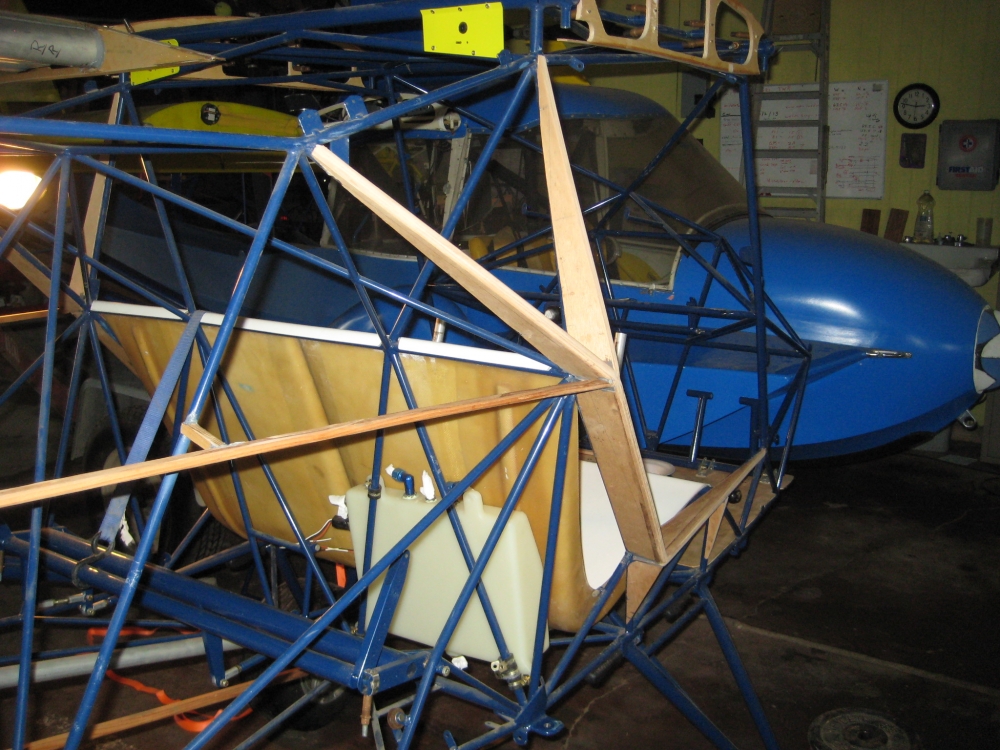
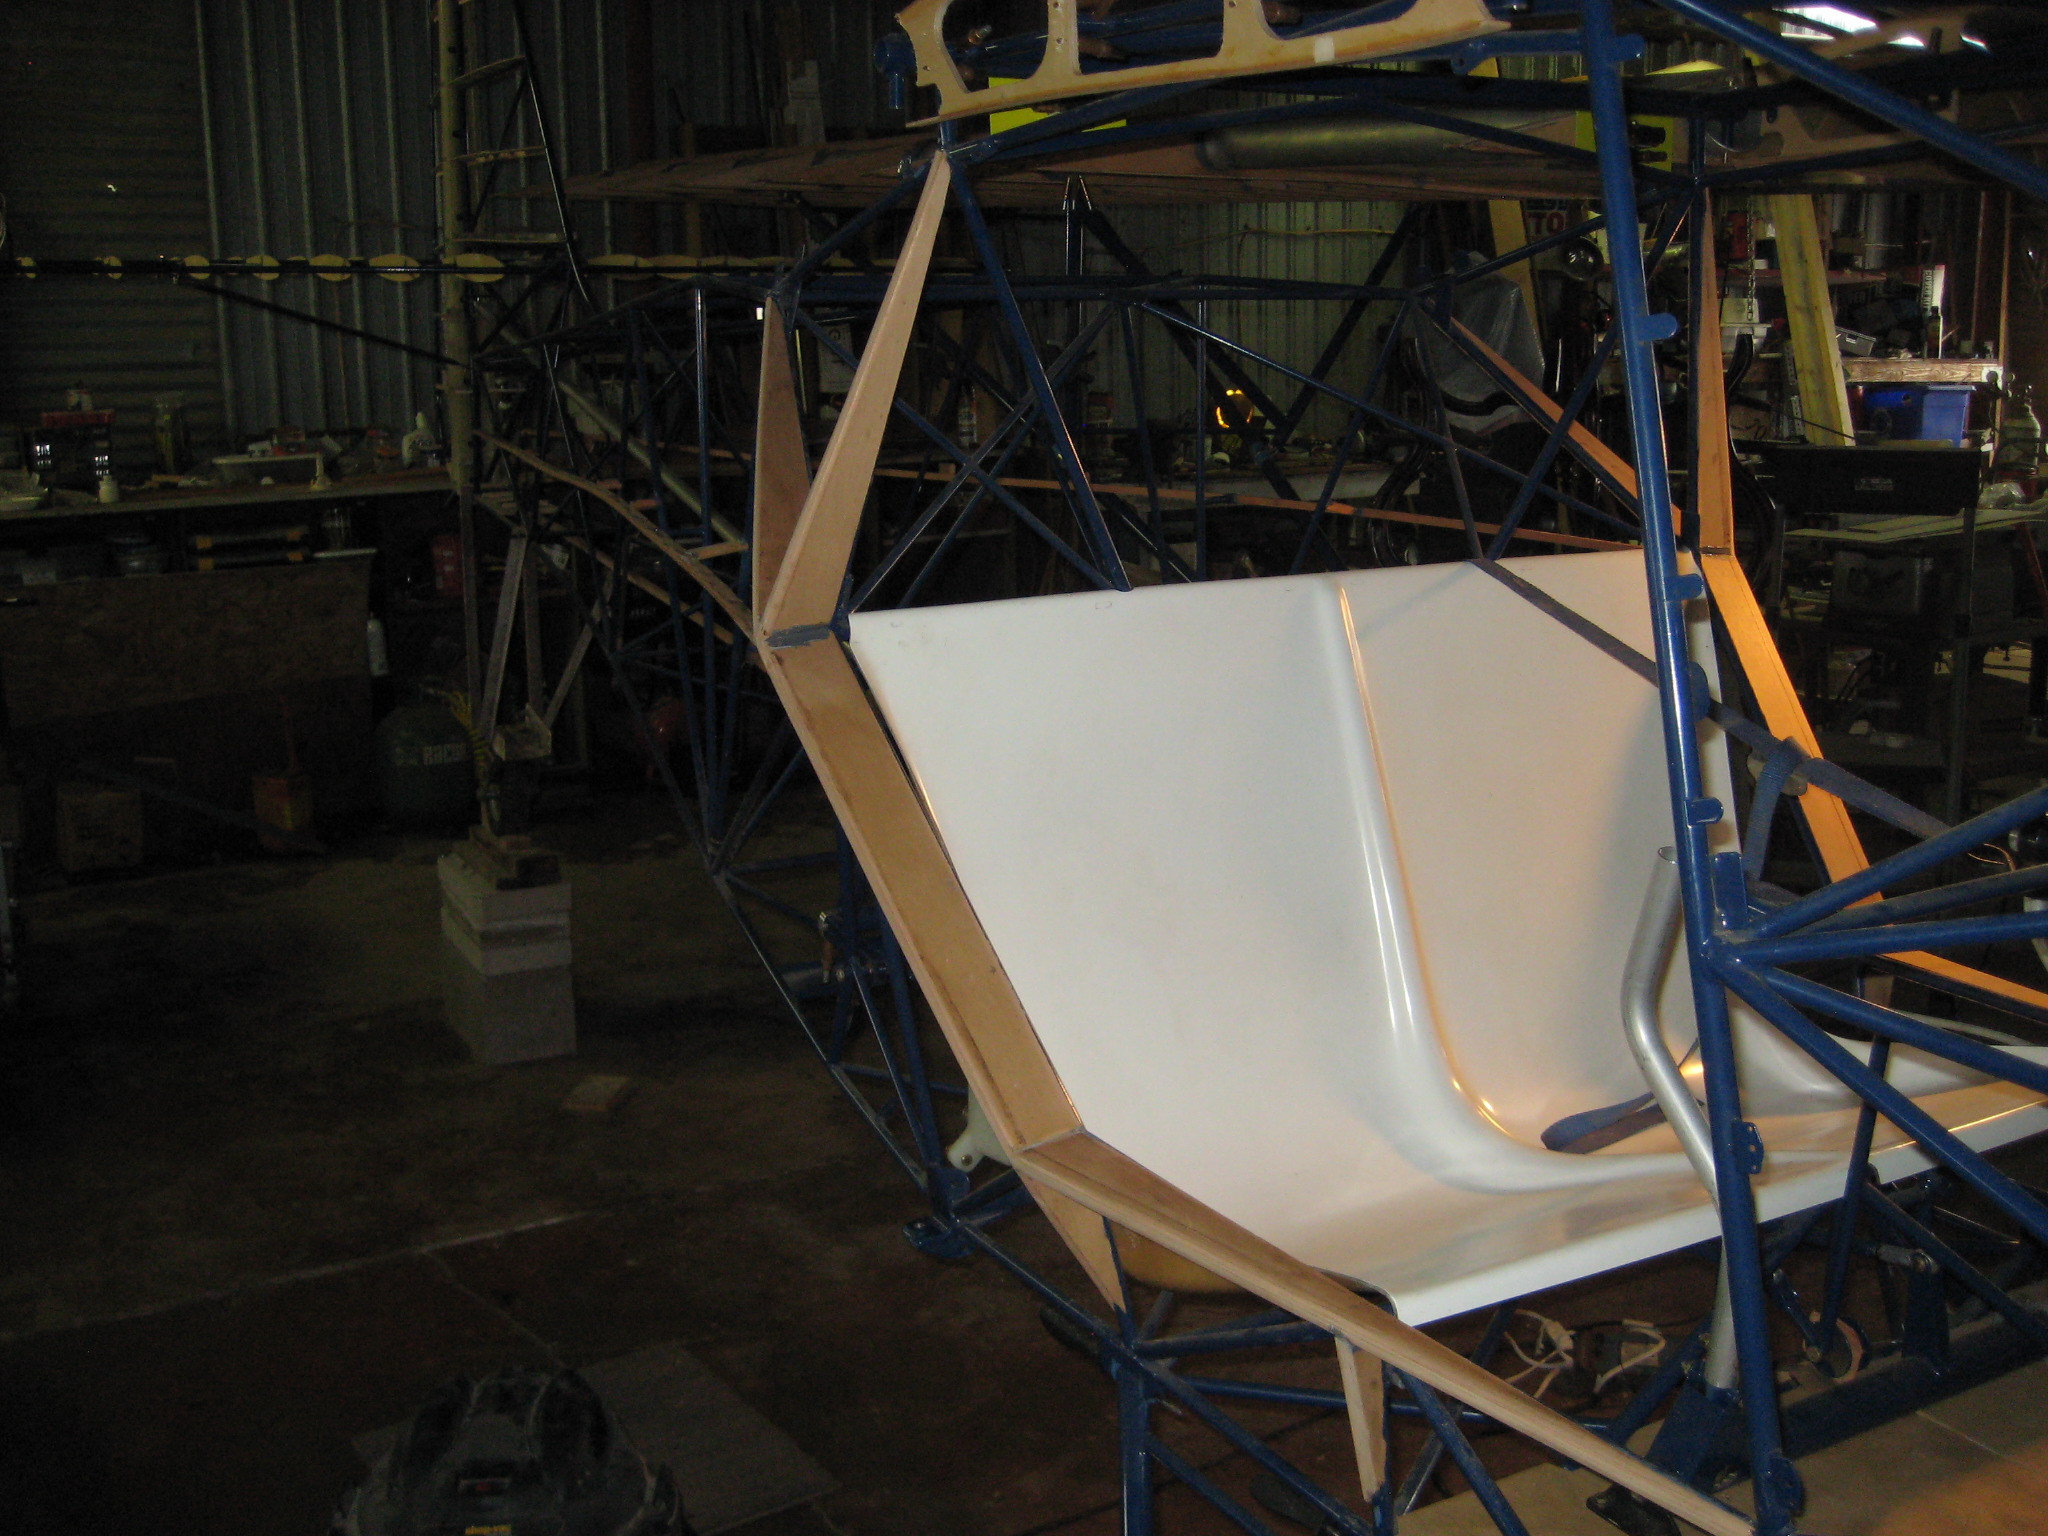
The edges on my box were 1) highly irregular and 2) too tall, pressing down on the frame and up on the seat pan. So, I cut them off, and glued with safety wire the pan to the frame. I also didn't like the way it would have cut into the formed seat "truss" on the botton of the pan, so made the access door smaller than the box to avoid the truss. I split foam tubing for the seat-to-box edge interface- no pics of that.
-
Went with a step, but didn't like the idea of stressing the gear leg too much. ordered some 1" ID tubing, split that, then welded a bar support to those, and pop-riveted those to the gear legs.
Am about to cover the gear- this was one of those "stopping places" - need to get the fuse up on gear. Welds aren't pretty (one reason I didn't want to mess with the gear legs directly). The inserts are rivnuts.
Onward.
-
I picked up a 912 radiator, and started looking at the mods to the radiator speed fairing- it's a total rebuild. Which made me start figuring.. So, can anyone tell me why the cooling area of the vaunted 912 radiator is actually *smaller* by two square inches than the 582 radiator, which fits the speed fairing? And how that makes it better? Extra capacity by a few ounces in the side chambers can be cured, and I don't think the heat flow differential of two inches in height is going to make that much of a difference.
I had all the measurements for the "bigger" 912 radiator, but hadn't sized the "smaller" 582 radiator. Still spending time learning about radiators, thinking I may go the 582 route. Any thoughts? Anyone have experience with those 2-row ebay 582 radiators?
There's always sometHing.
Thanks, Jack
-
The easiest way to go would be another 2200. You can pull the service manual off of the Jab web site, and at the very end it will tell you what the changes were by serial number. You have an early serial number, which would be the old J-head cylinders. Good news, they didn't overheat as much as the later models- mostly due to the fact that they didn't make the (advertised) power, coming in at around 55 HP, according to the certification of the engine in Australia. SN165 had a checkered past, but the really bad issues with the early engines were taken care of- the aluminum rods and early crank were replaced, along with the early block. It still retained the old heads, and the smaller carb. Those heads are hard to come by, but not totally impossible. Note that the prop was sized for the lower power engine, you'll need to replace it with a repower. 80 hp would make a *really* nice mk IV.
If you do go with an earlier jab (2200a), get a serial number as close to upper limit before they went to the hydraulic lifters, as per that service manual, or try a gen 4 model. It shouldn't be too hard to switch to a 912 series, the cowling would have been stretched to fit the jabiru,, but measurements would tell the tale. I wouldn't be surprised to find a bit of weight back by the tailwheel to counteract the jab installation. Plumbing in a radiator would probably necessitate removing any fairing work under the gear..
Jack Austin, TX
-
I might be able to give you a few pointers, depending on the avid you have.
All of the avids are homebuilts, and as such are fairly unique, meaning mine is different than yours, and pretty much all of the others. Figuring out how to help would be based on the serial number, which would tell me more about the gear release, and the propeller/engine combination. Heck, with the tail number, I can probably pull the engine combination, maybe even pictures.
I say this, because on build, I added the kitfox leading edge to the wings, as well as covering the upper leading edge with thin ply, to add more of a contoured shape. This gets rid of some of the dragginess, and shortens my takeoff and landings. I also have a Hirth 100 hp pushing a three blade warp prop, and in testing, I have *no* problems getting off the water at gross weight. My power-on stalls are also pretty hard to manage, as the power tends to offset the stick. I do have a youtube video of water operations- I watched a lot of them when building mine- had to move the bilge pump outlet upwards, as the original location was underwater (as shown on some of those videos) ! You can search "Granger Lake Splashin" on the utube for my video. Avid catalina for some of the others.
So, let me know what you have, and I can probably help some. If you've never flown a pylon-mounted engine, be aware that adding power tends to push the nose DOWN, which can be exciting during a go-around. I found that doing a lot of water landings made landing on runways a lot simpler, just hold it off as you do skimming the lake, and ease off power. Mine isn't *as* draggy, but it'll still glide like a brick if you don't push the nose down on power loss/drop. If you're used to side-slipping in a crosswind, you'll risk dragging a wing float- I find it easier to crab, then kick. That's where the skimming practice really helps.
And, ENJOY!
Jack
-
What radiator are you using? I'm going with a uls in my build, and am looking at the (ugly) mods to make the larger radiator fit in the fairing. Mind you, I'm in Texas (105 today), so it may be a no brainer (maybe run the heater in summer, to bleed off extra heat (like I had to do in my old buick (convertible!) 215 V8..?), but .. Which way did you go?
Looking good!
Jack, Austin, TX
-
I thought about a heat gun, but didn't want to impact the foam internals, if they were made like the avid flaperons. Oddly, I've found that the spray can of Klean Strip Premium Stripper works much better than glopping on the liquid of the same brand, 2 coats vs 4. On the bright? side, I've just about whipped one flaperon, after 10 hours. Popsicle sticks make good scrapers, my lexan scraper didn't hold up to the stripper very well, dulling quickly. And, it's definatly something to avoid doing unless you tend towards ocd, pulling off thin strips, slowly to avoid breaking, by thin strip. My film was "shattered" by the years. Every now and then I get lucky and get a big chunk. Finish with purple scotchbright and wd40 to get the last of the adhesive off. I'll have to clean that off before priming. Temps inside the hangar hit 100 before noon, and using a fan for ventilation makes the stripper dry out too quickly, kinda like a convection oven.
Did go a lot better than getting the paper film off of the catalina lexan. I guess they don't think about long duration issues when they slap those "protections" on.
-
Read a few internet reviews, and picked up:
Goof Off Pro Strength, and 2 Minute Remover (both top listed on the internet. so, of course..) Neither of which did a darn thing. First is a liquid, second a gel. nada.
Also picked up a spray can (also comes as a liquid) of Klean Strip Premium Stripper.. And this works pretty well, softening and bubbling up, making it possible to remove with my custom lexan scraper. I think I'll go with that- there is one thing.. they say let it sit for 15 minutes, and they also say best under 85 degrees. If you let it sit more than 20 minutes when the temp is 105 in the hangar, you waited too long. You've both softened the film, AND the adhesive, and it sticks right back down under the bubble.. I'll hit it again earlier in the morning.
Thanks for the pointers. I tried just about everything in the search boxes, but not protective coating. Jack
1 person likes this -
I'm building a kitfox IV speedster from a 31 year old kit. In those years, the plastic film covering the flaperons has become one with the metal.
Once upon a time I found a video where the poster had found a stripper that seemed to work given enough time, but I've been unable to find it again. Dug through this site, and another, no joy.
I'm open to suggestions!
Thanks,
Jack Austin, TX
-
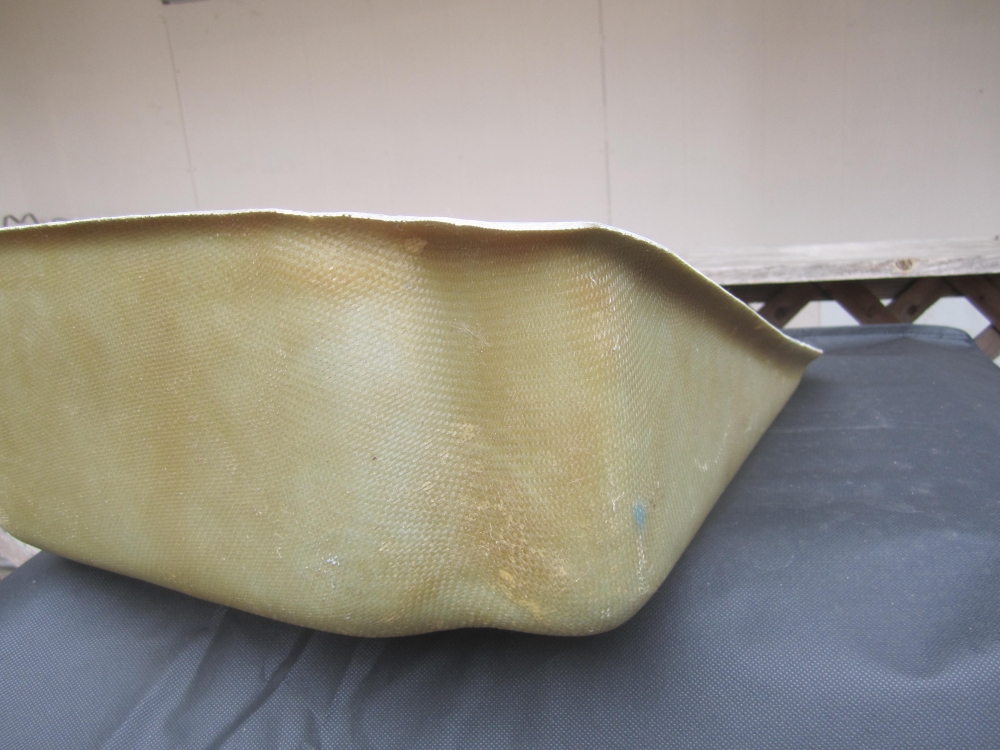
That took more than a week! Mine was 1/16", .062. I replaced the back side windows with 1/8", in an effort to cut down on interior noise. Lexan bends better than Plexi.
Sorry for the delay,
-Jack
-
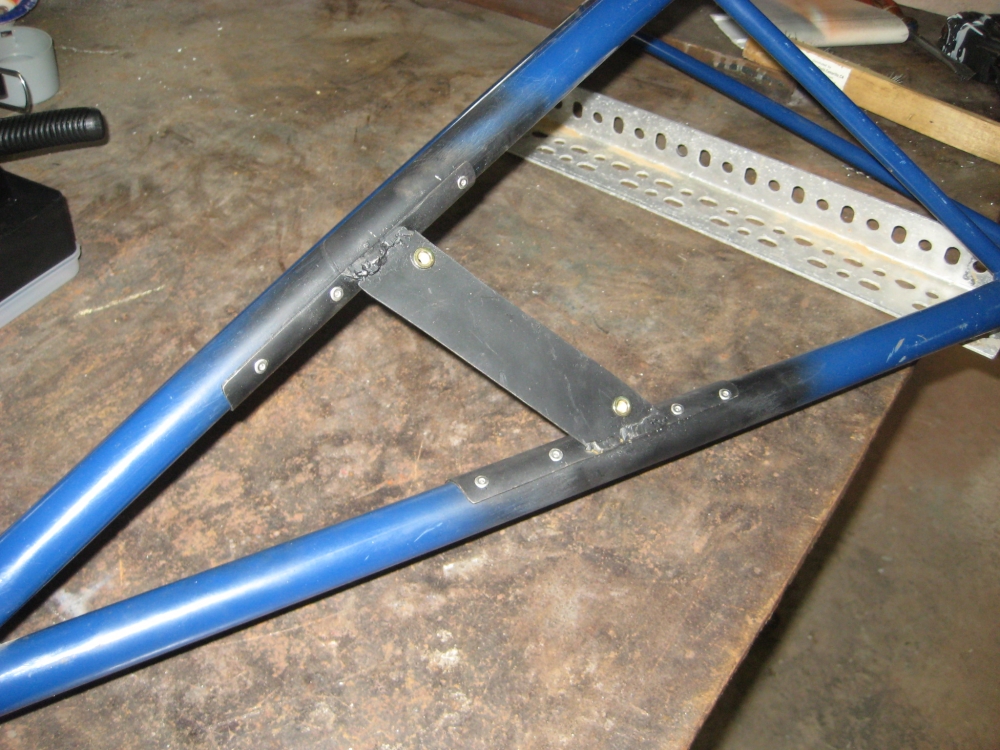
Back to building, ready to cover the gear legs, on the speedster, but...
The "angle welded to the Legs for this purpose" (page LG-H-1) to attach the step in the KF IV tubular gear doesn't exist. If I'm going to be modifying gear legs, I'm kinda leaning towards the avid "post" step, as easier to use, and adding more protection to the pants for passenger use. I've had both in the past, but the KF 2 I had was slow enough that I never put the pants on, so always stepped on the tire.. instead of the step. Mostly the same for the Avid MK 4
Rather than weld directly to the gear leg(s), I'll do whichever on a 1" id sleeve over the existing tubing. I don't want to compromise the existing tubing, not that I plan to prang it in, but, well, I may loan it to someone who..
Opinions?
Thanks,
-Jack
Austin Texas
-
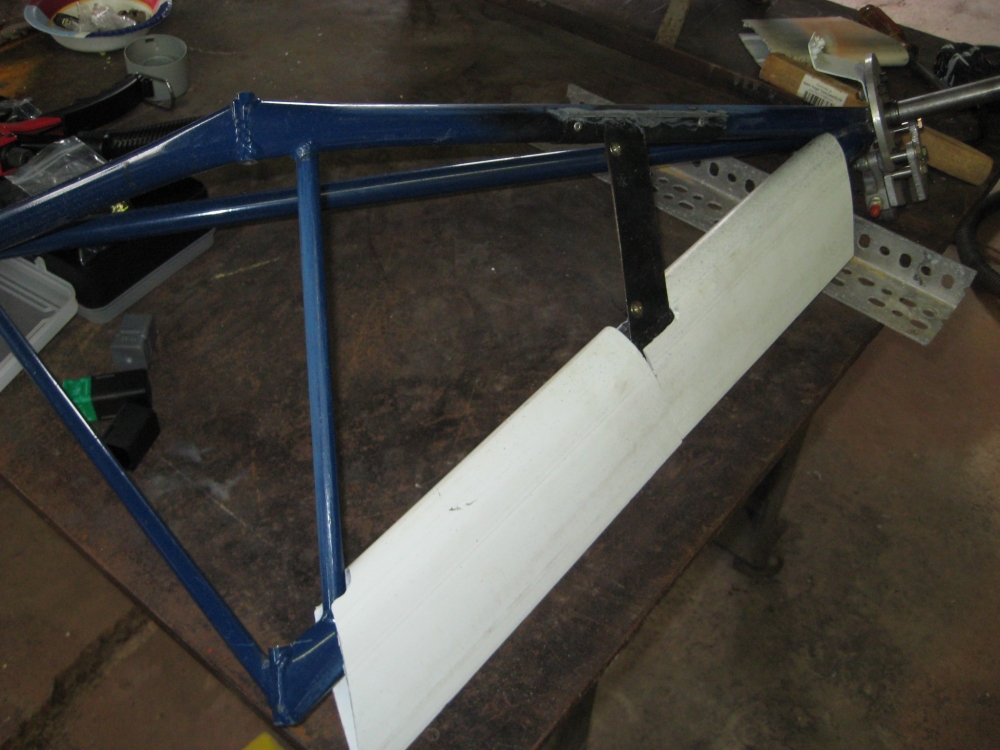
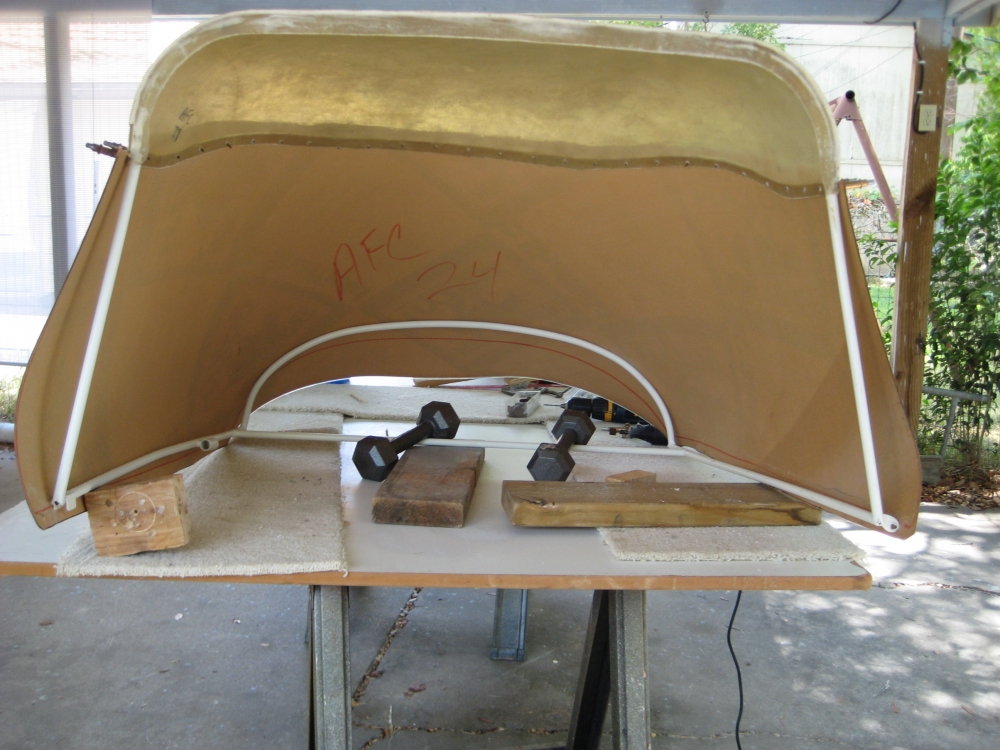
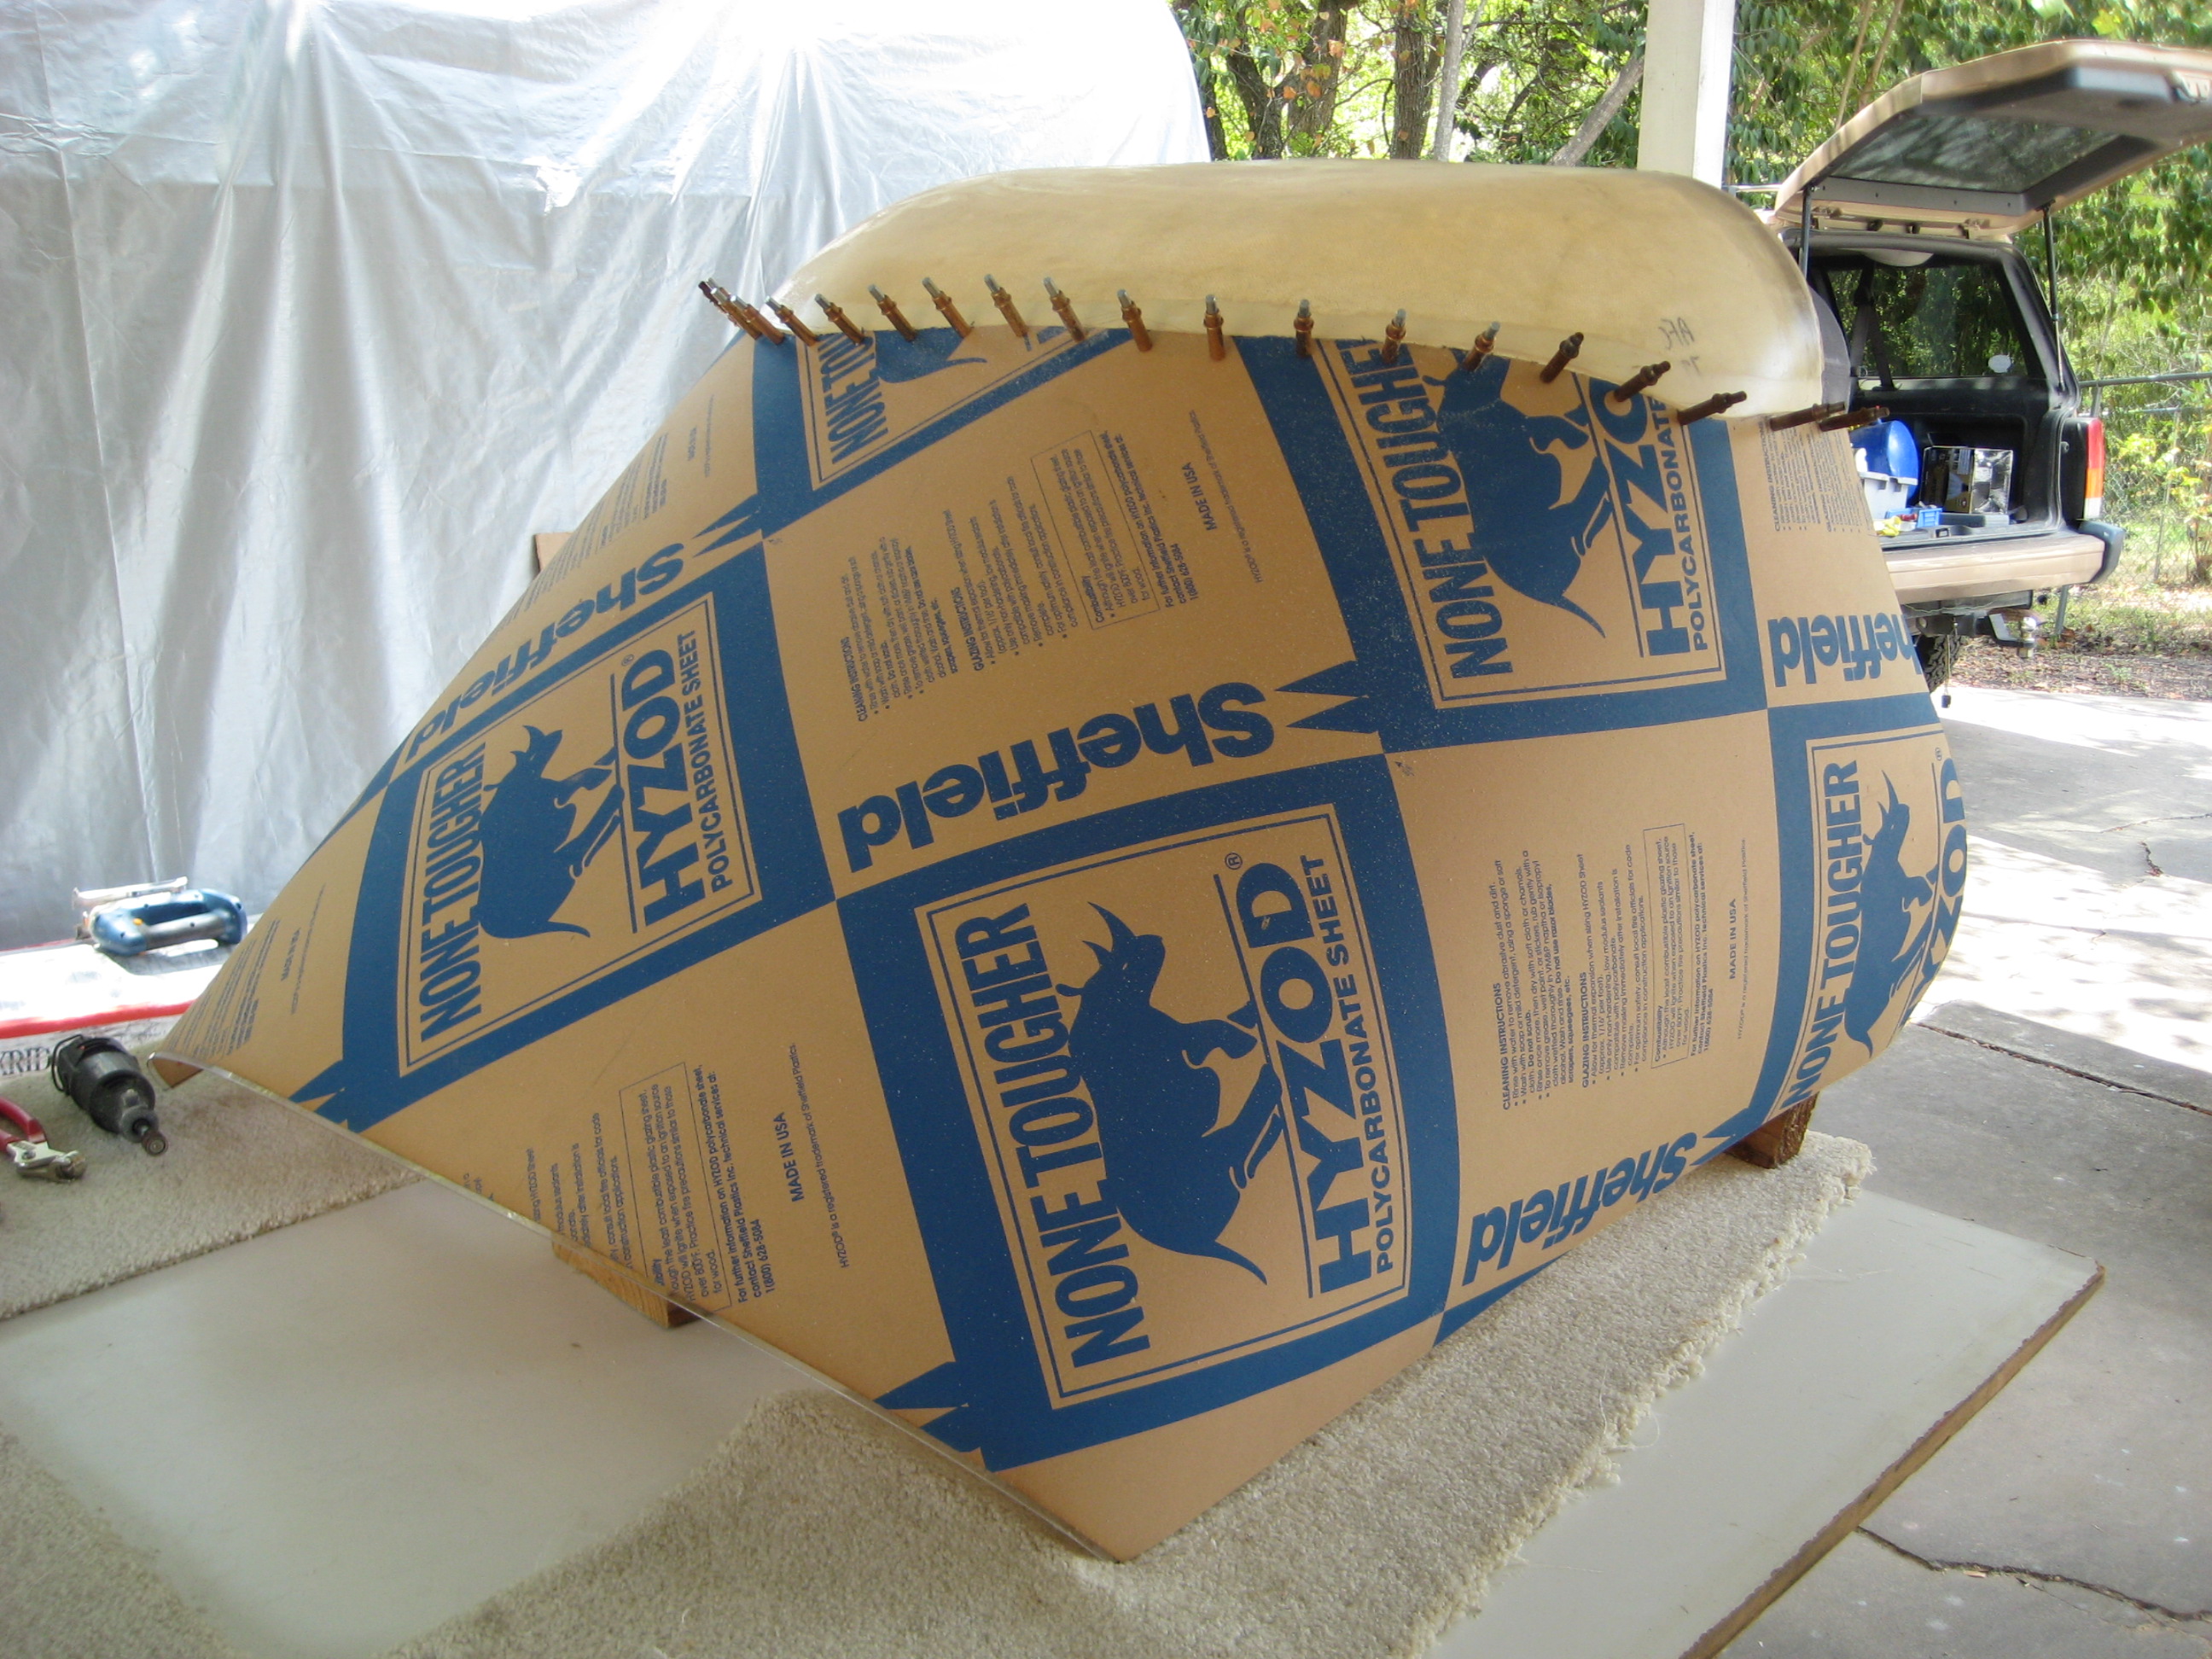
It'll be a few days before I can go out and measure, but I do know that I'd like it to be a bit thicker, as it has a tendency to deflect inward at higher speeds.
The pic stretched out with the wood braces was an attempt to straighten the lexan- it had one heckuva curl after all those years.
It may be a week before I can measure, but I'd recommend going with the next size up- it'll still bend to conform, and what I have probably sets the "VNE". I once asked why the VNE was set where it was, and the answer, from Mr. Wilson, was a "I didn't think anyone would want to fly it faster than that". I did build mine with the leading edge fairings, and the upper leading edge skins (which I'll never do again, oil canning is a problem), and I've been adding fairings to anything that was round.. The catalina gets a bit less balanced as you go beyond the published vne, which I can hit easily--- 100 HP hirth F30, 3 bladed warp prop. No issue getting off the water at gross.
$.02
Jack
N92KL
1 person likes this -
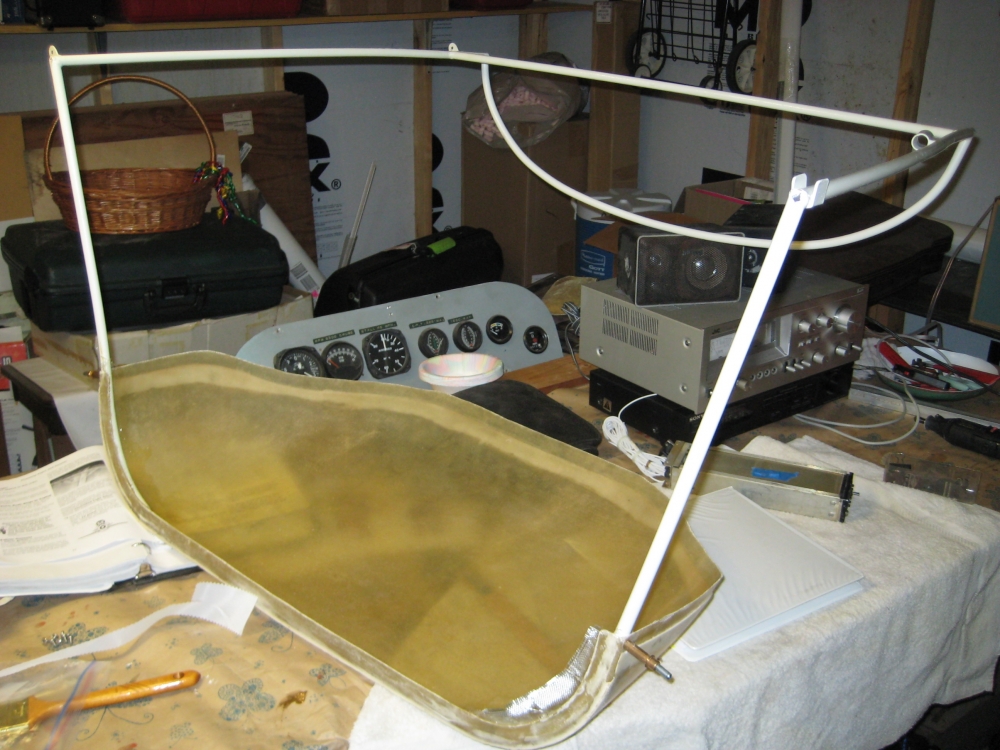
One of the most difficult parts of the canopy for me was getting the paper off of the lexaxn after 25 years. I later replaced the side window with thicker lexan to cut down on interior noise.

-
Does anyone have a picture of the mods they made to use the speedster radiator fairing for the rotax 912 radiator? I'm assuming that the 912 radiator is the one to use- I'm in Texas, so it does get warm every now and then. I'd kicked back and forth using the smaller radiator, and using the heater core as an adjunct radiator if needed, but..
Any pics would be appreciated!
Thanks,
Jack (Austin, TX)
-
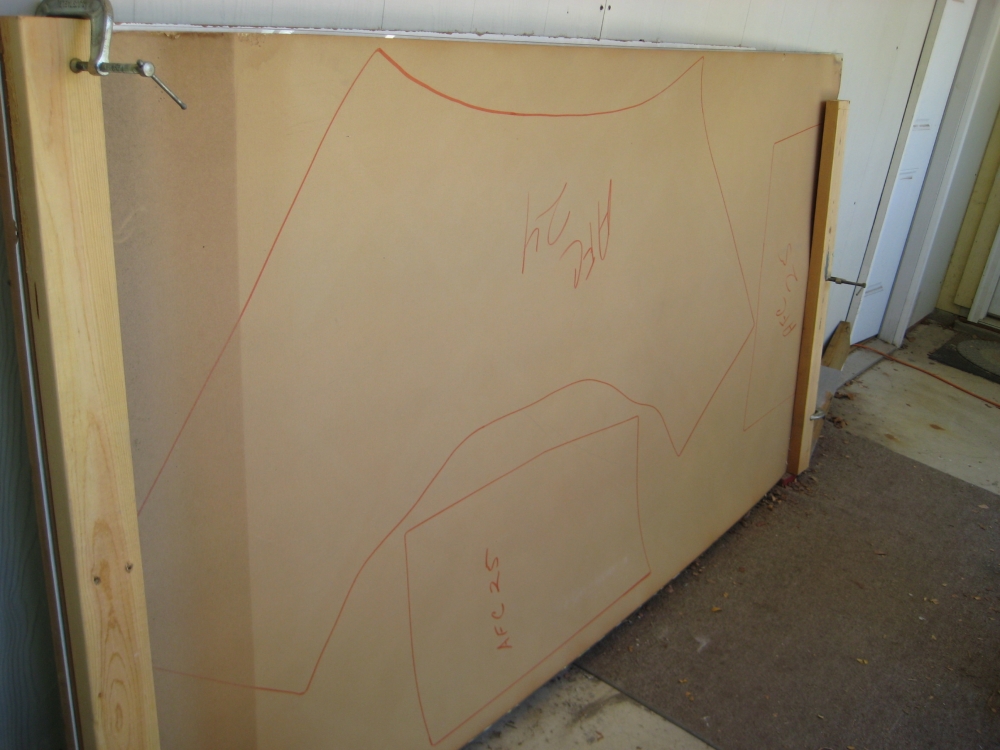
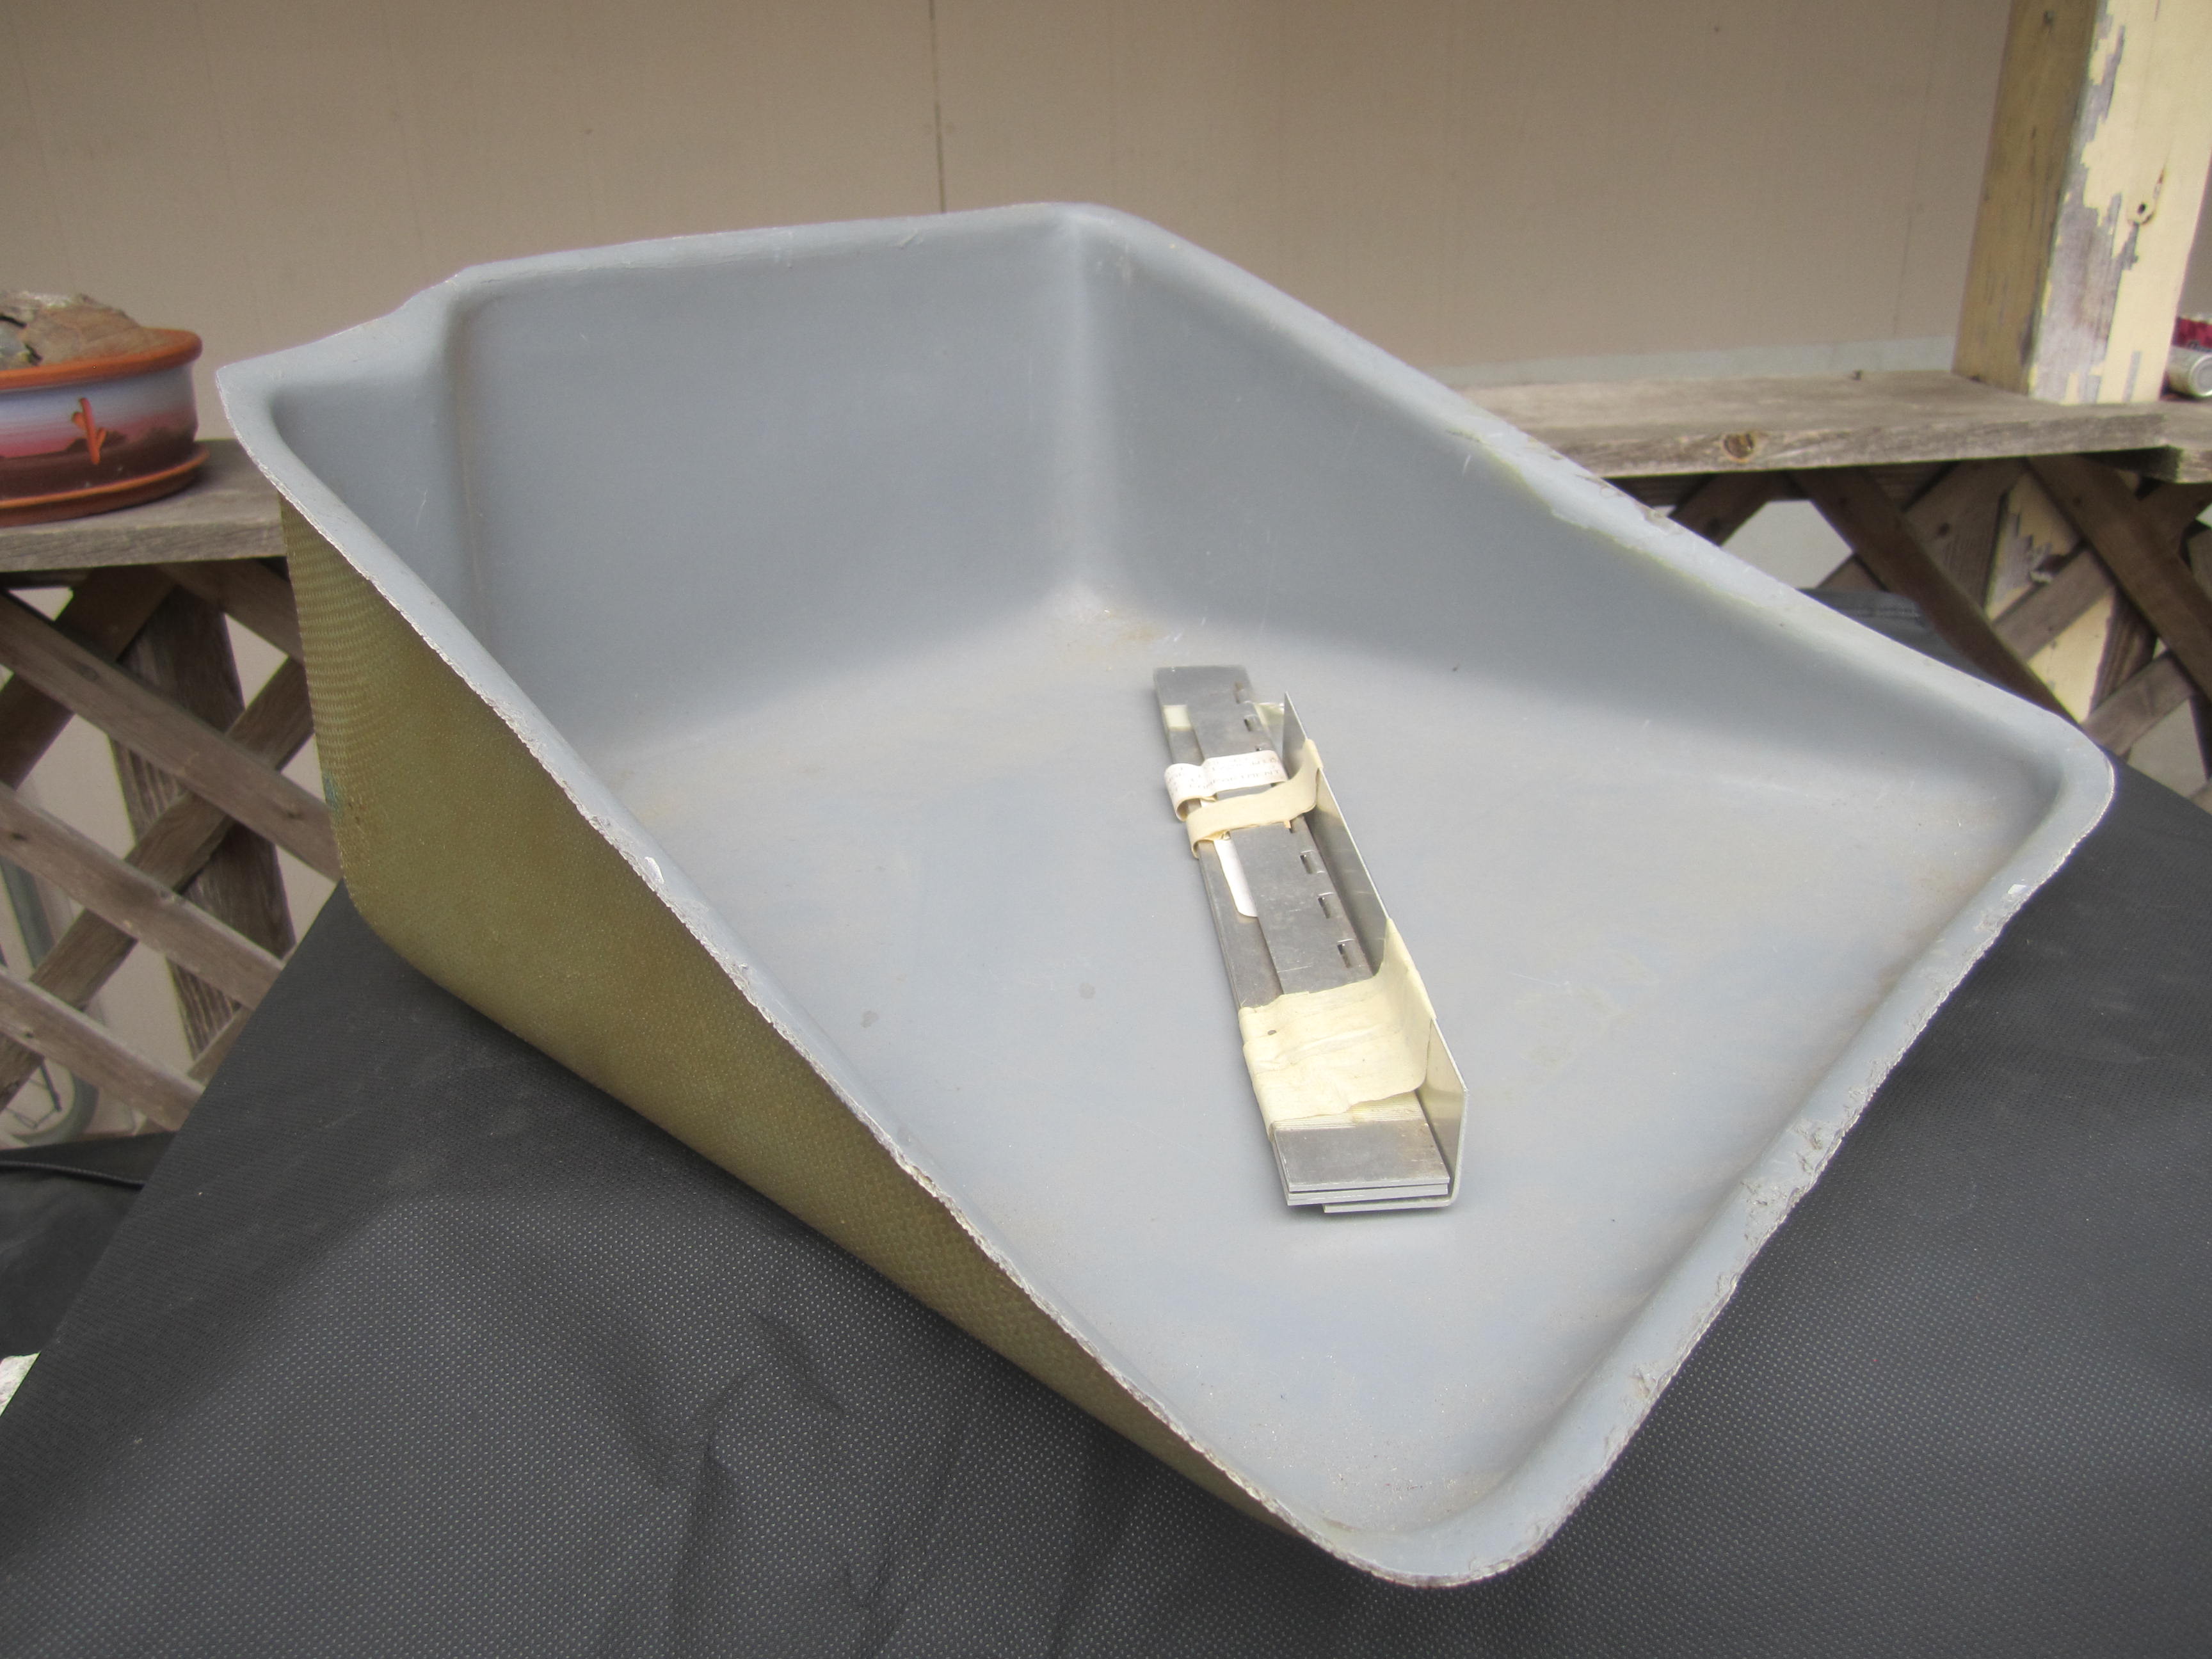
I've looked at and measured this 7 ways to Sunday. It came from Denny with a few flat pieces of Aluminum, one angle, and one (short) hinge. If it had been laid up with flat edges, maybe... but, then again, if I put it up against the bottom, it's too tall and gets into the tubing. I was about to cut it down.. or toss it aside. Of course, no instructions.
Did anyone figure how to make this work, other than buying from murle williams? Any hints would be appreciated.. instructions even more so!
Thanks,
Jack (Austin, TX)

-
If you go to... this forum, and look around January 29, 2020, you'll find a posting titled
catalina magazine article (circa 1986)
I added another article to the bottom of that thread as a pdf which you might also enjoy.
Hope this helps
-Jack
-
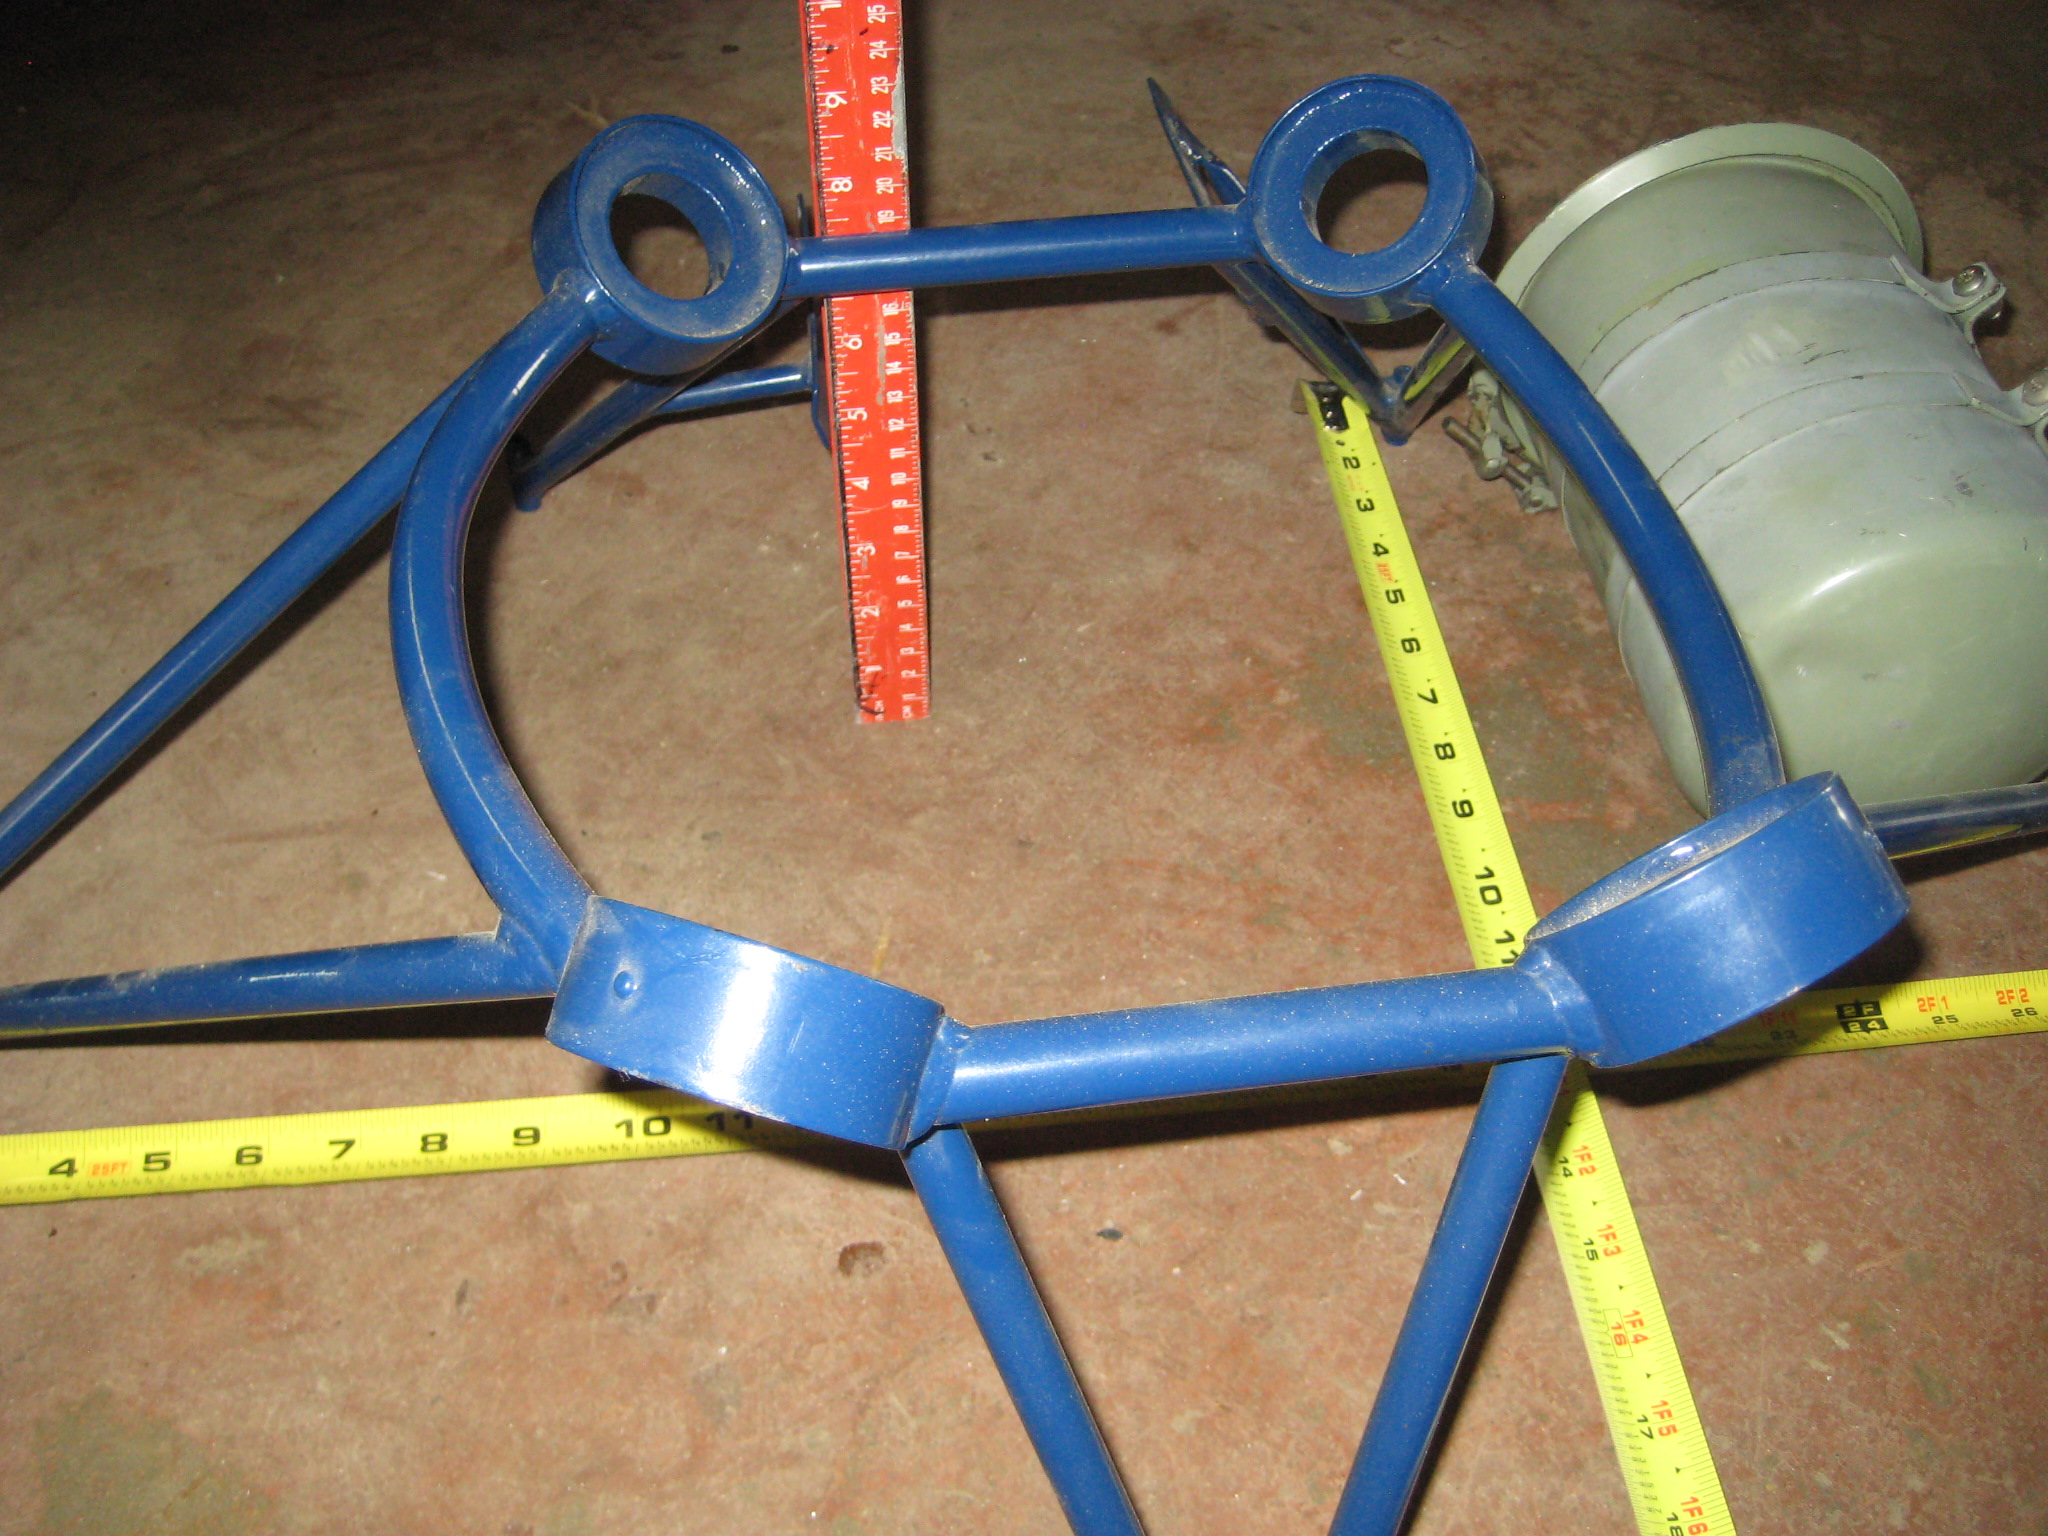
I did about the same sizewise.. only difference on my installatio was the addition of support blocks under the lower piece, and I haven't wrapped with fiberglass... (yet?).
One thing I've found extremely handy with the kitfox/avid planes.. that tailstand in the first pic that I threw together years ago with a harbor freight inflatable caster, and a cut-up bedframe, bolted together.. Has been used without adaptation on a KF 1, Avid MK4, Avid Catalina, and now the KF 4. I lift the tail onto a padded sawhorse, install it on the towbar points, *then* fold the wings. Since it's not welded, it's able to fit them all.
-Jack

 1 person likes this
 -
I just did the same thing- figured if it was ok on the avid to glue on wooden lift strut fairings that were structural, that widening the fuselage with wood would be a no-brainer. I used 5/8 oukume plywood (left over from rebuilding a boat..), and notched the bottom with a 1/2" router bead. I did figure the only real stress point might be my fat a$$ getting in, so put in a couple of supports on the bottom that would not be picked up by the fabric. I'll post a couple of pics to go with yours.
Having a heckuva time bending the door frames to an exact match. Finally getting close- I'll post pics of that as well.. that camera is at the hangar. Like your clamps!
-Jack
Austin, TX
KF 4 speedstar (build)
-
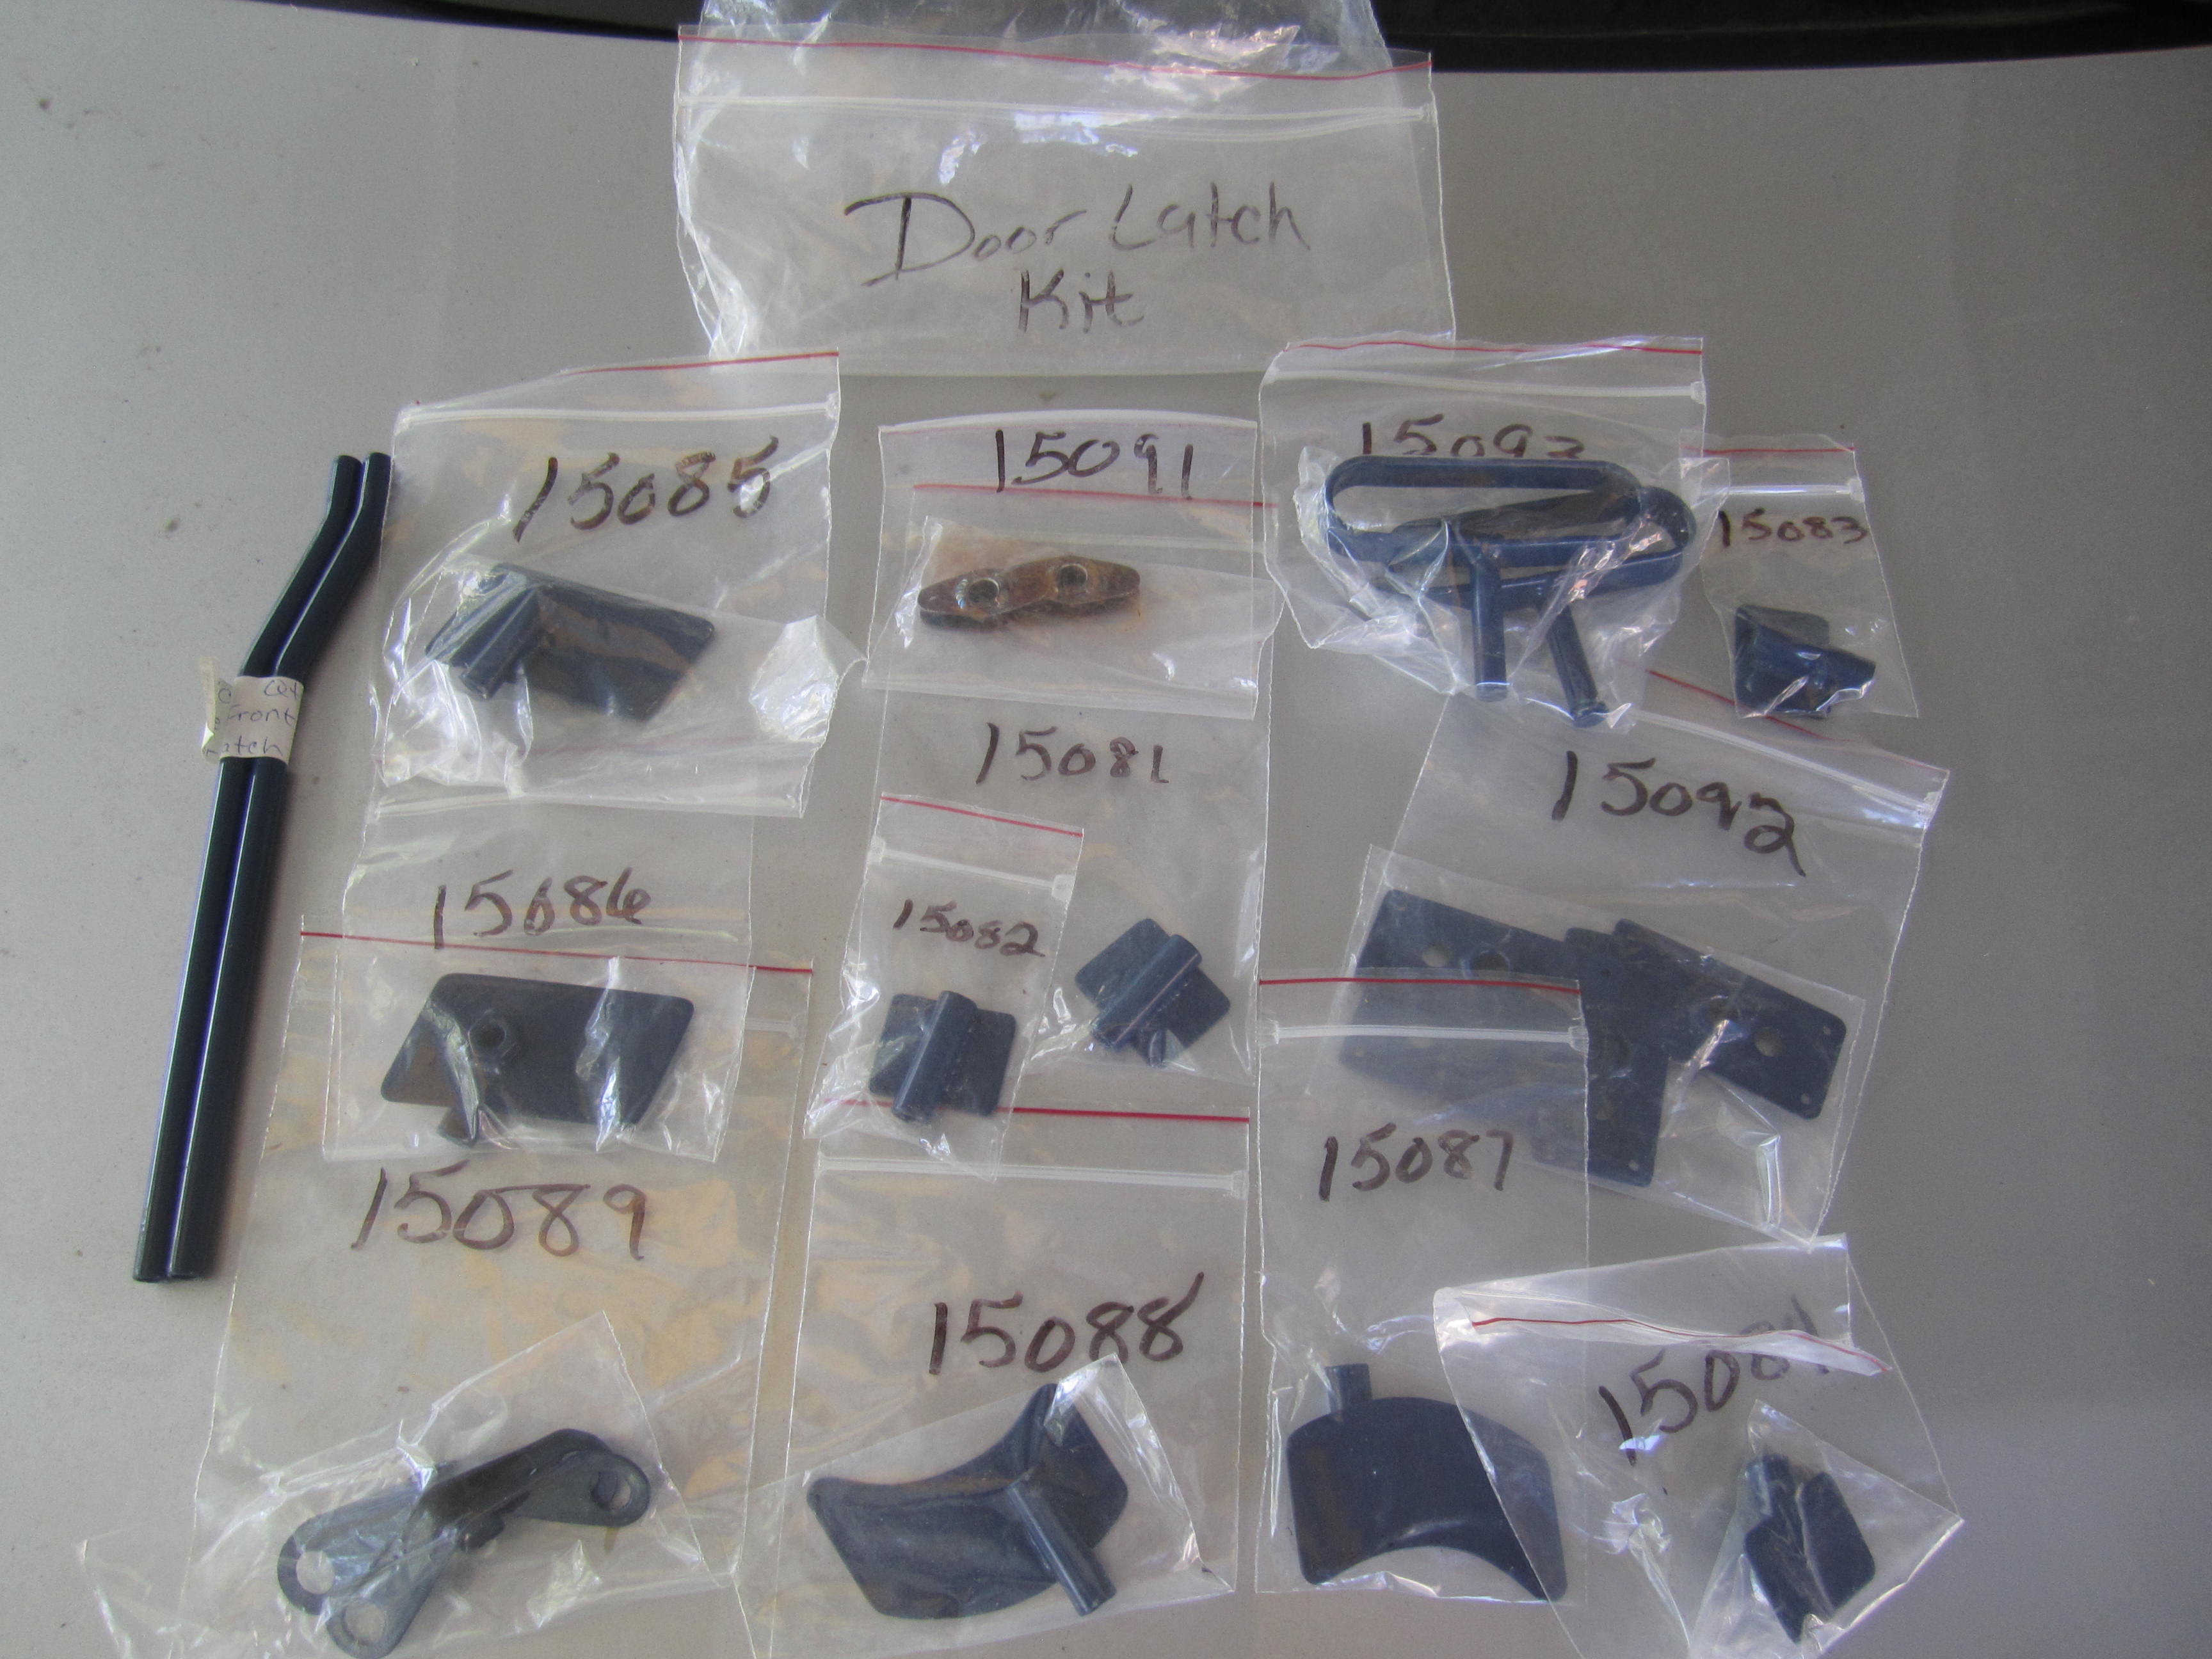
I'm working on a speedster kit from 1992, have a partial manual, bought the pdf build manuals, and.. none of these parts (pictured) show up in any of them. While I do appreciate a good puzzle (tail access covers mis-marked L/R), I'm hoping that someone might save me the trouble? If you have these parts in your door, would you mind sending a picture of how they go together? What you see is what I got. If you notice anything missing, I'd appreciate a hint, even more a picture. Best of all, a page or two describing the assembly?
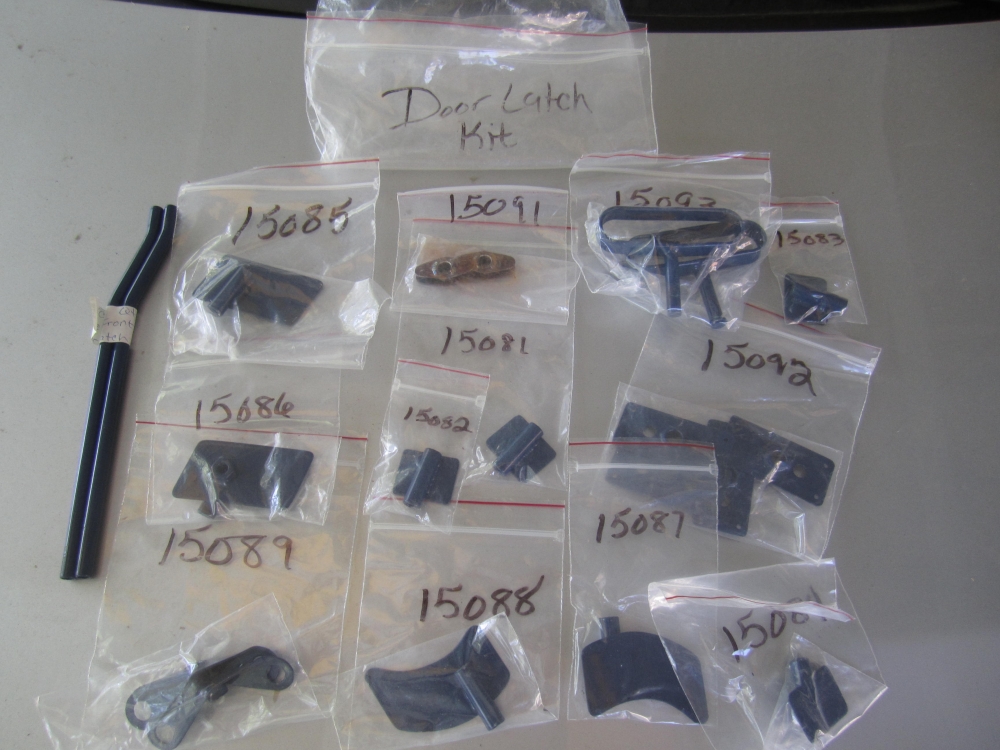
Thanks,
Jack Austin TX
-
AVID CATALINA • FOR SALE • Avid Catalana project for sale. Almost complete. Rotax 912, Warp Drive propeller. $25,000.00 • Contact Joseph Maridon , Owner - located Spokane, WA United States • Telephone: 702-375-0048 • Posted February 10, 2022 • Show all Ads posted by this Advertiser • Recommend This Ad to a Friend • Email Advertiser • Save to Watchlist • Report This Ad
1 person likes this -
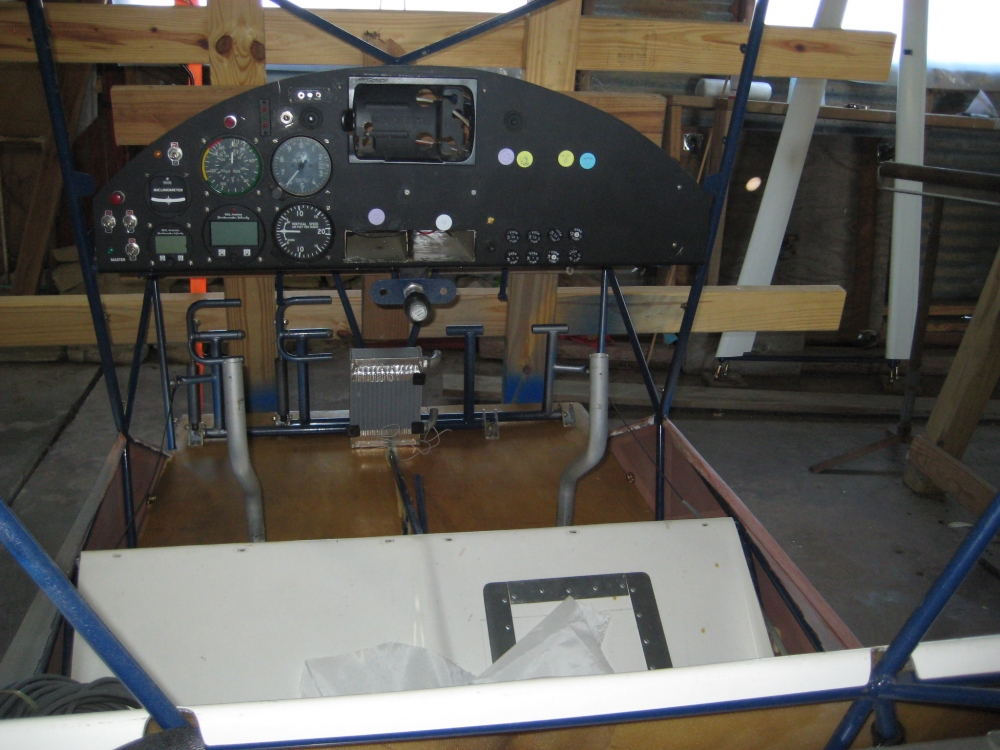
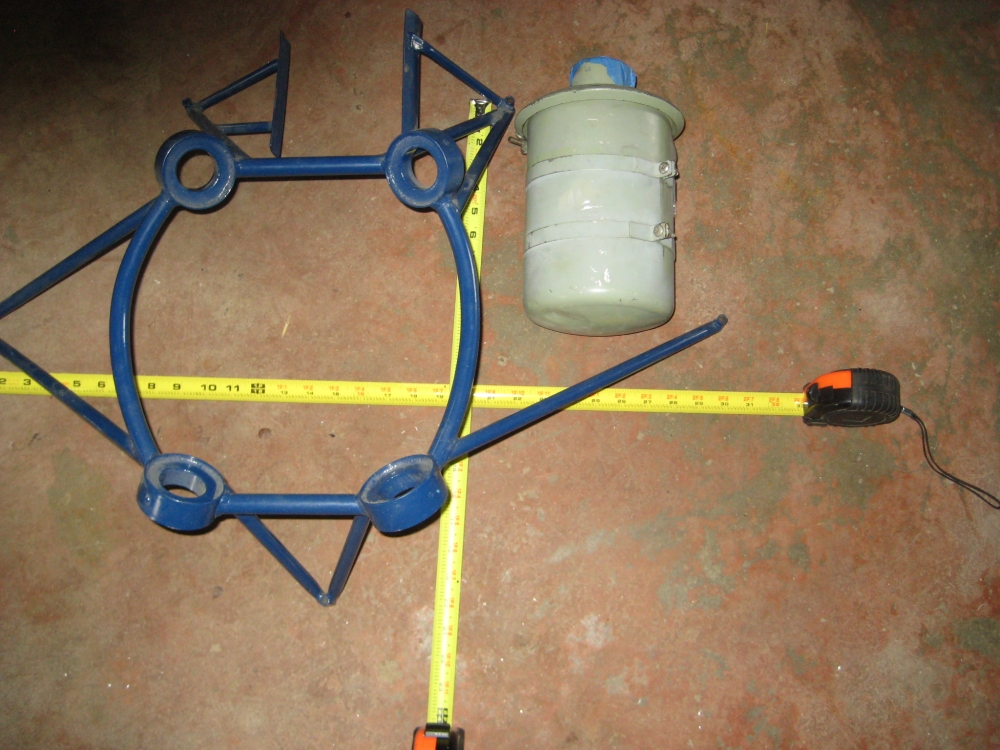
Jim? What's the little dimple on the passenger side firewall for?
My oil tank is 10 inches tall from the (rounded) bottom to the top lip of the filler, sans cap.
Did Skystar/kitfox modify the tanks on the early IVs? I've found reference to a 1/2" height issue.
You went with the smooth cowling- did that make a difference in the mounting of the oil tank? I'll be fabbing my own firewall.. was there a difference in the height of the firewall between cowlings? Speaking of height.. does anyone have the measurement from the top of the firewall to the upper motor mount attach point centers?
Thanks again
Jack

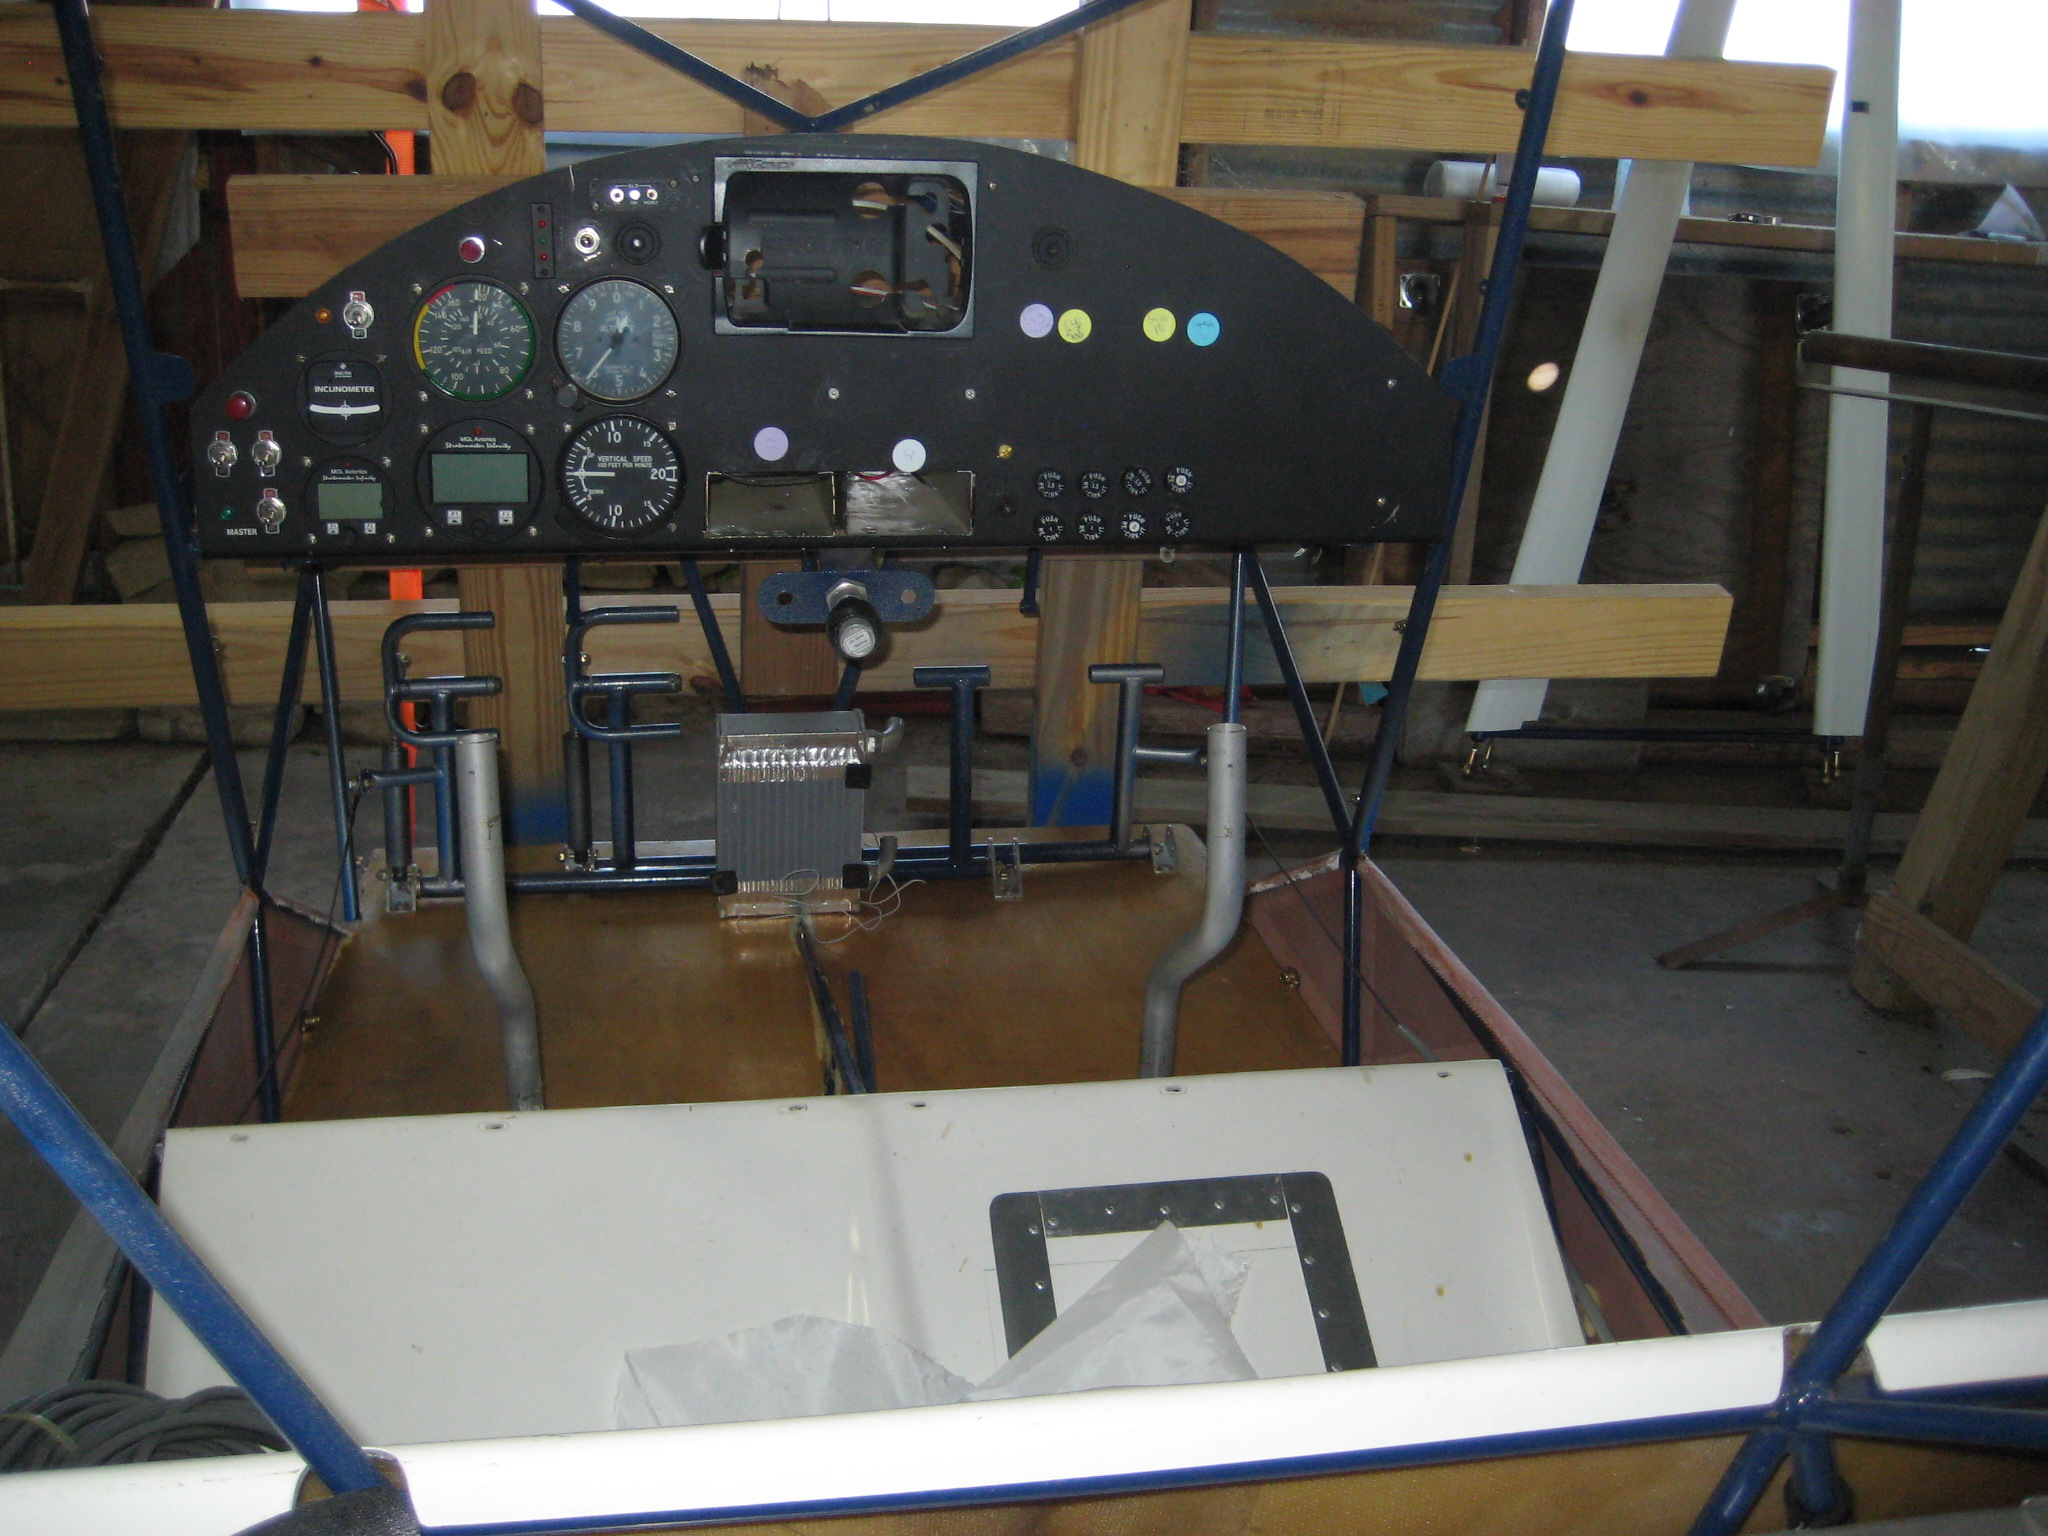


Need Kitfox 4 912 rotax firewall pictures
in Kitfox IV
Posted · Edited by AvidJack
I agree with the value of the forums. I was devastated when yahoo was purchased, and the groups there were destroyed. All of the years of knowledge that had been contributed, were lost. I've spent lots of time going through threads, here, there, and everywhere, trying to find answers before reposting a question that's been asked before. Sometimes, you have to have the right incantation, or key phrase.. as what you guess isn't what it was posted under before. And if you find something of value... COPY IT.
I'd seen your firewall thread, and most of your kitfox build posts- it was one of the things that really had me going nuts- I had no idea that there were different starters, until I started looking at them a couple of days ago. Now, I know.. That's also why I left the breadcrumb of information in that picture for the next person that comes along. I first modeled the two sides of the lower firewall out of cardboard, and figured the dimensions for the pedals, and brakes, to clear. I made the inset as per the instructions, and.. it didn't look right. Motor's in the mount, so do a flat measurement and look at the clearance required for the starter, and it wasn't even close. I have an inset I'm going to go with that is almost the full depth of the well. I'm leery of cutting up a $400 starter unless it's absolutely needed. The passenger side doesn't have brakes, so the inset isn't (?) a major problem. I've been digging through firewall coverings as well, and ended up ordering a carbon felt welding blanket which I'll fit to the backside of the firewall, and cover with.. something. It is nice and light.
Thanks for the response, and guidance.
-Jack