Good old number 29
Contributing Member-
Content count
122 -
Joined
-
Last visited
Everything posted by Good old number 29
-
Good old number 29 added a post in a topic Finally, a good day to fly skis!
I'm not on skis, yet, but it was a great day to fly, either way.
-
1
-
-
Good old number 29 added a post in a topic Chicken Stuff
I've been saving all of my receipts, but hadn't added them all together, until today. It was right about what I thought. Just over double the initial purchase cost. Of course, that doesn't include the thousand hours, or so, of labor that I put into it. That would be another ten times the purchase price, but I just count it as time well spent. For the same money, I could have bought a high time 150 or Taylorcraft. Some of the items, I could have done without, but I made it what I wanted. The big ticket items that I could have gone without, are the two wing tanks and the wide landing gear. That accounted for about a quarter of the expenses. I do have a fair amount of covering and finish products left, and thousands of miscellaneous rivets. No regret on the cost. As I figure it, I could probably sell it for what I have into it. Not a bad deal.
-
0
-
-
Good old number 29 added a post in a topic Bringing a Kitfox 1 back to life
I noticed that the tubing is kind of in the copilot's way, especially the pull-starter tube by his left rudder pedal. I don't have any big issues from the left seat, but I noticed right away that there was less room on the right side, and mentioned it to my instructor. My foot got jammed in there in the first minute of testing, with ordinary shoes. Need to keep that left foot toward the right side of the pedal. The copilot also has to deal with the crossbar that angles across the cockpit, right where the top of his head should be.
-
0
-
-
Good old number 29 added a post in a topic Bringing a Kitfox 1 back to life
That is exactly the reason I bought it, and it is finally working out for me. I actually got to fly it for myself, today (with the instructor). It was as great as I hoped it would be. Took a bit longer than I planned, but I should be able to get my license before fishing season. I work year round, but summers are especially busy. The plane was great. Beautiful day. Warmed up to the 20s, clear and calm. Last time we flew, I was sitting right seat, hands off, ducking around that cross bar. There was also a strong crosswind, that day.
-
2
-
-
Good old number 29 added a post in a topic Bringing a Kitfox 1 back to life
What he said. My instructor flew left seat, so he had the brakes, and said I better put them in so we could do it right. I'm glad I did it. Obviously, I want to learn to fly it without breaking it. Besides that, the brakes are a lot better. There isn't enough traction right now to know for certain, but I believe the brakes will hold it at full throttle. I couldn't quite get there with the previous setup. I improved the geometry on the left, and made my new right side pedals taller, so they have a really good advantage. I was concerned that the additional leverage was going to make them softer, but they were twice as firm after I rebuilt the old masters.
-
0
-
-
Good old number 29 added a post in a topic Bringing a Kitfox 1 back to life
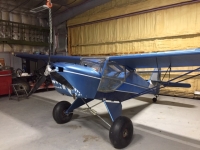
Dragged the plane back into the shop and installed right seat brakes and a defrost vent. Rebuilt the original MC5 master cylinders and put MC4s on the new pedals. Much firmer brakes. Maybe the cold will let up soon? Minus 6 here this morning. Supposed to be colder tomorrow. Um, why are my pictures loading upside down? Incidentally, that's basically the same view I had when I did those ugly welds.
-
0
-
-
Good old number 29 added a topic in Avid fox flyers pics and vids
Vortex GeneratorsThis is the best video I’ve seen on vortex generators, and their placement and effect, on Kitfoxes.
https://m.youtube.com/watch?v=IRNPM7A54Yk&feature=youtu.be
- 14 replies
- 2,450 views
-
Good old number 29 added a post in a topic Gap Seals
I’ve only used the black stuff, not the clear. I used it for taping up a rip in a snowmachine seat. It held up for years, and was still going strong when I sold the machine. There was no taking it easy on it, either. Gorilla Tape works like no other.
-
0
-
-
Good old number 29 added a post in a topic Rudder/Elevator
My Model 1 is 1/2” on the front vertical of the rudder and 3/8” on the rest. Same with elevator. 1/2” and 3/8”.
-
0
-
-
Good old number 29 added a post in a topic Hoerner wingtips, not the shoes
I thought Hoerner tips were supposed to be convex on the bottom side, but the ones pictured in the article don’t appear to be. That is what makes them work, right? The convex shape speeds the air away from the wing, so the vortices don’t circle right back down and push down on the top. The vortices are sped up and out, away from the wing. Anyway, the pictures looked like a flat, or almost slightly concave, angle up to the tip. My droop tips are not removable, or I’d volunteer to try Hoerner wingtips in a fair comparison. I think the droop tips have similar benefits in reducing stall speed. The air can’t fall off (upwards) the ends of the wings, or whirl around and push down on top as easily. Holds the compressed air cushion under the wing, where it belongs. At least, that’s what the infallible internet told me.
-
0
-
-
Good old number 29 added a post in a topic Getting started/setup for Welding?
Gas welding really is a good way to go for thin steel like this. It’s just a matter of pulling the heat off before it starts sparking off and burning through. You have to be kind of quick with the torch. TIG is pretty similar to gas welding, but with more precise control of the heat. I see a lot of welding snobs turn up their nose at the self-contained MIG boxes, but some of them are pretty decent. I have a dual voltage Lincoln MIG box that I like. You can run it on 120 or 240 volt just by switching the cord. It won’t do everything you can do with a professional high amperage setup, but it will handle the small stuff just fine. It does take gas for true MIG (some little wire feed boxes don’t), or flux core (FCAW) without it. You can also get a spool gun for it and weld aluminum, but you do need to use 240v to get much good use out of that. The gas welding I did on the plane looks great. It was a solid 95%. MIG was hit and miss, with most of the misses due to being out of position and bad visibility. If you have a good angle on it and you can reach it and see it, it works fine. A good welding hood is worth the cost. If I didn’t have the other options, I would have happily welded everything I did on the plane with the torch. If you’re getting a wire feed, get a good brand name one that does mig, not just flux core.
-
0
-
-
Good old number 29 added a post in a topic Tig pulse box add on.
We had a pulsed mig control box in the company’s Homer shop. Pulsed mig gives you a lot more control with thin metals, allowing tig-like welds on thin gauged materials. I’ve never had the opportunity to try pulsed tig.
-
0
-
-
Good old number 29 added a post in a topic A few more calculations
Forgive my ignorance, but would you please explain this for me. I’m not familiar with the terminology or the significance of much of it, but I would like very much to understand it.
-
0
-
-
Good old number 29 added a post in a topic Baby it's cold outside
The planes do fine, it’s the people that suffer. Wouldn’t be so bad if there was more room for a good pair of boots. I have to angle both feet to the same side to fit my boots on the rudder pedals. I had to use a heater to get it to pull over fast enough to start at -20°, but it fired right up and ran good after half an hour on the heater. I have a little propane heater that’s something like 13,000 btu. Propane makes a bit of moisture when it burns. Frost forms on the metal bits at first. I let it run until it was warm enough to dry off the frost, and it started on the first pull. Pull starter on my 503, no electric start. The flight instructor, however, decided to call it off until we get out of the extreme cold. I didn’t complain. Checking on the plane today, the hoar frost was thick enough to almost fill in the chain link fence, in places. It was just beautiful.
-
1
-
-
Good old number 29 added a post in a topic Bringing a Kitfox 1 back to life
I got carb heat hooked up. If I had the plane here when I made it, I would have fit it just a little differently, but it’s good the way it is. I also got some braided ignition shielding installed. The whole project was more difficult because I was working outside in the cold. Wish I had it in the shop for this, but it would have taken me longer to get it there and back than to do the work. The temperature dropped over 60° in the last two days.
-
0
-
-
Good old number 29 added a post in a topic Structural analysis on spars
Here’s a link to an article that details fairly well the changes from the first Kitfox to the Model 4-1200. When I first bought my plane, I called Kitfox and asked about increasing the gross weight, and John told me basically that it couldn’t be done. From a liability standpoint- who cares, that’s wrong. It can be done. But, to go clear to 1,200 is a lot of work. Needs stronger landing gear. Those lift struts went to 1” diameter .049” thickness. Drag/antidrag tubes are thicker and have steel attach brackets. Thicker lift strut carry through tube. Bigger and thicker carry through tubes for both spars. The 1200 got a 10 inch taller rudder than the Model 2, with four inches more chord. Same four inches more chord on the elevator, and two inches longer chord on the flaperons. All things to consider. Not trying to talk you out of it, by any means. Just listing some of the changes Kitfox made. I absolutely think you should do it. I kind of wish I’d swapped for the extruded stiffener in my Model 1. Easy to get that extra hundred pounds. Go for it. Keep us posted, too. We’ll all be interested to see how it goes.
http://avidfoxflyers.com/applications/core/interface/file/attachment.php?id=19834
-
0
-
-
Good old number 29 added a post in a topic Structural analysis on spars
The angle of the strut may still be a limiting factor. Clipping the wing may allow higher loads on the wing, but the lift strut will still be pulling at the lower attach point at a steeper angle. It’s better to have the longer strut with a shallow angle pulling straighter out on the lower attach bracket. Have you considered making a larger strut/spar attach bracket that will attach at the original mounting point and extend ten inches farther out to the new attach point? You did the spar and lift strut carry through tubes? I’d love to see pictures of the project.
-
0
-
-
Good old number 29 added a post in a topic Pulse pump
That looks like the same pump I got. Genuine Mikuni. Seems to work fine.
-
0
-
-
Good old number 29 added a topic in Technical tasks
Carb heat boxWithout starting a debate about engines that don’t need it, here is a cheap and effective way to rig up carb heat. It requires only hand tools to build. Including prep time and layout, it took me six hours to make. I had the sheet metal and the heat muff already, so my only cost was $12 for the control cable. Estimated cost for all the materials is less than $100.
Here is the finished product:
The cable actuates a flapper door to select one of two outlets. One outlet goes to the carb, the other to cabin heat. The inlet air comes from the heat muff on the muffler. The diverter box could also be used select defrost or floor heat, or hot or cold air.
Tools and Materials:
12” x 18” of .025” 2024 T3 aluminum
1/8” aluminum pop rivets, 1/8” & 1/4” lengths
Heat muff for the exhaust
5 feet of 1-1/2 inch diameter high temp hose
16 penny galvanized nail
2”x 3-1/4” 20 gauge galvanized steel
(2) 1/2” #6 machine screws with lock nuts
(5) 1-3/4” hose clamps
Bench vise
Drill
Drill bits
1-1/2” hole saw
Tin snips
Hand seamer
Hand riveter
Flat metal file
Pliers
Screwdriver
hack saw
1” diameter pipe, tubing, or dowel
NAPA choke cable
Wire-feed welder
Steel welding wire
The process:
I will attach more pics for clarification of these confusing directions. It is not as hard as I make it sound. Currently only able to load one pic. I’ll load the rest when I’m able.
Cut four pieces of T3 at 5-1/8” x 1-1/2. Mark at 4-9/16”. Bend each piece around the 1” pipe to round it into a 1-1/2” long x 1-1/2” o.d. tube. Use the hand seamer to finish the radius on the ends. Overlap the end to the mark that you made. Use a hose clamp in the middle to hold it at the right diameter, drill and install two rivets in the seam. It should fit tightly in a 1-1/2 hole, and the heater hose should slide on tight. Make parallel cuts 1/2” apart, 1/2” long, up from one end. This 1/2” will bend out to make a tab which will be used to rivet it to the body of the diverter box. Make three tabs, equally spaced, on one end of each tube. Bend them up very carefully, using the pliers. Spread the bend out a bit. The tabs will break right off if you just pinch and bend.
Cut a flange out of T3 for the air filter, as seen in the picture. It should be about 8” square. I angled the top corners down from the rivets. Snip 1/8” off the corners at a 45°, and round them with the file. Do that on all the sharp corners. Brake it 90° at 2-1/2 inches, clamped between two pieces of wood in the vise. Use the hole saw to cut a hole in the center of the short side. Attach one of the 1-1/2 hose fittings by sliding the short end into the hole, tight to the three tabs, then drill and rivet in place. Mark 2-1/2” up from the 90, drill and rivet the plate to the back of the air filter with four rivets, with the bottom of the air filter at the mark, leaving 2-1/2” gap to the 90° flange.
Mark out the diverter box. One piece will make the bottom and sides. A second piece will be the top. I’ll post more pics to make this part clearer. The box is two inches deep. One end of the box is two inches wide. It is four inches long. The other end is four inches wide. Take a 9” square of T3. Measure 2-1/2 inches from the edge, and mark the shape of the box. Mark 2-1/2” out from both sides and the ends, parallel to the sides of the box. The sides of the ends should be 1/2” longer than the bottom, to wrap around the sides. That is, the bottom and sides are one piece, and it all folds up, with the ends wrapping over the sides to be riveted together. Mark 1/2” from the top of each side. Brake the sides up 90° from the bottom of the box. Brake the 1/2” at the top 90° down, to the inside, parallel to to bottom. This is the flange to which the top will mount. Brake the 1/2” ends around the sides, drill, and rivet in place. Mark center on the short, 2” square end, and put the hole saw there. On the opposite end, mark and cut two holes with the hole saw, 1” on center from each side. Rivet one of the hose adapters in each of the three holes.
At the long end of the box, top and bottom, centered, and tight to the end, drill a hole to fit the 16D galvanized nail through. One hole will be on the bottom, and one will be on the flange at the top. This is for the flapper hinge. Cut 2-5/8” x 2” from the 20 ga. galvanized sheet. Radius the corners. It should fit tightly to one side of the nail. Trim the tight spots so it fits easily when it pivots to either side, without much gap. Allow the head of the nail to have some end play so it doesn’t bind. Tack weld the flapper securely to the nail. I used L56 .025”. Test to make sure it has free and full movement.
Cut the top of the box. You could trace the bottom, or mark it 2-4x4. Cut it 1/8” small, and the edge won’t stick out. Cut a notch in the long end to clear the nail. Nip and file to clean up and smooth the edges. Making sure the box is straight, not warped, drill for two rivets on each side, through the top, into the flange beneath it, placed so they do not interfere with the movement of the flapper, and rivet it in place.
Cut 3/4 x 1-1/2 from the remaining scrap of galvanized sheet. Use the hand seamer to bend it into a U shape, the short way, so you have a 1-1/2” long stick of 1/4” channel. Drill a hole in one end to fit over the nail. Drill one or more holes in the other end to attach the cable. Fit this actuator lever over the nail, in line with the flapper, leaving 1/8”-3/16” space between the top of the box and the lever, and tack weld it to the nail. Cut off the end of the nail above the lever, using the hack saw.
Cut 1-1/2” square and another piece, 1/2 x 3/4”, from the T3. Make a 1/2” cut, 1/2” in from one side. Brake it 90° down along that line, then carefully bend the cut end out about 60°. This is the cable mount. Bend the small piece slightly to fit the cable housing, clamping over top of it. Again, using caution to avoid interference with the flapper, rivet the cable mount to the base with three rivets; two on top and one through the tab on the side. It should be placed so the cable is at the proper place and angle to push and pull the actuator lever through its full range of motion. Position the top clamp, drill, and attach with the two #6 machine screws.
Attach hose from heat muff to box inlet. Attach hoses from the two outlets, one to the carb heat, the other to cabin heat. Mount the air cleaner, mount the box (not blocking flapper travel with any hardware), mount the cable.
- 2 replies
- 4,678 views
-
Good old number 29 added a post in a topic Carb heat box
A couple notes on the layout of the box. I needed to cut the small end back more than was shown in the first pick. As marked, it’s cut at a 45 across the corner of the box, like the other end. I caught that and cut it after I took the pic.
I also recommend cutting the sides to 2”, or slightly less, and only having the top flange on the ends. Instead, the top would be cut 1/2” long on each side, and be braked to fit over the sides. This would make the fit a little better, without having to make all four flanges of one piece align perfectly in one plane.
Here is a hand seamer, for reference:
-
2
-
-
Good old number 29 added a post in a topic New guy from IL
Nice plane! Welcome to the forum. Great group of people here. Good for you, getting it all straightened back out and up in the air again. Merry Christmas!
-
0
-
-
Good old number 29 added a post in a topic Jetting and prop setting
Here is a picture of how the pitch adjustment is made on Powerfin props. Insert the 1/4” steel dowel in the blade root and measure the gap to the closer side of the adjustment window, using feeler gauges. We started at .041”, which gave an initial static RPM of 6,300. In the air, it would have exceeded 6,800 without throttling back. Three adjustments later, it’s at .058” from the finest pitch. This allows 6,650 rpm full throttle, level flight, and about 6,400 climbing, solo. We saw an increase of nearly 1,000 rpm difference between static pulls, fixed on the ground, and when it was moving in the air. We took it as far as .062”, which gave 6,300 solo climb.
-
0
-
-
Good old number 29 added a post in a topic Bringing a Kitfox 1 back to life
Thanks for your help and support on it too, Jim. The tank, false ribs, carb o-rings, those parts I got from you were a big help. You and TJay were the ones who steered me to this forum after seeing my project on Teamkitfox. That was a big deal too, since the people here are more into projects like mine. It was pretty exciting to see it take off. Even better when it flew the pattern and then landed without a problem. I need to deal with some static on the radio, and a couple other little things, but I’m really happy with how it came out.
-
2
-
-
Good old number 29 added a post in a topic Bringing a Kitfox 1 back to life
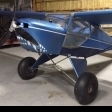
Touching down after the first flight. Well, it’s the first flight for it in a long time, and the first flight since I bought it. Its very first flight was on April 13, 1987. Remember the third step. Dream it, Build it, FLY IT. I love step three. Even watching it from the ground, while holding my out of focus iPhone with cold hands in the 8° morning so I can take a bad video of how awesome it is. See?
https://youtu.be/O83AgxnJcZU
-
1
-
-
Good old number 29 added a post in a topic Bringing a Kitfox 1 back to life
Mr. AKFlyer himself. Thank you very much for your assistance today. Leni and Bob both came to the airport and helped make it happen. This is the second takeoff. We made three prop adjustments, and went up a size on the jetting, to 165, between flights. I brought the bungee struts home to swap out the two 1080’s for one 1080 HD CW per side. Much too stiff as it was. Leni was the fearless test pilot. Everything went well. Engine and prop are silky smooth. Temps are good. It flies like a Kitfox.
https://m.youtube.com/watch?v=g4SV0OGmicc
-
1
-