
nlappos
Contributing Member-
Content count
688 -
Joined
-
Last visited
Posts posted by nlappos
-
-
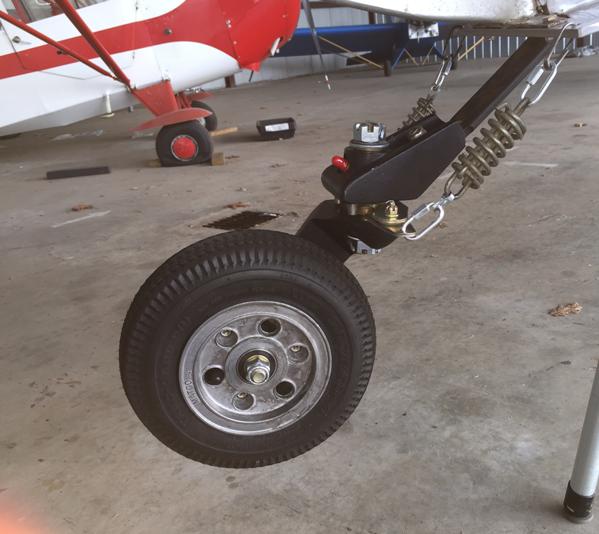
I removed my little Maule 6" hard rubber tail wheel and put on a new Matco single arm pneumatic wheel (WHLT-8). The basic wheel swap was easy, one bolt, but while at it I cleaned up the whole tail wheel area:
1) I removed the Matco 45 degree wings and put on some 25 degree ones to match the Avid's rudder rigging. Had I left the 45 degree ones on, the wheel would never unlock, yielding wider turns,and crappy manual ground handling because the wheel would not swivel fully.
2) Re-bent the spring to angle the wheel down a bit. The spring had flattened enough to make the wheel pivot axis point forward, perhaps 20 degrees off the vertical, thus making the wheel lift the whole tail when it pivoted. A local car spring shop (search Automobile Suspension, leaf spring) did it while I waited for $20. Now the wheel is almost purely vertical. I bet they could have made a new one easily, too.
3) Extended the steering arms at the bottom of the rudder using a flat bar of 1" x1/8" aluminum. This extended the horn about 1.5" per side and made the steering more powerful and kept the geometry of the springs square. I bolted the flat to through old holes.
4) Rigged the springs using some threaded quick links which are much easier to use than the previous spring clips (https://www.amazon.com/gp/product/B00M9FAPYK/ref=oh_aui_detailpage_o01_s00?ie=UTF8&psc=1) I used #35 sash chain which has a working strength of 106 lbs, and which can be easily opened and built up to desired lengths.
Taxi and flight tests showed great improvement in handling, the basic lock in the trail position is stiffer and steering commands are much crisper (I bet the increased steering arm was as much responsible as the wheel). Landings track straighter now, the wheel is locked more tightly in the trail position. The big spring on the right is a bear to deflect now, but tells me positively that I am getting right wheel deflection. Another positive note: the tail wheel no longer acts like a phonograph needle for all the bumps and cracks in the tarmac, taxiing is quieter.
I got some tail wheel shimmy, so I tightened up everything after the flight (found the spring to fuselage bolt had lost torque, allowing the spring to rotate enough to be the cause).


 1 person likes this
 -
Ed, no weight (they are the same as my "original" as-weighed tires so I didn't bother to weigh them) will get the diameter tomorrow.This site is a little cheaper, says they are 17.6" diameter, inflated:
-
EDMO, I used the tubes shown, and they worked well, but I didn't measure their diameter. They were stamped "Firestone" and were high quality and thick. It seemed that they are very inflatable, and can fill a wide array of diameters. The tires are high quality brand new and made only a few months ago.
-
I bought these a few months back, all new stock, great quality and great price:
-
The Big Asian Country has many folks with no ethics at all, so the parts are clearly not AN even though marked that way. Let's face it, they put poison into milk because it made the protein tests rank a little higher, and killed babies in the process. What's a few pilots, in the scheme of things? At Sikorsky we learned that you have to use the rep of the supplier as a big part of the quality cycle, C5.
2 people like this -
The entire cross country is on my Facebook page, this link is supposed to allow anyone, even without FB account, to see the album. Let me know if it works, Fred:
1 person likes this -
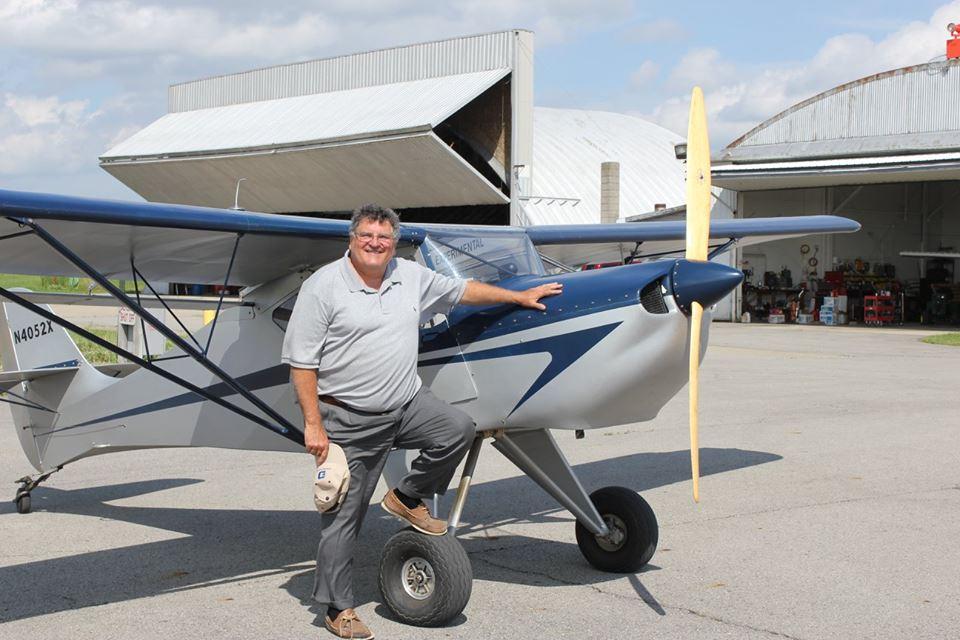
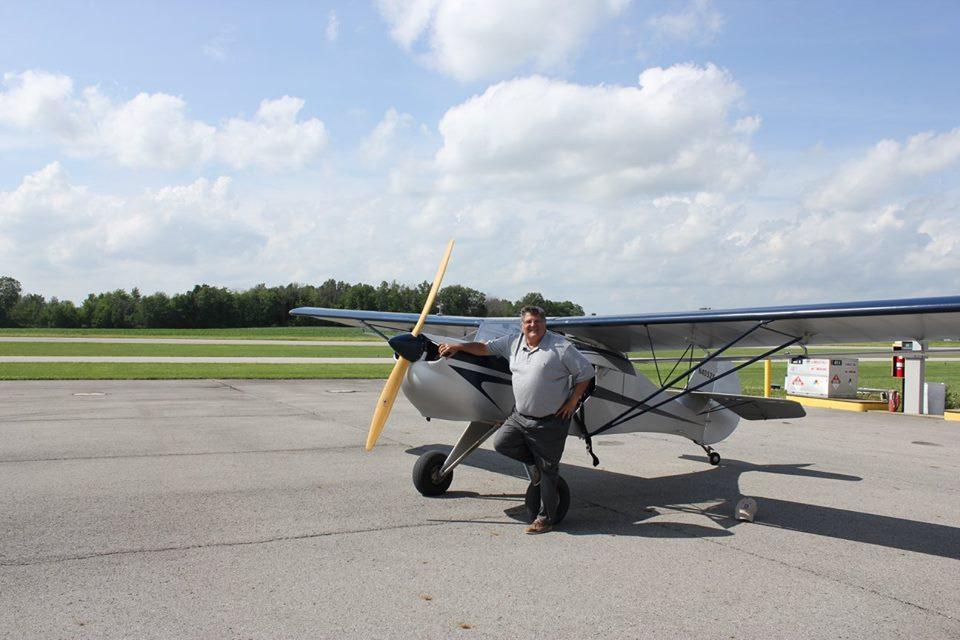
It's been a year since I bought my Avid and learned to fly it, and what a fine year it has been. Some of the highlights
I met and learned from Joey Myers. He shared his hangar in Rio Vista, and that was a real highlight!
I learned to fly a taildragger (or at least I learned how to not quite ground loop it)
I flew across our great country, over the Rockies
I fly from a small airport in Connecticut with a nice hangar, no tower and great neighbors
I love the little Avid scooter, it is like a friend now, and when I am up in the air, my grin almost hurts.
I find myself thinking about flying it at odd times, the way I used to think about fishing or baseball!
My annual cost less than $200
I often get 3 landings in, and it takes about 20 minutes of flight time and 1 1/2 gallons of car gas. And if two of them are pretty, I am set for the week.
I find AvidFoxFlyers to be a fine place to learn things from folks who have been there already
Thanks Guys!
Nick

.thumb.jpg.1240690c4c903de7ba0c7887924dd6e7.jpg)
 1 person likes this
 -
The US military in WWII was unbelievable. In the Pacific, the CB's (Seabees) would start building the base while the islands were being conquered. On Guam, Tinian and Saipan, the airbase was launching B-29's just 5 months after the first Marines went ashore. That 5 months was spent invading, mopping up, constructing the base, the runways and the port facilities for bombs and parts, and the barracks and hangars. An entire B-29 wing was operational 5 months after the island was first attacked!
The Seabees were the core of the post-war housing boom, because they came home and then used the same concepts to build the small, efficient houses that many of us grew up in, which were built with the same economy of scale as the air bases. The first major house project was Levittown PA, which was built by former Seabee LT William Levitt! Levittown Long Island came next. (https://en.wikipedia.org/wiki/William_Levitt)
3 people like this -
I'm taking money that the slashed tires are the work of some twisted member of our community, otherwise he's have slashed a zillion car tires instead. Some aviation nut, I'm thinking.
-
This Youtube Video has some advice, I wonder what our veterans say about it? https://youtu.be/c_kEZnXDgYM
1 person likes this -
There are two kinds of fuel pressure gauges, the wet and the electric.
A wet one routes the pressurized fuel to the gauge, so any leak becomes a really big problem as the leak pours gasoline on your knees! Wet gauges cost about 15 to 20 on ebay and twice as much thru aircraft houses. (http://www.ebay.com/itm/Marshall-Gauge-0-15-psi-Fuel-Pressure-Oil-Pressure-1-5-Midnight-Black-Liquid-/331519166762?hash=item4d3015092a:g:eJ4AAOxybetSAp10&vxp=mtr)
The electric have a sender unit and an electric gauge, and cost a heap more, typically 50 to 100. And the pressure you're measuring is only a few PSI (maybe 4) so the gauge has to be a sensitive one.
Nick
-
Wow! I've instructed long enough to hear the wheels in his head turning, ever so slowly. Single pilot, instruments, and with that steel trap mind, he is trying to make a smoking hole, he just doesn't know it.
-
We're proud of you, Joey, even if that bird you are flying in has no fabric covering! What is that fuzz on your lip?
Stay cool, stay safe and come home soon.
Nick
1 person likes this -
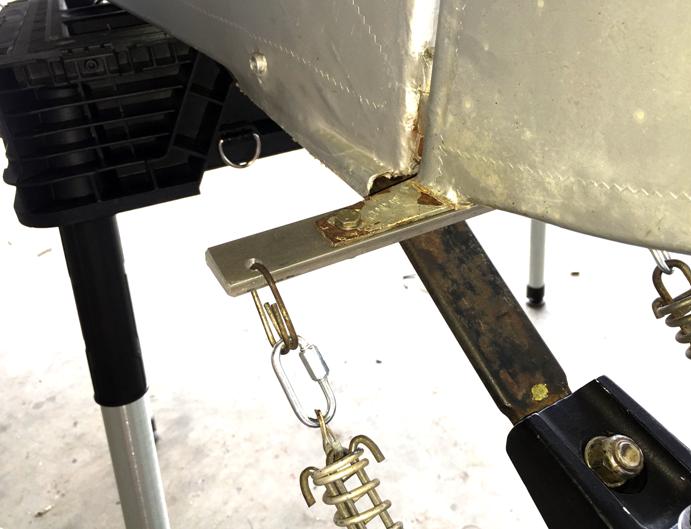
Here is the excel sheet for my Mark IV. I stole shamelessly from Joey, who did the real work. The tail should be 50 ish pounds. I think. I did a spot weight after mods, without leveling, just to be sure the total made sense (it did). With the aircraft in normal tail dragger attitude, the tail weighed 94 lbs. Leveled, it weighed 54 lbs.
1 person likes this -
I put new tires on my Matco split hubs, and used the guidance Matco publishes to squeeze the tire beads together, so the inner tube doesn't get pinched when the hub halves are bolted together. The procedure uses shop beam clamps to crush the sidewalls together, making the two bead rings almost touch, which makes it far easier to push the tube away from the hub halves so it doesn't get pinched. I used cheap Harbor Freight clamps, $3.97 each, to do it, and got both tires successfully mounted in a short afternoon. I posted the procedure below.It is also posted on the Matco site, under Technical Manuals & Service Bulletins (Compare)
1 person likes this -
For the record, the build manual is for my Avid Flyer MKIV serial number 1174D, and is of about a 1994 vintage.
-
RDavidson is right on, as much as Apples are loved by their aficionados, they are awful about how they want to be fed. The rules are fairly important: 1) Use only Apple certified cords, 2) use big power supplies, and 3) swap it all for new if the darn device slows down its charging rate, or rejects a charge.
If the cord has wires that are too thin, the voltage drop restricts the power delivered so the apple rejects the charge. Certified cords have the proper thickness and connections to avoid this problem. For the Big power supply, seek at least 12 watts, which is 2.4 amps at 5 volts (USB is always 5 volts). Remember volts times amps equals watts. A computer USB port has 1 amp at 5 volts, so it is only 5 watts, and most apples will reject it.There are many car chargers with 3 to 6 amps at 5 volts, so they can have 15 watts to 30 watts to make your apple smile.
1 person likes this -
Fedex Kinko's is a possibility for the copy, but they charge about $0.50 per page and so the 250 pages is a hefty sum, and frankly, I already have a copy!
akflyer, those files have been corrupt for a while, I tried every trick in the book months ago, too.
-
I have a whole Avid Flyer MK IV build manual in a binder ready to be scanned. I started once and realized how much work it is, and gave up. The foldout pages certainly complicate things. Anyone volunteer to scan my copy and return the original?
1 person likes this -
Latest input: I did a compression check (use starter to turn over the warm engine at normal crank speed) and it showed identical compression at 119 PSI for the cylinders.
-
Lorenz:
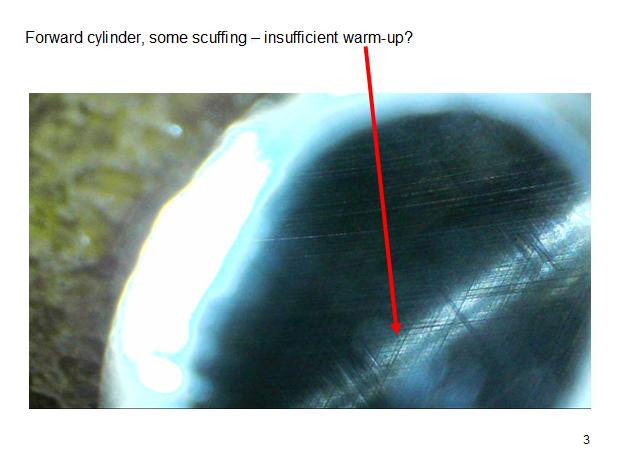
I bet that's cold seizing, and is my fault. The water temp was at 125 one takeoff, here in CT, and I couldn't get it any higher after 15 min at 3500 rpm (the most I could get with the brakes still holding me). And many circuits result in low temps during the glide, and even with a taxi back to take off again, the temp was seldom higher than 140.
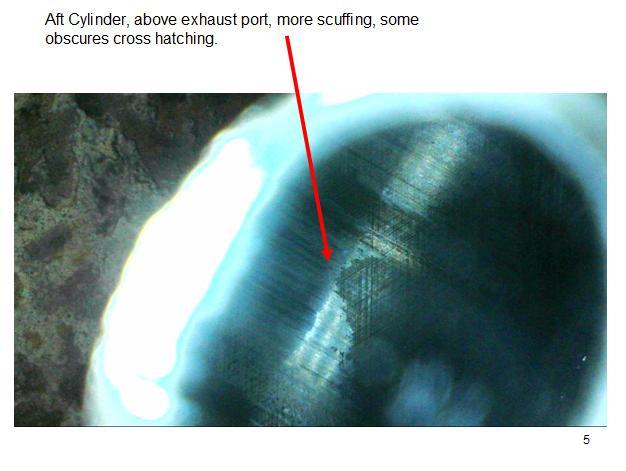
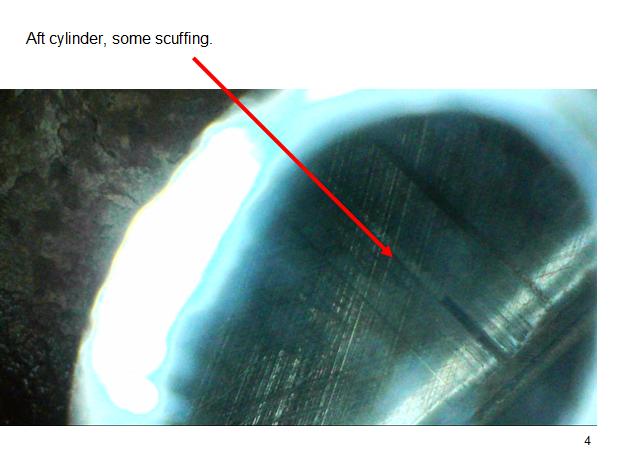
My oil is Lucas Semi-synthetic, not cheap, and recommended by lots of forum folks. The real question, is this amount of scuffing an airworthiness problem? I attached a video that is better than the still pics showing a tour of the aft cylinder's walls.
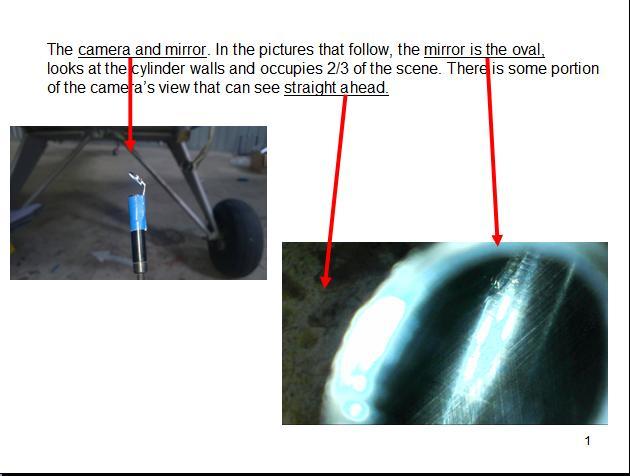
The camera is a cheap Amazon one, 2 Megapixel, $25, with a few simple tools. It is 8.5mm, and with the little mirror it sees to the side very well. I taped the mirror on after pulling off its plastic collar which was so wide the assembly wouldn't fit in the spark plug hole. See the blue tape in the last pic. http://www.amazon.com/gp/product/B016KUGVJC?keywords=borescope HD&qid=1455467033&ref_=sr_1_2&refinements=p_85%3A2470955011&rps=1&sr=8-2
-
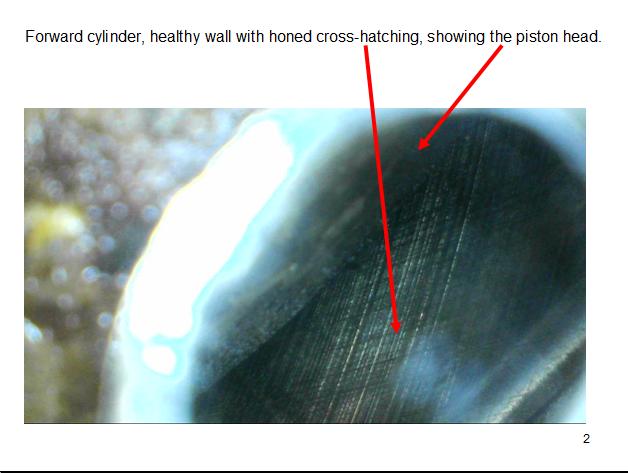
Ok, went back in with a mirror on the camera, and got the story. The walls are mirror-like, so they reflected the lead deposits on the piston head. Also fairly wet with oil, so the lube works. The plugs are light brown, with minimal carbon. But the bad news, some piston scuffing can be seen. Comments?


-
for the record, I burned 100LL for about 50 hours, and hi test car gas for the next 20. Lucas semi-synthetic for the oil the whole time. Starts and runs like a charm, lots of power.
I'll get some exhaust gaskets and peek inside asap.
-
I agree, that is at the bottom at the port level. The middle pic upper left shows the upper cyl wall area, which looks cross hatched, but I need better pics, will get them this week. I rigged a little mirror to get the camera to peek to the side.

.jpg.6add7ba292f94556721dff779ad31d07.jpg)


A little Friday fun
in Avid fox flyers pics and vids
Posted
Leni, nice job! Restarting just before the flare tells me how bad those trees were, you get a gold star.
You never mentioned your underwear, means you are far braver than me.
Nick