Luked
Contributing Member-
Content count
356 -
Joined
-
Last visited
Posts posted by Luked
-
-
TJay, what is the dark color on your spars? I'm getting ready to rebuild my wings, and I'm looking at options for corrosion protection for the steel and aluminum parts.
Thanks,
Luke D.
-
Thanks nlappos. After some google searches that's the conclusion I was coming to. Good to have someone else confirm.
-
I was hoping to pick up some spar material locally today, but ran into this question. It looks like the original material in used in my Avid project is marked as ASTM-B-210 (Aluminum Alloy Drawn Seamless Tubes). I think most of the tubing available locally is extruded. Does anyone have any info on this. I was hoping to get my tubing today, but I'm kind of hesitating now.
Edit: Well, I found a place that has the drawn seamless, so I'm going to go with that. It's about 50% more. This might be something to keep in mind if you are buying locally instead of ordering from someone like Aircraft Spruce. Btw, ACS lists 2.5" x .065" @ $8.75/ft. The local place sells 12 ft pieces only, but the cost comes out to $6.25/ft.
-
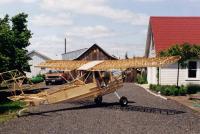
It's the Avid "Speed wing" rib. Not completely flat, but pretty close. It's actually a little convex on the bottom.
-
Wish you were already flying this
 . I'm rebuilding my speed wings, and have considered extending them.
Anyway, good job so far. Keep up the good work. It looks very nice.
-
Does anybody have the MkIV speedwing rib design drawing or a spare actual rib?
I can send you one, but not right this second. I am rebuilding my wings, and need to decide what will and will not be re-used. Maybe a week or so.
-
For anyone contemplating the oem ply spar inserts, you might want to consider lengthening them to 24" and adding the quarter round strengtheners. Details here: http://www.avidfoxflyers.com/index.php?/topic/264-mtow-modifications/
Hey Doug, did the 24" inserts have the same size of cutouts on the ends as the 18"?
-
Hey Joey,
If that doesn't work out, I can do it too.
Luke D.
-
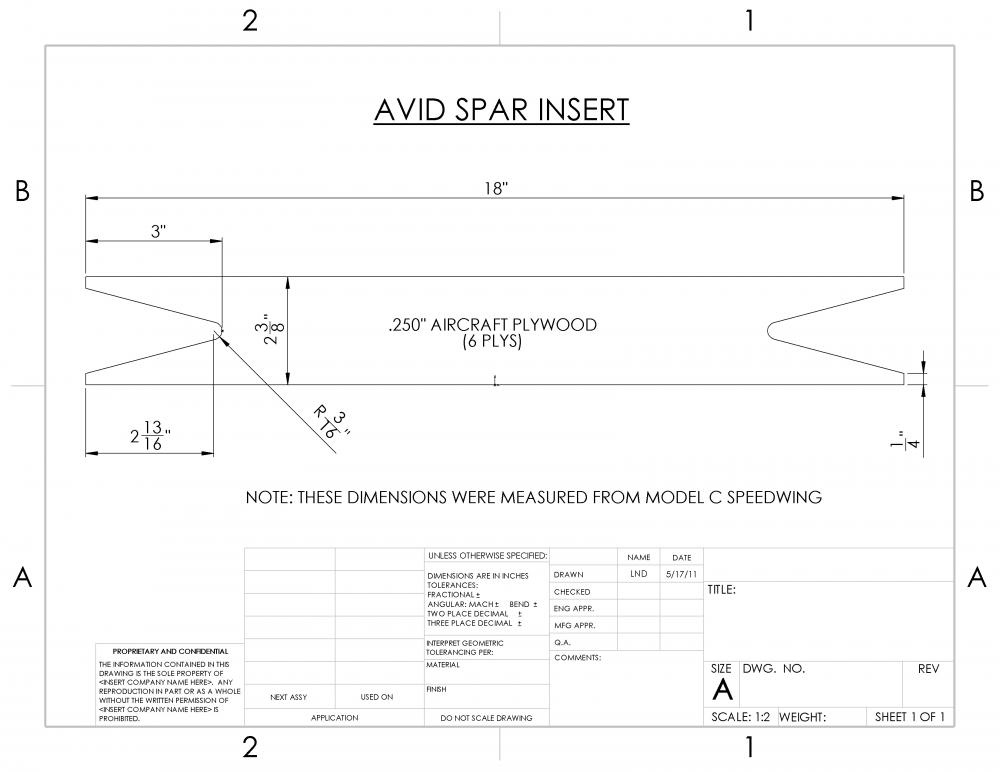
I thought I'd save this here for future reference. I just measured it off of my Avid speedwing project. I saved it as JPG and PDF just incase the PDF has any problems.
-
Glad to hear he's going to be okay. Thanks for the update.
-
Thanks for the reply Paul. My friend gave me the newest cans that he had which he estimated to be about 2 years old. It is 3M 2216 A/B Gray. He said that he had used some of the 20 year old stuff from the original kit in non critical areas, and it appeared to mix up and work just like the new stuff. Also, it was stored in his insulated shop that he only heats when he is working out there. Not sure what to think. I think I'll try calling 3M tomorrow.
Luke D.
-
Sorry to see this. I've enjoyed seeing his posts on here. Hope it turns out okay.
1 person likes this -
Okay, I had time to do a little searching, and it looks like 9460 is still what is being used on wings. I'm still curious if anyone has any thoughts on going beyond the 2 year shelf life.
Thanks,
Luke D.
-
I've got to do some major surgery to the wings on my budget Avid project. A friend of mine is finishing up his Magnum project, and said he has some left over structural adhesive. He couldn't remember the number, but he thinks he bought the same stuff that was included with the original kit. I'm going over there tonight to check it out.
He said that he's had it about 2 years, and he thought that he read that 2 years is the shelf life is on it. He also said that some of the old stuff that he had seemed to work just as well as the new stuff he bought. What do you guys think about using 2 year old adhesive? Also, are there better adhesives than what was originally provided in the kits?
Thanks,
Luke D.
-
The ribs on your tail feathers look interesting. Are those your own design? I didn't think KF had that option on the earlier models.
-
No problem.
-
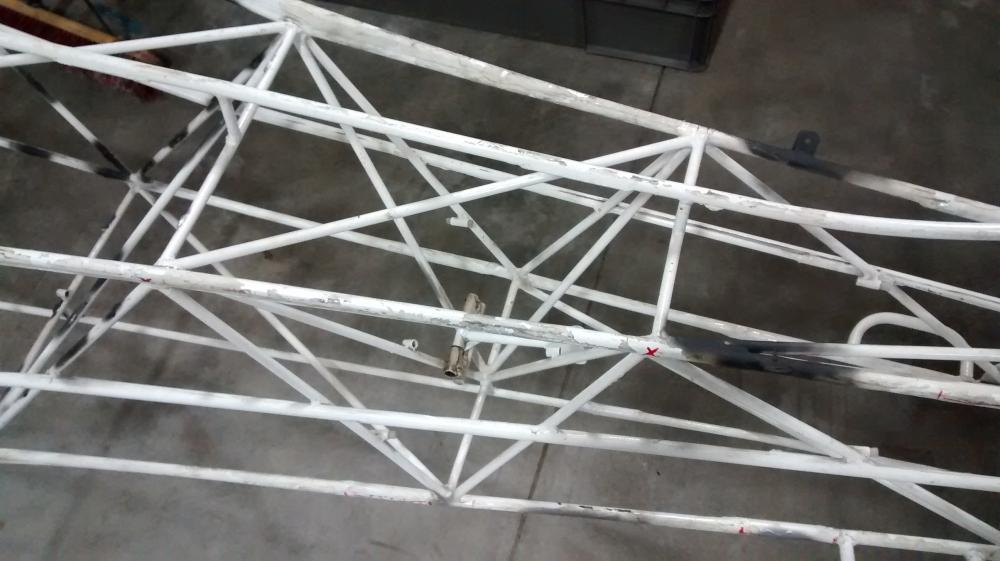
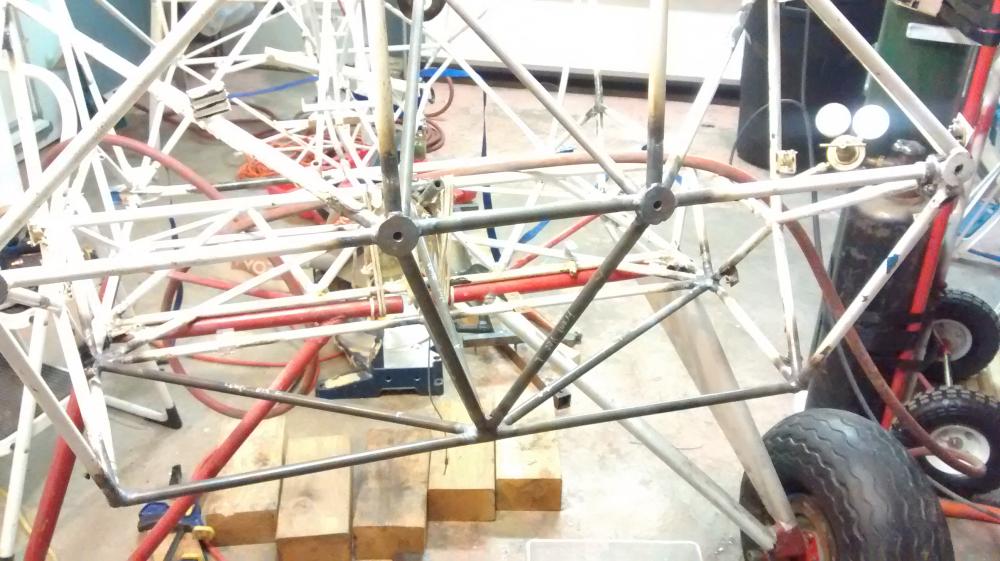
It's kind of hard to get a picture from the bottom because I've got the fuse sitting on the floor right now. Here is one from the top. I think this angle give the best idea of what is going on. Looking from directly overhead, it can actually be kind of confusing what tubes are where. Ignore the idler arm in the middle that was for a different pushrod system made by the previous builder. You can see the vees going down to the center. I think simple diagonals would have been enough to do the job just like at the other stations on the tail. They might have done that just to mount the idler. You can also see the additional wood pieces that were added to the longerons to blend in the shape of the extended area.
 1 person likes this
 -
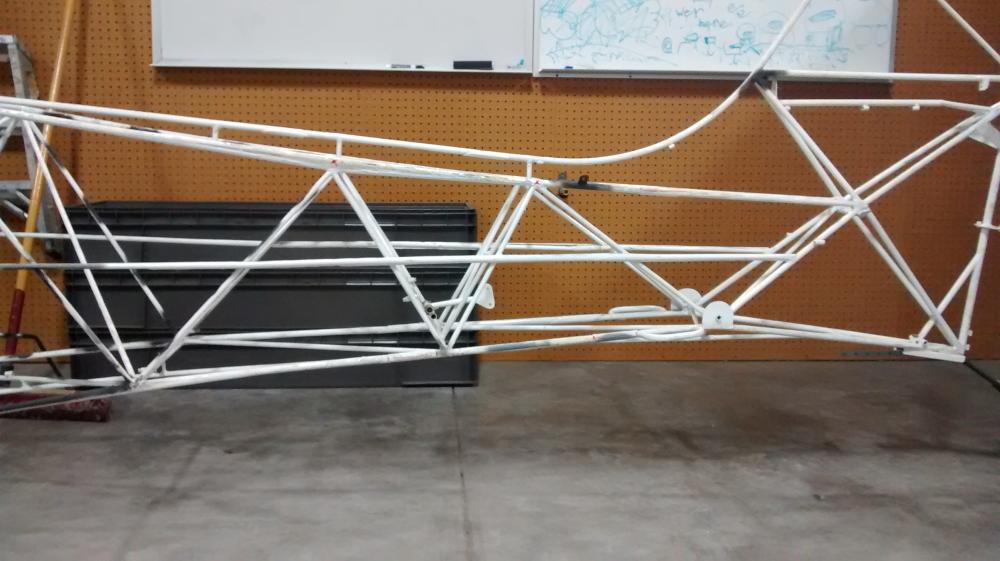
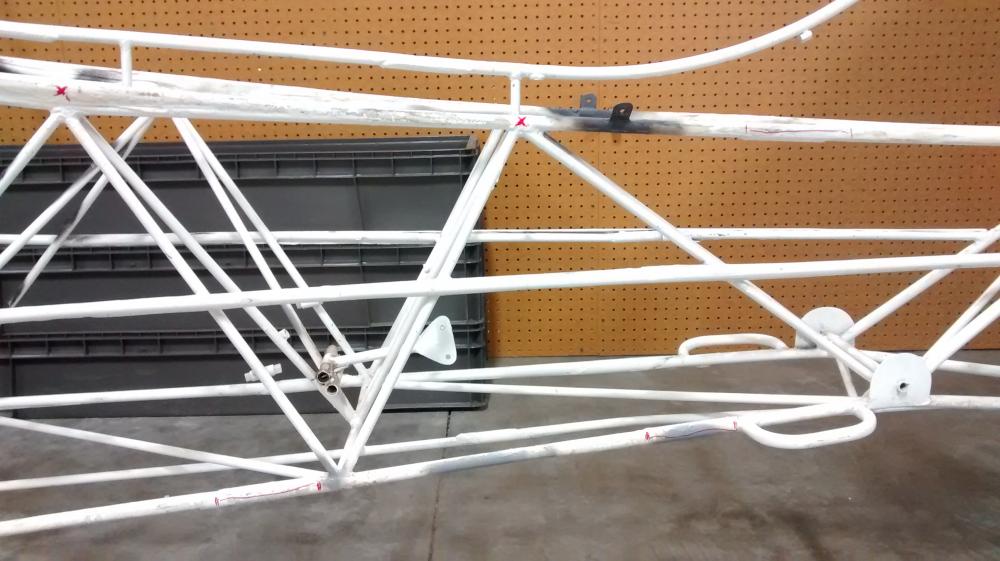
Here is a wide shot of the tail. I think the "vee" near the center of the picture is where the extra length was added.
The red X's are about 15 1/2" apart. I also tried to mark where the longeron splices are. There is one just ahead of the lift handles, and one just ahead of the bottom of the "vee". On the top longeron there is one directly above the lift handle. I couldn't quite tell where the other top longeron splice was. The spices had a larger diameter tupe slipped over the longeron. The splices only go around about 3/4 of the longeron, and are tapered on the ends.
 1 person likes this
 -
Hey Kenneth,
Sorry, I don't know anything about the Champion either, but good to hear from you again. I guess it would beat your teenie two at flying slow which is good.
Luke D.
1 person likes this -
I've got a stretched fuse on my first project. I'll try to get some pictures for you later today.
2 people like this -

I sure would be.
Mark
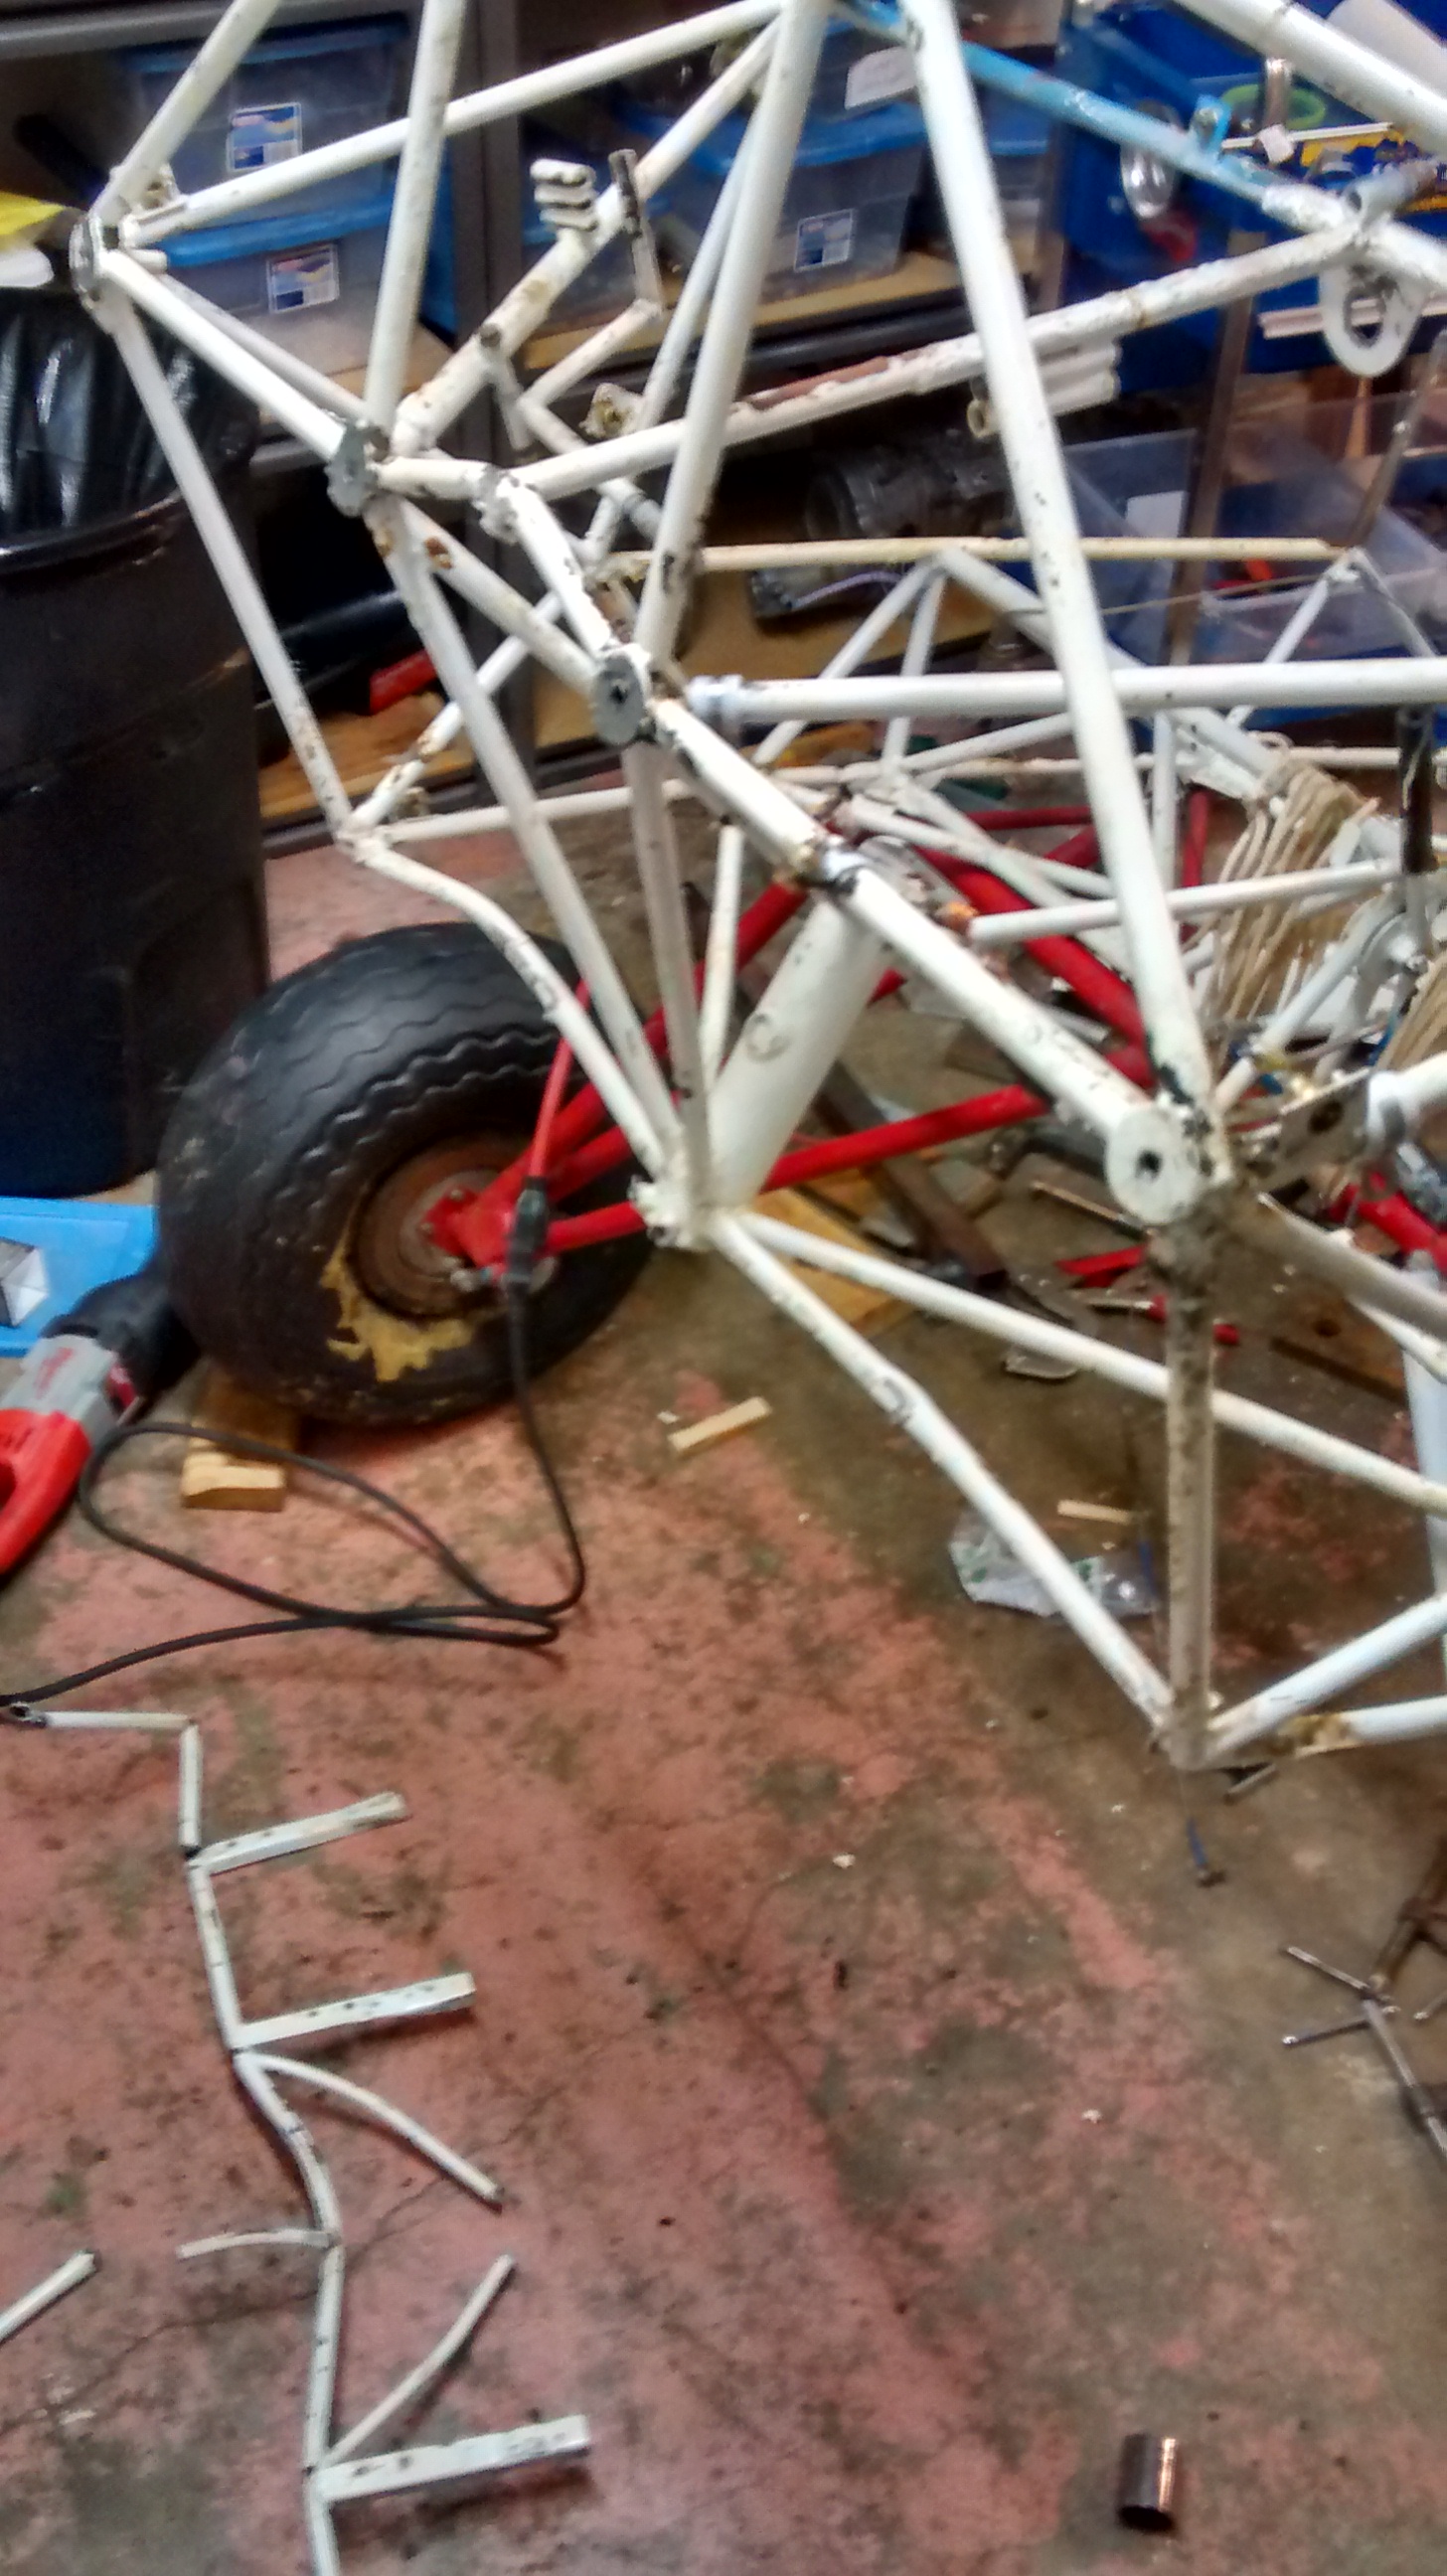
Mark, the only thing I removed was the socket / tube structure you see in the picture above. It's pretty much the same as the part I sent you before (except all bent up). Sorry, no nosegear on this one.
-
FANTASTIC - mad welding skills. Kudos.

Haha, well thanks for the compliment. I'd say passable welding skills. I haven't done a lot of thin walled welding until my Avid projects. I'm definitely improving though.
-
I'm planning to use as many parts as I can from the 582. We'll see...
 Before that I've got quite a bit to do on the rest of the plane.
I got some more welding done this weekend. The majority is done now. Here are some pictures.
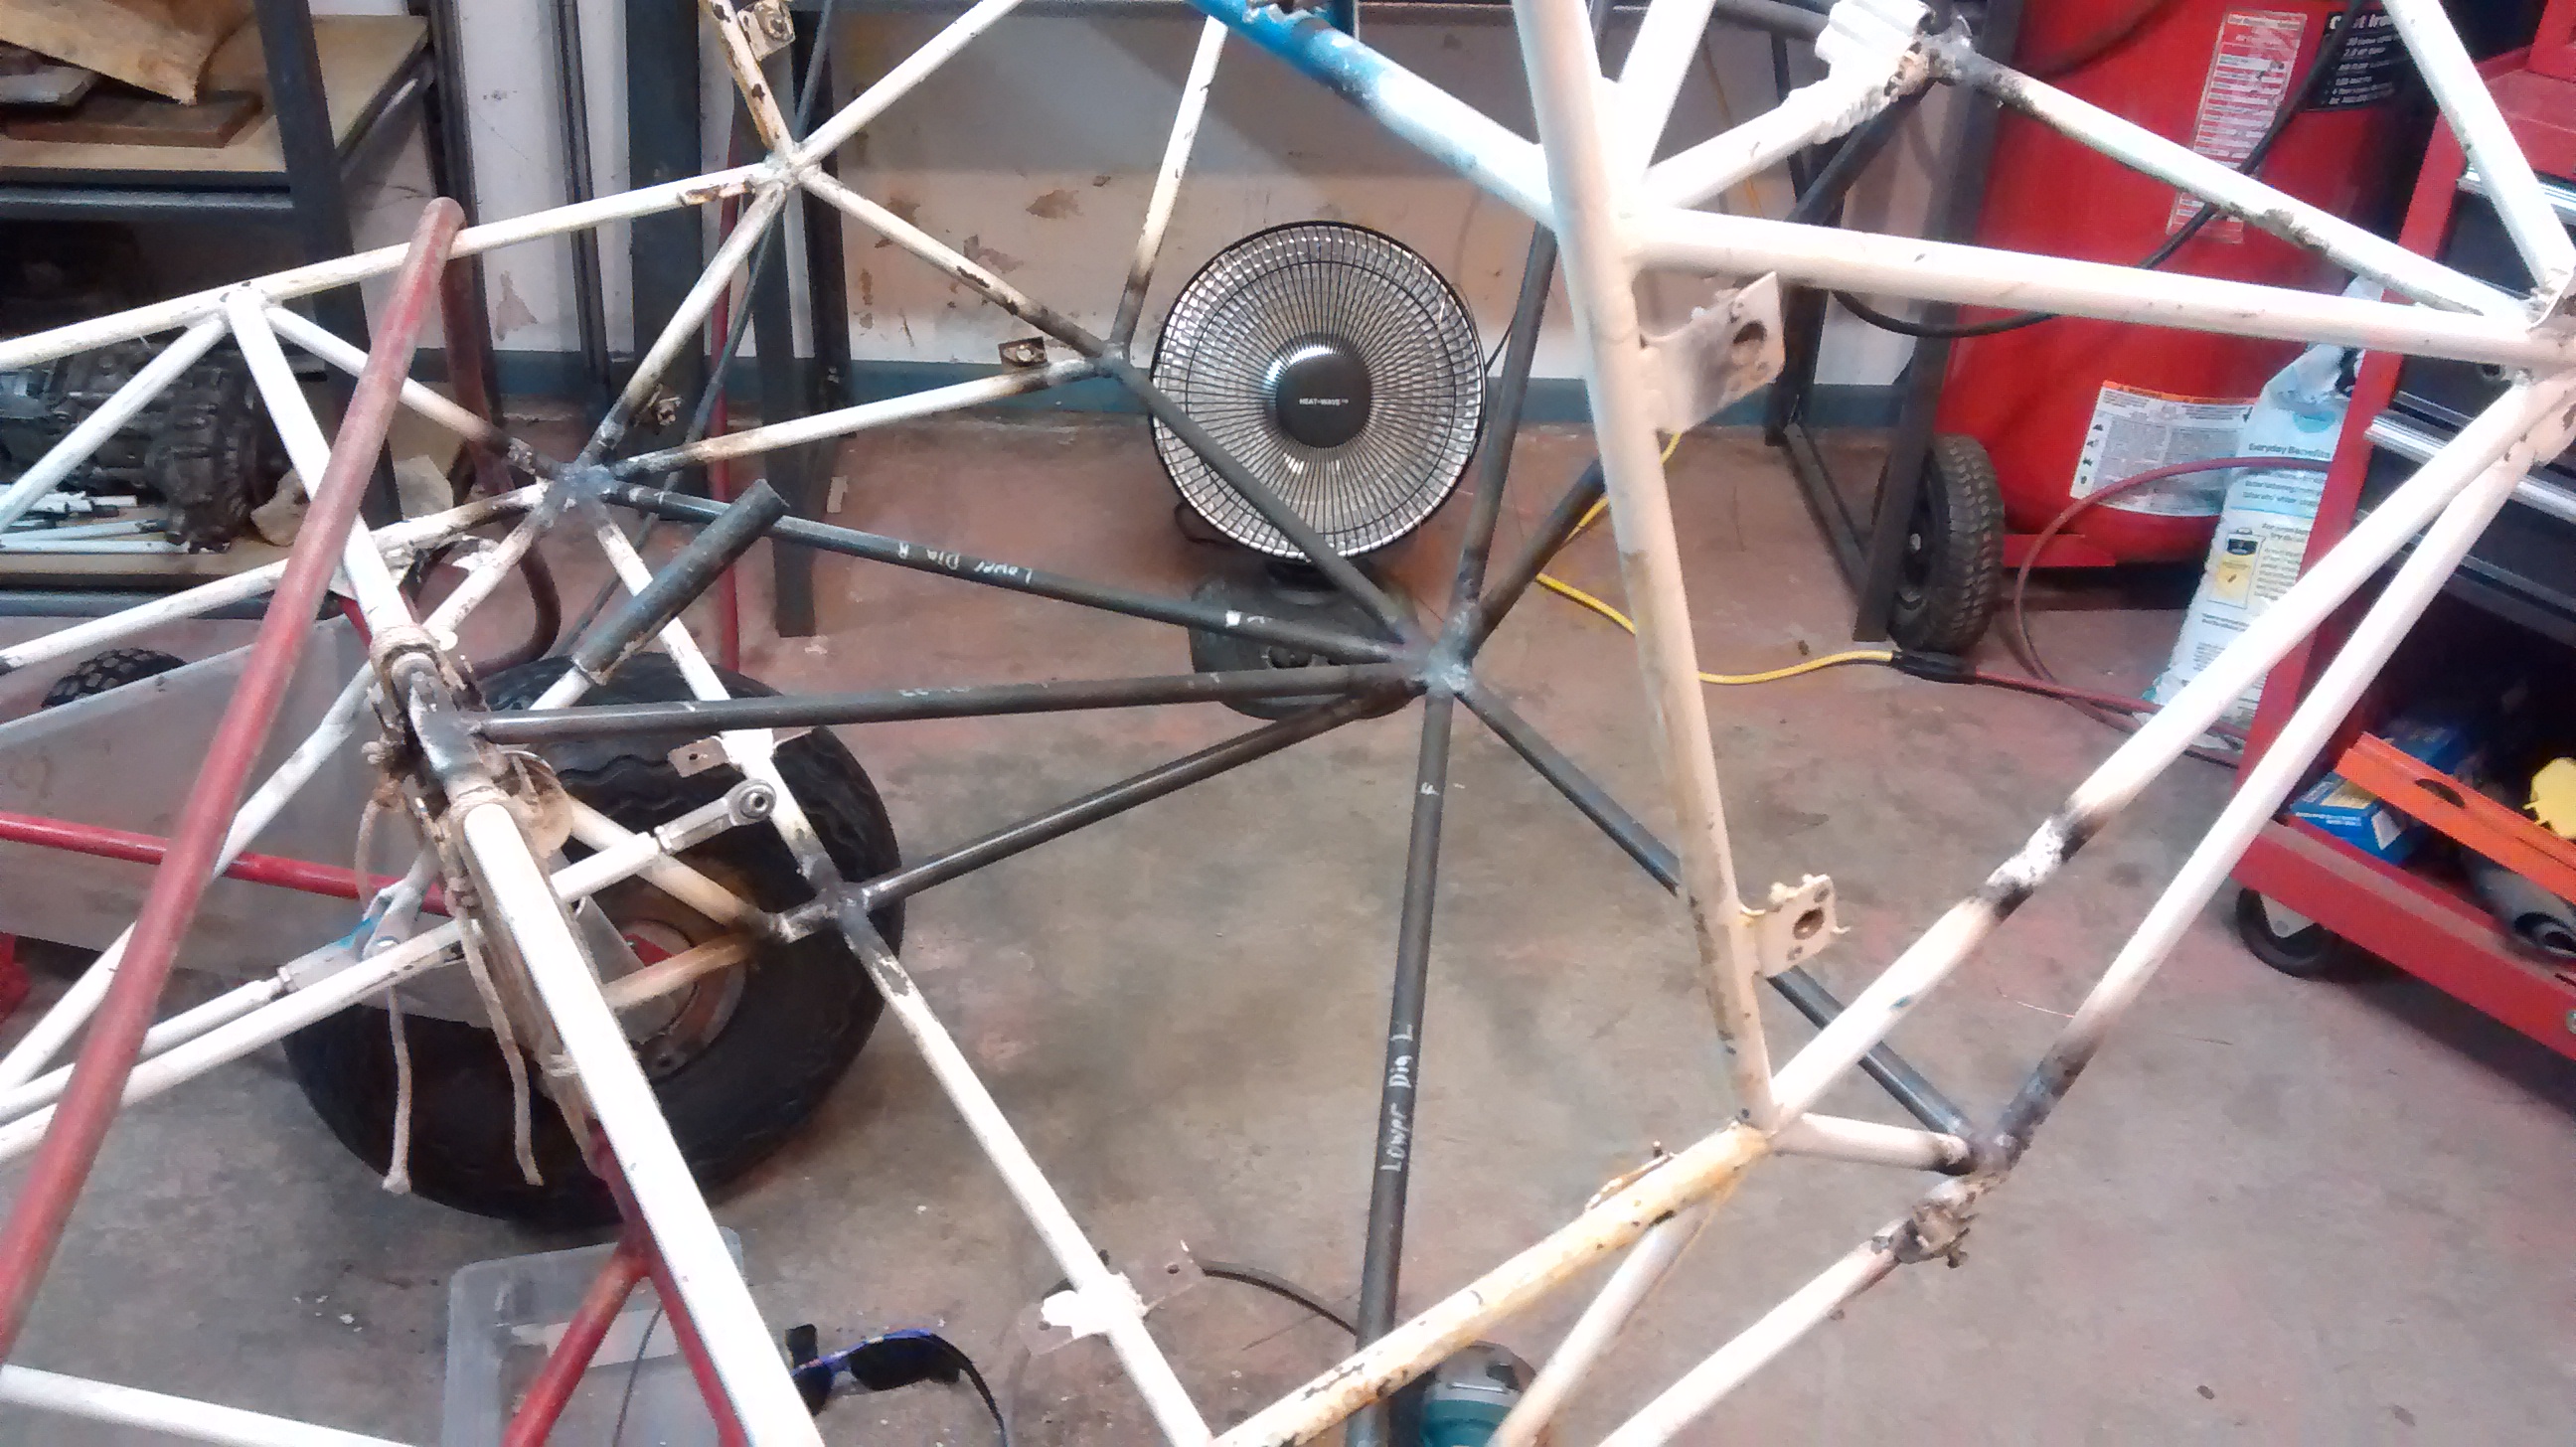
I removed the trike tube, and replaced all of the bent tubes in that area
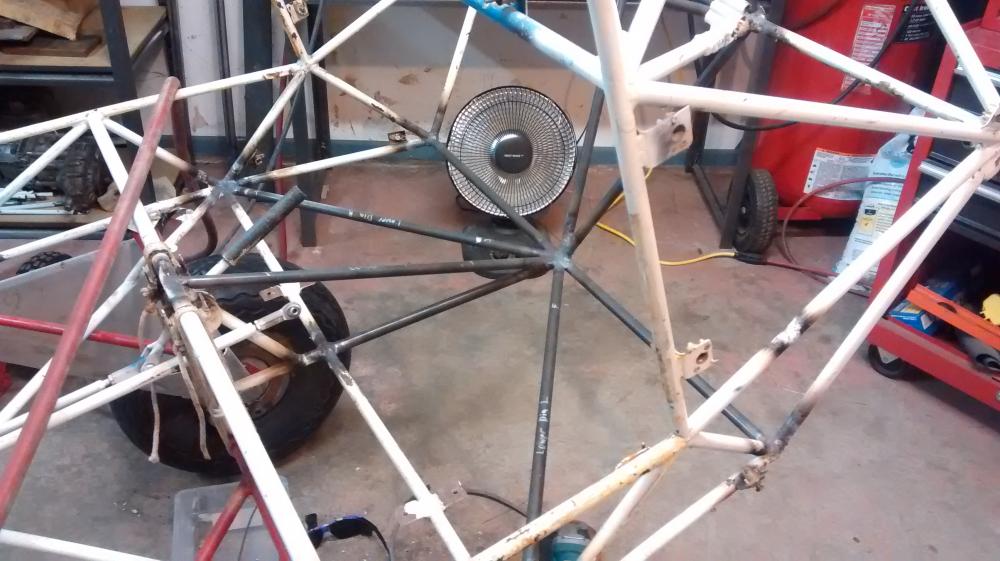
Here is a view from the front (partially welded in this picture).
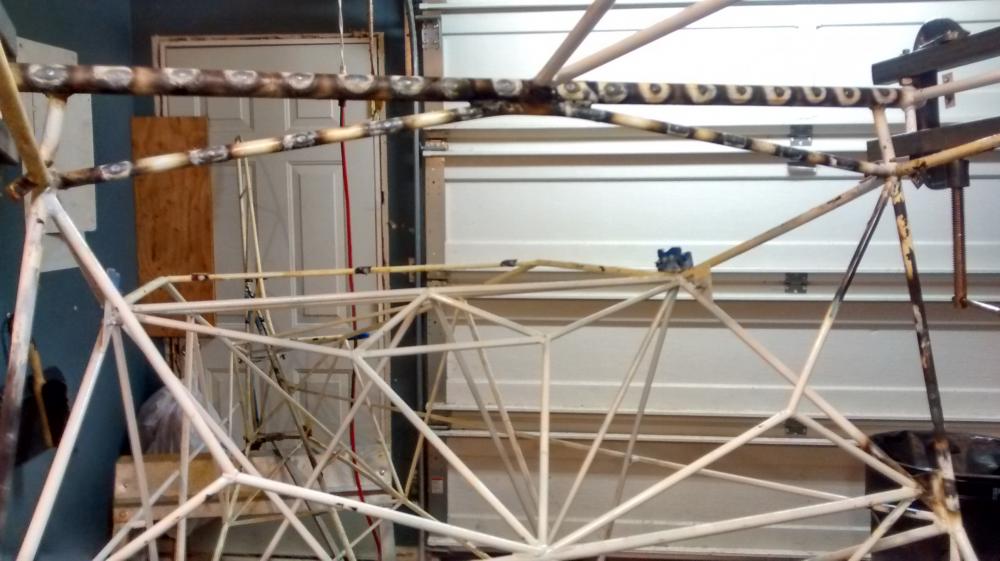
Here's a shot showing some of rivet holes I welded shut.
-
Now you tell me...
They actually would have been hard to save because of the repair I was making. I'll have to decide if I want to go to the effort to replace them.Thanks Doug


Budget Avid
in Avid Model C
Posted
I started working on wings earlier this week. Had to move to the shop temporarily for more space.
I actually got the covering stripped off, but I guess I didn't take a picture. Some mice had been living in the front spars, and they had some corrosion. Not that bad, but I decided to replace them. I got some tubing on Thursday from a place in Portland. Hopefully I can get some more done today.