High Country
Members-
Content count
479 -
Joined
-
Last visited
Posts posted by High Country
-
-
Joey, thanks for the heads up on the power supply. I'm still looking for one. do you have a link to the one you are talking about?
-
that must be some power house to be able to go full vertical like that and still be able to pull his sister along for the ride!!
1 person likes this -
at least he's chasing his dream I guess. is that a broken off spark plug at the end of the first video. hope he has dual ignition
-
can't help with the tail spring but would recommend if you have any local metal recyclers in your area the ones around here have a section of good used metal that they sell for scrap prices back to you. if so you can probably find what you need for a buck or so. small enough piece and they will probably just give it to you.
-
or just eliminate one and go back to the original plumbing design. I'll 2nd leni on on the heat gun I've used this technique several times and it works great
-
I was originally planning not to have a battery at all but with my MGL engine monitor I need one now, guess it will be good for the radio and gps as well, anyways what would be the best bang for the buck and keeping the weight down. I'm currently running a 532 but will eventually upgrade to the 582 in a year or so but still plan to keep the pull start. I was considering this one http://www.crazedpilot.com/8oz-12volt-life-lithium-battery-for-aircraft-with-no-electrical-systems-for-lighting-radios-and-more/%C2'> but not to sure about the lithium and can I just charge it off the engine rather than having to plug it in after use? any other better options I should consider without breaking the bank?
-Robert-
-
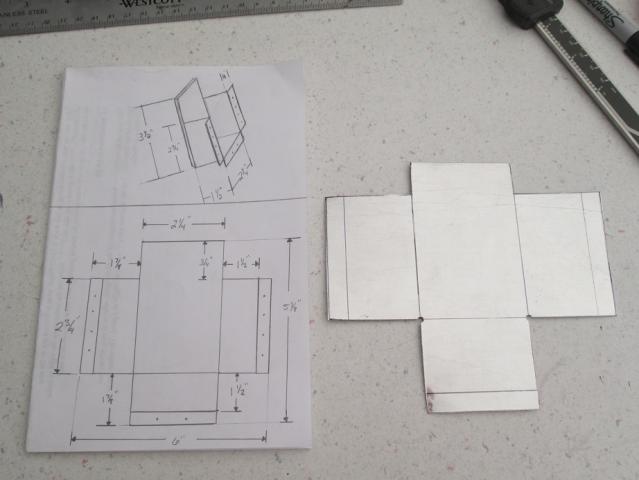
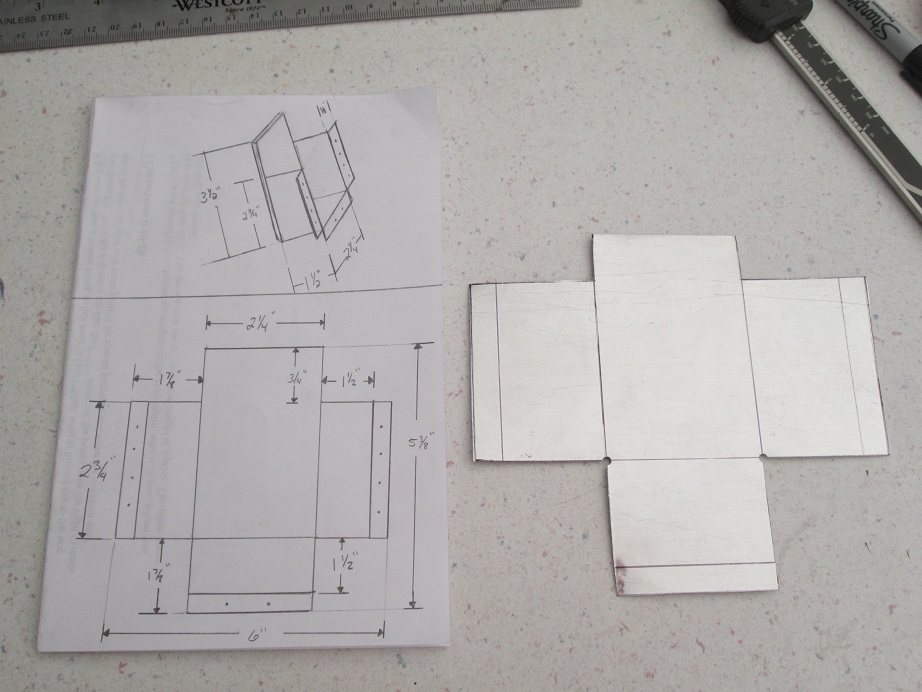
Yesterdays chicken scratch at the breakfast table if anyone's interested in the box dimensions
 1 person likes this
 -
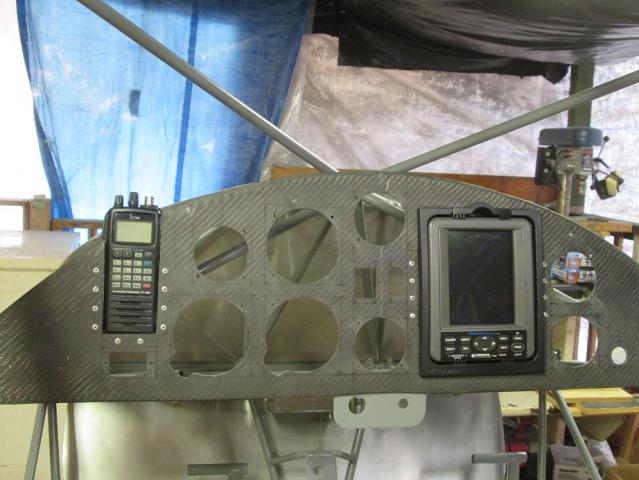
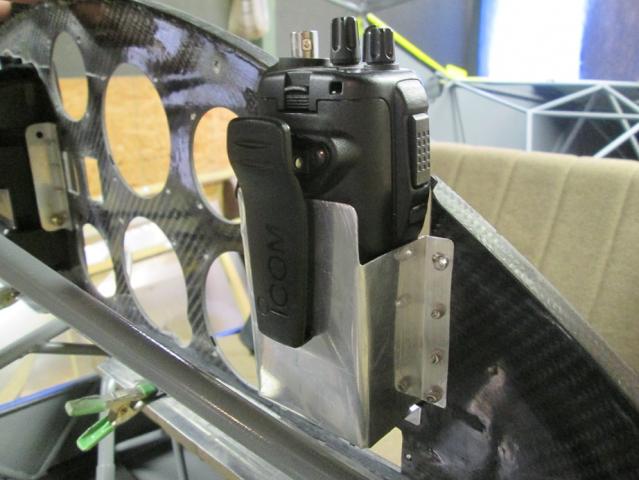
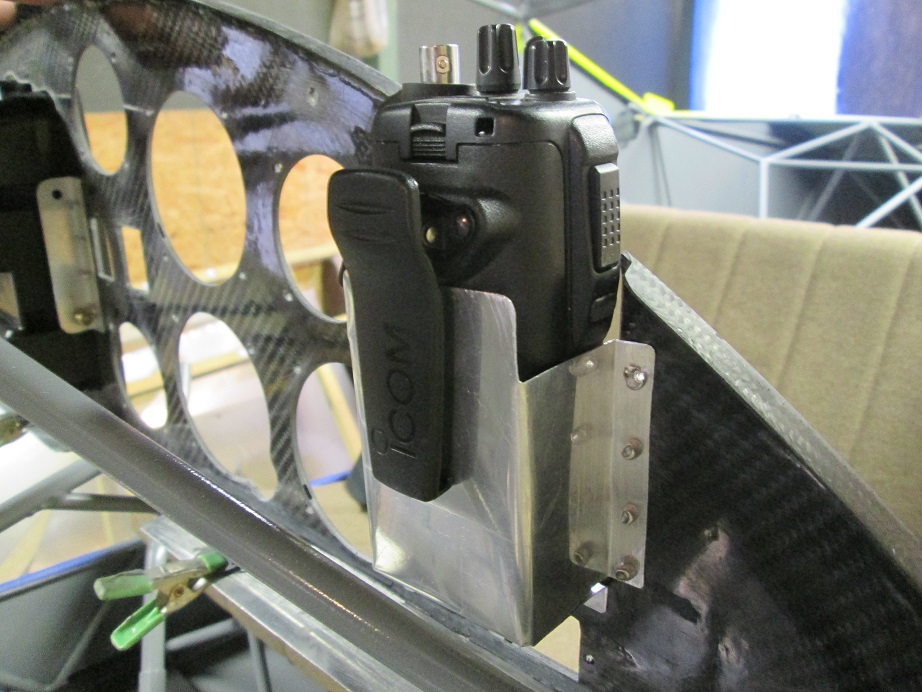
Thanks for the input thats what I was hoping for but wanted to know before i cut into my panel. here is how its looking so far. it will have the master switches on the far left side and will be painted yellow to match the rest of the plane. hate to cover up the carbon fiber but we want the gauge color to contrast the panel rather than just disappear into it. I made a tray behind the panel so the handheld sits flush but can still be easily removed for use outside the aircraft.
 1 person likes this
 -
Sorry to jump in so late I'm just finally getting caught up on some of the threads. to throw in an alternative option (which I chose to use on my project) the main gear legs off of a Ridge Runner http://realflying.com/ will fit perfectly on our airframes and they use the bungees like the cubs have under the plane rather than on the seat truss. all I had to do was fab up my own cabane and shorten the bungee struts 1/2" and it all bolted in real nicely just finished the mod this last weekend. This gear is just a tad longer than Brett's wide bush gear so it sets almost the same but replaces the springs with bungees. I'm planning to finish painting it this week and get it installed soon if you want pics just ask and I will shoot some for you.
-Robert-
1 person likes this -
just curious what others have done regarding their panel layout. I'm going to be using a handheld radio (currently have Icom IC-A6) and the best place for me to mount it is on the left side of the panel but this puts it right next to the master switch and I'm concerned about getting unwanted noises from the engine. would I be ok if I ran shielded wire to both the master and radio power supply? and a good ground? I've seen others have them next to each other just not sure if they have issues or not. I believe Joey's is like this?? or should I try and relocate the radio to the right side of the panel which I don't want to do. I will be cutting a hole for the radio and making a box riveted to the back side so the radio will be flush with the panel but still able to be removed easily if needed. input and pics would be great. I'm hoping to finish cutting out the panel this week

-Robert-
-
Nice looking plane Mark, looks like you have the MKIV cowl as well. looks a lot better than the old A-C cowl that I currently have. do you have any pics of the inside by chance? panel? Having flown a narrow gear Skyraider I would second the motion to just put a wide gear on it and learn to fly the tail dragger the way it was intended rather than put the nose gear on. I think you will be happier in the long run. to put on the nose gear you have to do a bit of welding which would be no problem with the fabric off if you choose this route. FWIW I'm currently working on converting the wide bungee gear from Ridge Runner to fit my Avid. Its just a bit wider/ higher than Brett's gear and it keeps the bungees which I prefer to the springs. Its mostly a direct fit for the main gear just have to fab up my own cabane V which should be pretty easy. good luck with your new bird
-Robert-
-
Good looking paint job - I really wanted to say that some big black stripes/shapes would really set it off - but didn't want to be critical sounding.
EDMO
Ed, I wouldn't worry to much about being to critical, I'm always open to ideas from others. the paint you see here is not exactly like we had it drawn up to be. I had input from others while we were painting and I'm sure glad we did, I think it looks even better than we had designed it to be.
1 person likes this -
While researching to begin wiring my Avid I found these videos from SteinAir and thought others might benefit from watching them as well. http://www.youtube.com/user/shbruch/videos sure makes some of the smaller connections seem much easier than I was expecting especially for the ray allen trim system
-Robert-
1 person likes this -
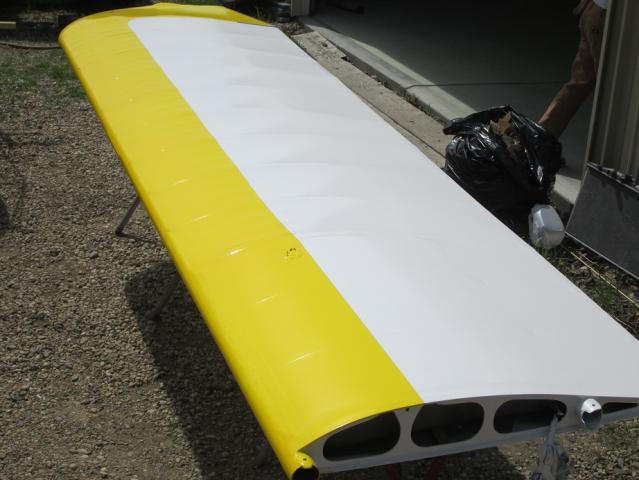
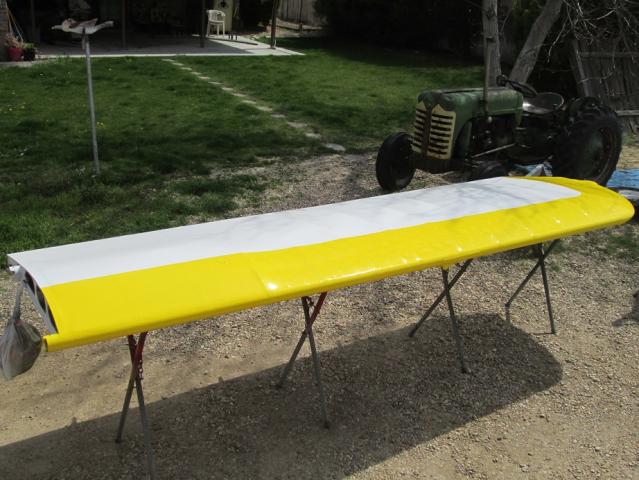
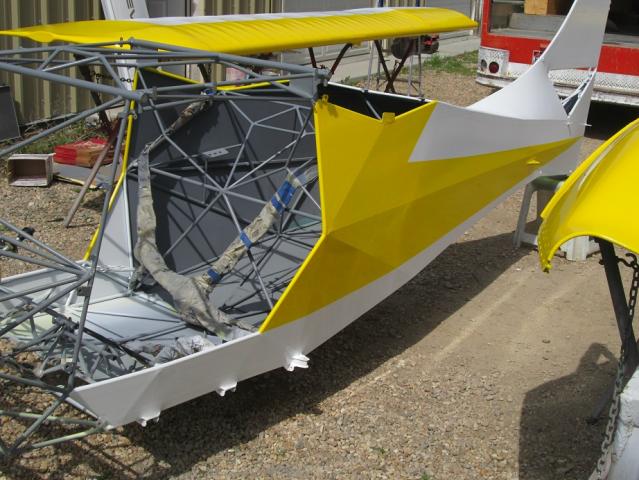
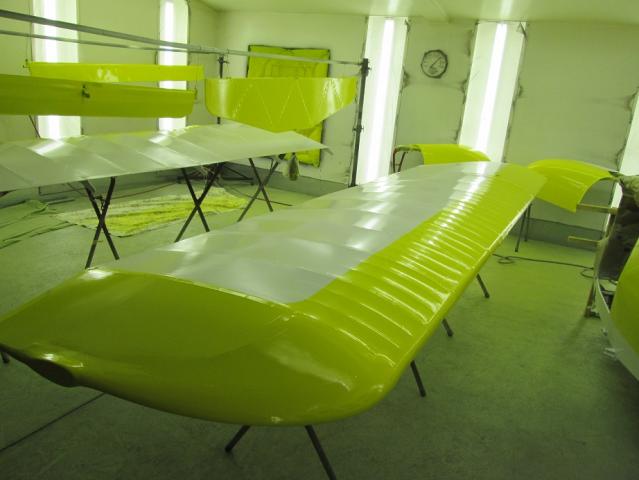
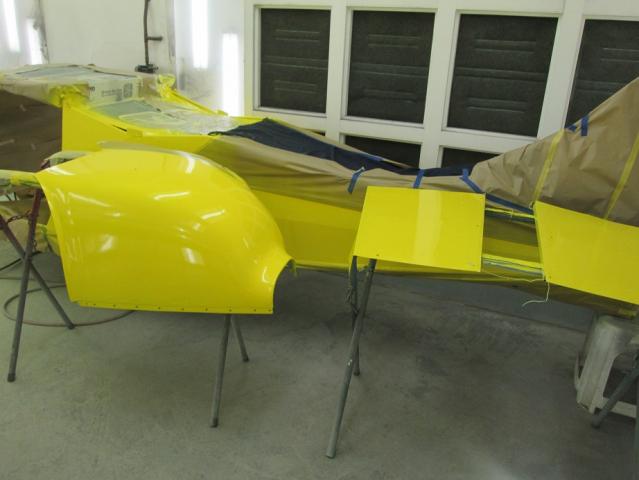
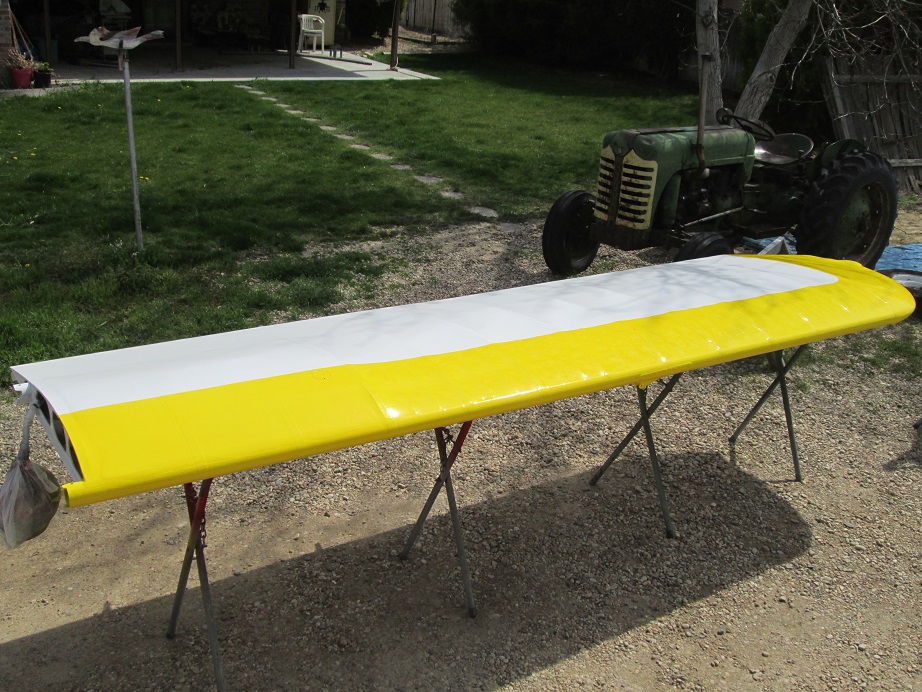
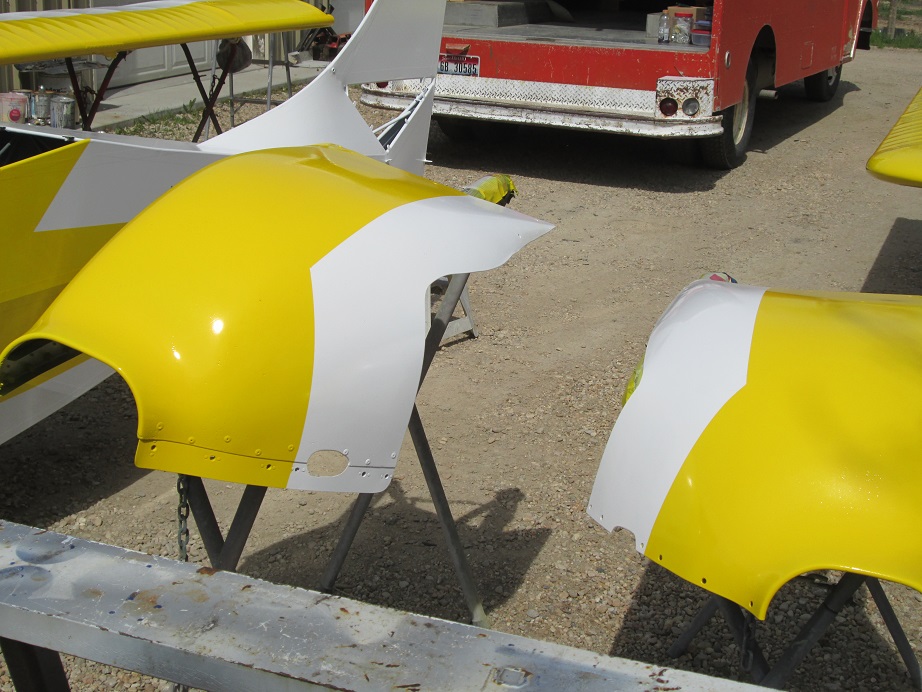
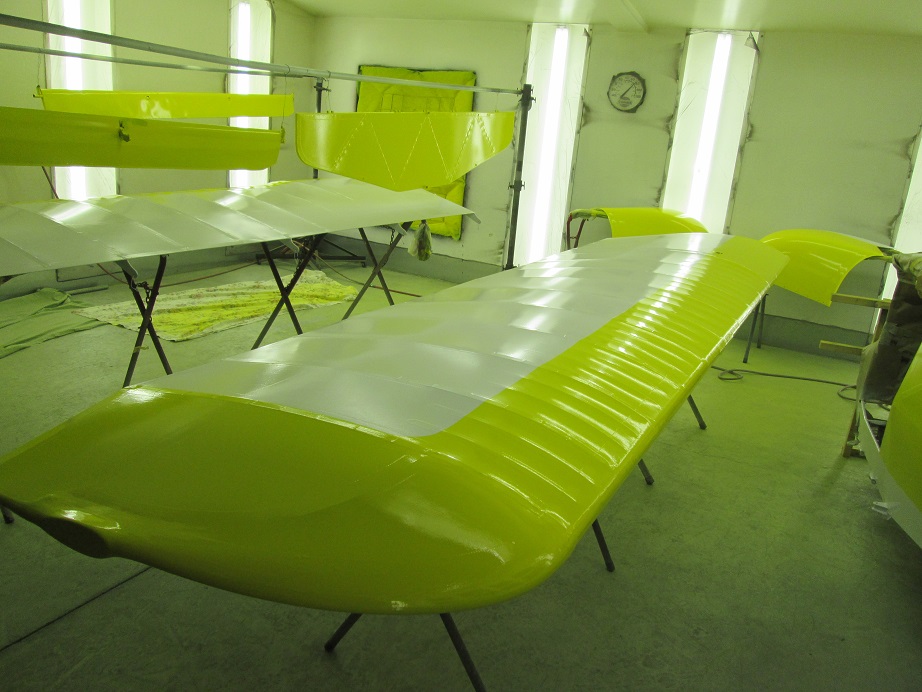
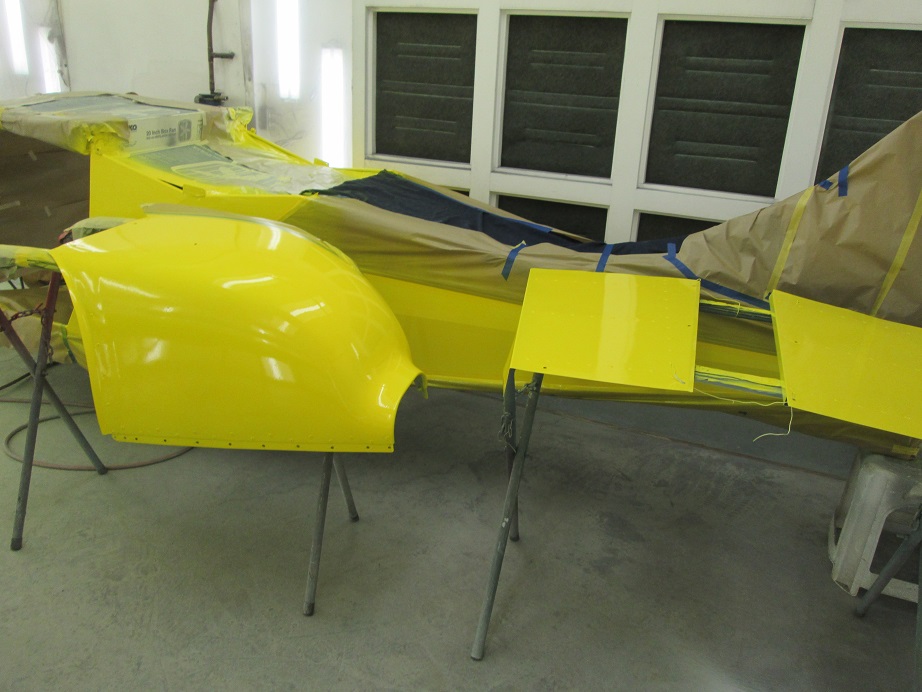
some more pics after it was coming out of the paint booth


-
thanks for the comments. We're very excited to see it coming along. the paint booth was a friend of a friends and worked out awesome. really helps to have that kind of lighting, ventilation, and temp control. Colors used were Juneau White and Sport Yellow. we are going to pin stripe everywhere the two come together probably with a nice black to make the yellow pop off the white. It really shines in the sun already.
-
I would like to dye my ugly brown sling seat black to make it match my paint job. has anyone else done this before that would like to pass along some pointers? I have the original brown C sling seat its still new unused in great shape I just don't like the color even more so now that I have the rest of the plane painted. it just doesn't go well with my chosen colors
-Robert-
-
Thanks for the input, I'm very pleased with how our paint turned out. the main things I learned for the next guy would be 1. take your time with the prep work clean everything very well and when its all cleaned wipe it down again with alcohol just for good measure. 2. wear a tyvek paint suit and respirator. 3.EkoPoly seems to spray best between 70*-75* any colder and its much easier to get a run. take your time more light coats are better than fewer heavy coats. 4. if you have a run use a wide foam brush to carefully brush it out while its still wet sooner is better than later, if you do this especially if its not on the final coat you will probably not have to do anything to fix it later it will go away with the following coats. If it is on your final wet coat just brush it away anyways and when it starts to tack up just hit that spot again with another wet coat and it will be gone.
Materials used were - lots of blue shop paper towels I mean lots. Alcohol for pre cleaning (don't even think about touching wet paint with anything other than water it will have a bad chemical reaction and you will be doing lots of sanding trust me. 2 1/2 gal of your base color more if you have a learning curve to deal with I had an extra quart and was glad I did still have a little left. 1/2 gal of your color coat will do most designs. 2 gal eko fill 1 gal eko bond 1 bottle eko clean 1-2 quarts eko prime
Thanks again for you guys' input I hope my experience can help the next guy
-Robert-
-
Nice job (and welcome)!
I like it but I'm too lazy and time challenged to make my own. I've been looking for one of the old 'large' style Skystar belly pods for my Avid+. Works with bungee gear, not aluminum spring gear. Wonder which would hold more?
Just came across this add on barnstormers and he has the cargo pod you mentioned, If your interested it may be worth a shot seeing if he is willing to sell it separate from the rest of the plane http://www.barnstormers.com/listing_images.php?id=876832&ZOOM=cc2b83d4afe4dbb7cf6dcb67fd3a84c6
-
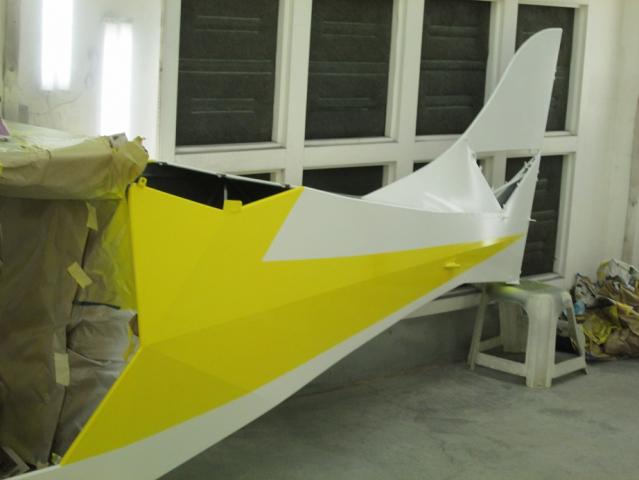
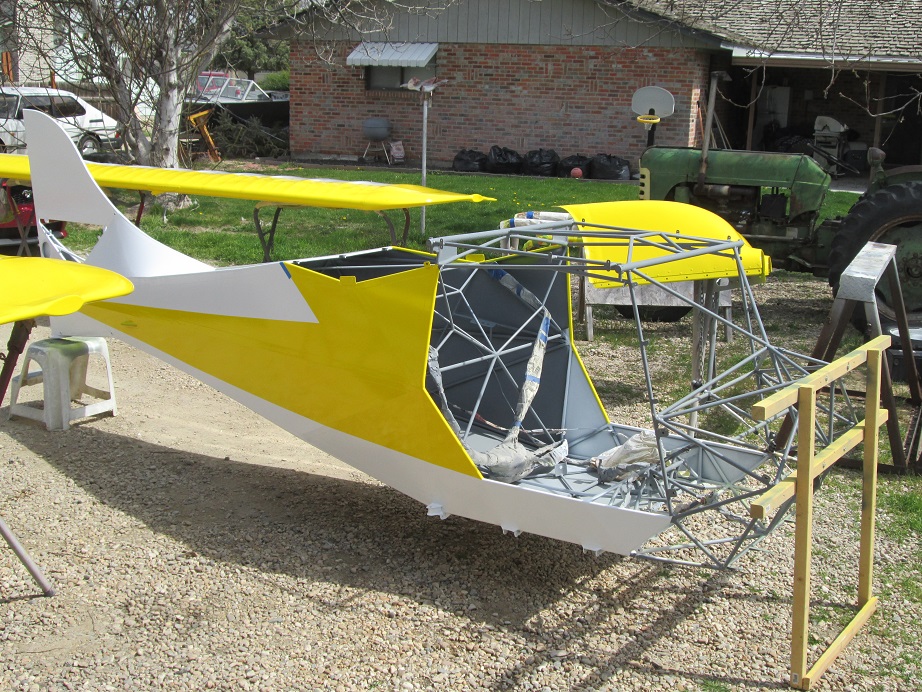
I had some Awesome help the last 3 days getting the Avid painted and am very pleased with the results. here is a few sneak pics at what we got done. I will put up some more when I have some time
-Robert-
 1 person likes this
 -
Thanks for putting this up Ed, I've been thinking about my lift struts lately as I have the original 3/4" struts and am looking for the best way to go. Been thinking about just cutting the tubes about 6-8" from the ends and sliding 7/8" - 1" tubing over the stubs and welding it all back in place. seems to be the easiest way to strengthen them. I think the ends are supposed to be strong enough. what are you guys' thoughts? If I have to build them both from scratch I'm thinking it might be good to add a rod end to both sides...

-
-
I'm using my original rudder bars so hopefully Joey can come to the rescue there but I did however locate the original pedals for the cable breaks I've been pretty busy lately but will try and get some pics for you in the next couple days and you can decide for yourself if you want to just fab some up, it would be real easy, or you can have these ones. all that said I've had the old style brakes on a skyraider and hated them and I always flew from dirt or grass strips. I think it would be in your best interest to go for the hydraulic brakes yes its not cheap but I think its worth it. just my .02 whatever you decide It would be real easy to fab up your own parts or just use these ones and you could easily use the same torque tubes later if you decide to go hydraulic, it is wise to add some small gussets to where the uprights come off of the main torque tube and also the tabs where the rudder cables attach. I'm assuming you can weld based off your name but if not just some hysol and rivets should work fine for the gussets. good luck
-Robert-
-
I'm completely through all the gray ekofill/ ekoprime coats and will be headed into a paint booth this weekend
is there anyone with experience using Stewart Systems that could give me any tips or things to look for as I paint my new bird. just trying to be ahead of the game to get the best paint job that I can. Thanks a ton I will get some pics up next week when its all done-Robert-
-
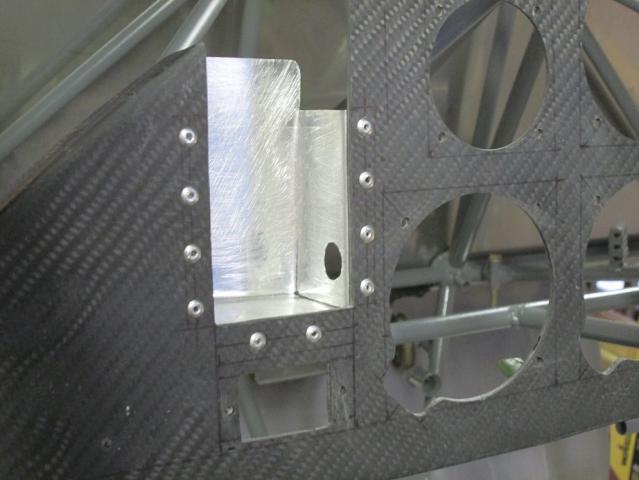
The little reinforcing tabs are already supposed to be riveted in as well as hysol so no worries there the rivet holes are a non issue. also you can just file out the hole bigger with a small round file, I used a chain saw file, to fit the bushing how/where you want it and then just hysol it in, if its a tight fit the stress is being exerted into the spar and reinforcement material anyways so the hyhsol is mainly just holding it into place when wings are folded back. make it extend up through the top if you want and add more hysol or a second steel strap. this would eliminate the need to remove the current plates.
-Robert-


best battery for NO electric start
in Avid and Kitfox parts Suppliers
Posted
Thanks for all the input I just ordered the earth x ETX 6A under 1 pound and only 135 bucks shipped to the door. hope its works out as good as it sounds. its also made here in good ol USA which is worth something to me.
-Robert-