.JPG.08f9e23d729418efb8a3e9fd398de605.JPG)
1avidflyer
Contributing Member-
Content count
4,229 -
Joined
-
Last visited
Posts posted by 1avidflyer
-
-
I did some more searching after I made the first post, and found what I was looking for in the Yahoo groups Avid Flyer group's files. Avid Spring Gear Doc. was the file. Take care, Jim Chuk
-
Hi all, within the last week or so, I read a post about someone who built their own spring gear. They made a small trailer frame, welded tabs on the frame to match the landing gear tabs on their fusaloge, and then built the landing gear mounted to the trailer tabs. After it was done, they pulled the trailer up and down a field with about 1000 lbs on the trailer to test the gear. Now I can't find the post as I'm thinking about doing the same thing. I'm on several different Kitfox/Avid sites, so it might have not been on this forum either. Does anyone remember this topic and where I can find it? The topic may have been posted a while back, I don't remember the date on it, but I just ran accross it looking at older threads. Thanks, Jim Chuk
-
I believe I heard $1250. Jim Chuk
Hey Guys,
How much does the wide gear from Airdale cost? Thanks, Bryce
-
One thing I would add, putting the protractor at the tip of the blade is probably more appropriate for the standard blades than the tapertip blades. The tapertip blades are only about 1 1/2" wide at the tip. With my taper tip, I mounted the protractor at the thickest part of the blade. Then of course you have to make sure the protractor is at the exact same distance from the tip on the other blade or blades as well. Also that the protractor is square with the blades. I still like my lazer prop setting tool better though. Take care, Jim Chuk
-
Looks like fun Joey, I'm going to a ski flyin on a lake about 45 miles away on Saturday. Don't think the ice will be melting though. It was about -30F last night but it's supposed to warm up to a balmy +10 F Saturday. My heater works, but isn't all it could be at 0. I've been on straight skis for the last month. Love the winter flying up here in northern Mn. Take care, Jim Chuk
-
I'm always reluctant to drill holes in structural parts as well. I can't argue with your point about weaking the spar when the holes are drilled in the bottom. Weather it's enough to hurt, I don't know, but it's another reason I'm liking the idea of a foam block glued on the front of the spar and then shaped to the correct contour. If a guy wanted to, I'm sure one could set up a jig and hotwire pieces of foam to the exact shape you want, maybe 2' long pieces or something like that. More I think about this, the better I like it. I know there is fiberglass resin that wouldn't melt the foam also. T C Jim Chuk
Jim,
The only problem I see with this drawing is the rivets on the very center of the bottom of the spar - There were warnings about not putting any holes/rivets in the top center and bottom center of round spars because this is where the most stress/strength/resistance to bending is. And, on the spars with the web in the center, Kitfox says NEVER drill into the web.
Offsetting the rivets from center would be better structurally, IMO.
How about wrapping the LE skin farther underneath and riveting/gluing it to the capstrips?
ED in MO
-
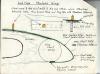
I am going to be rebuilding my first MK IV soon (hopefully) and I'm thinking I will add this extention also. I already have the aluminum on the top of the wing where the false ribs are, so the aluminum wont have to be as wide as this drawing shows. Being as how most Avids are nose heavy, and I'll have a Jabiru on the nose, I think it will help the CG just a bit as well. It does add a bit of wing area too (about 3 square feet) and I think that can't hurt either. An idea I'm kicking around would be to build the leading edge with foam that is glued to the front spar and then sanded to the profile you want. Once it's shaped then lay fiberglass over the foam to give it some extra strength. If regular building foam is used, the resin in the fiberglass will have to be a kind that wont disolve the foam. Also it would need to be sealed from covering chemicals that would disolve the foam also. Take care, Jim Chuk
Jim,
This is how my plane was done. It seems to work well and it was taken a whack from a few branches and survived! :lol:/>
:BC:/>
-
Not sure, but I just looked at Leading Edge's price from about 5 years ago, and the set was $520. OUCH! I think when people say make an offer, they maybe still kindof have an idea what they might want. Maybe the guy in New Zealand will come up with a price himself if pressed on the issue.
 The other thing you could do is run a wanted add on Barnstormers. A call to Steve Beaty at Airscrew Performance might get you a set also, but when I talked to him a few years ago about this, he said the 2.62s were harder to find than the 3-1 sets. Take care, Jim Chuk
Thanks Jim! What do you think would be a fair price for the gears? Bryce
-
I have a drawing that shows a way to make a leading edge extention I will post here. It was drawn by Lee Dubay, who worked with Avid early on as a dealer. He did come up with a few nice ideas relating to the Avids. Take care, Jim Chuk
I had them on my KF2 wings - dont see much difference except you wont dent them if you bump something with the leading edge - I just pulled a set off of my project to extend the LE 4 inches for the Soob engine and nose gear weights added, and wont need them with the 1 1/4 new LE tube. They come in about a foot of extra length, and you can extend them onto and blend the ends with 9460 for the tips, or just blend them without adding them to the tips - your call on this. If you have removeable tips, just put a split line at the end of wing, or blend there.
They really smooth up the LE. Dont know what they cost now - but were worth the price when I bought mine, IMO.
ED in MO
-
Bryce, I was just looking on Barnstormers, and saw a new set of 2.62 gears for sale. He says make an offer. Only problem is they are in New Zealand.... They probably weigh less than 2 lbs, so shipping shouldn't be to bad. Also, there was a new E box with 2.62 gears in it for $1500. A bit steep just to do some experimenting, but then who ever said anything about aviation was cheap? Take care, Jim Chuk
-
According to my racing source, and I have no other info - The Motorcycle oil I listed above is the ONLY ONE with Zinc in it now. He says MM oil burns with the gas, so doesnt lube the exhaust valves and exhaust like the "non-burnable" synthetic 2-cycle oil????/>/>?
I'm just an old machinist - Love the smell of hot black sulpher cutting oil. :lol:/>
ED in MO
In reguard to the Marvel Mystery Oil, if you wonder what it contains, this may tell you. Google MMO NTSB and then look at the first listing. According to the NTSB accident report, MMO is 3/4 mineral oil, stoddards solvent, and 1 percent lard. Not sure that it's true, but it is kind of interesting..... Take care, Jim Chuk
-
I am still a little confused about what to expect when I finally get the DAR to do my inspection. It has been said several times on this forum that "experimental" means I can do what I want to. What is the DAR going to look for then other than the correct markings, ie 2" experimental, passenger notice, 3" n numbers, data plate on tail, etc.
I would ask the DAR. One may be a real stickler on things, and another one may say to himself: You have 40 hrs. of phase 1 time before you risk anyone else. If you're willing to risk your own life, who am I to argue. No doubt, those are the extremes, especially the last one, I'm sure they have guidelines they follow, but I recently heard of a DAR that wouldn't do the inspection because the plane didn't have an ELT in it. I thought that was kind of bougus as there are a number of exemptions to the requirement for an ELT and I think the phase 1 test period would fit into one of those exemptions. It would be good to have a working relationship with the DAR well before the plane is ready for inspection. Take care, Jim Chuk
-
Do you know if wing inspection holes are required on an AVID Flyer to get the certificate of airworthiness? :dunno:/>
On four different Avids I've owned, the reinforcement rings were installed, but the center fabric wasn't cut out. I doubt that they are required, it's an experimental airplane, and you can kindof do whatever you want. If you ever have a mouse build a nest in the wing and you want a way to get all the seeds and stuff they carted into the wing out, the inspection holes will come in handy. Cut out the center fabric, and put an aluminum cover over it. Actually if you have a few of them and paint them with the rest of the aluminum parts, they will match if you ever have to use them. I actually put in a few extra rings so if I ever had to change the pitot hose, I could. Little bit of extra work now could save a lot later. Take care, Jim Chuk
-
Join the club... Keep trying and make sure you leave a voice mail. He's extremely busy and if you don't leave a message he for sure won't get in touch with you.
I've made four calls to him today as well. Land line and cell. My fusaloge is stripped down and ready to go into the jig and have things straightened out. Take care, Jim Chuk
-
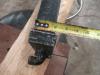
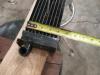
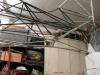
You will probably get better answers - I dont think my belly rad for the 532 would hold that much - but havent measured - wonder what manuals say? Guessing that this rad is about 6 inches high by 24+? inches wide. My Soob rad (think it is a VW rabbit rad) is 2 times as high and little wider.
Are you South of Nashville? Where? I have a cousin at Lawrence County who was making a living as A&P and covering experimentals. Need to fly over there someday.
Ed in MO
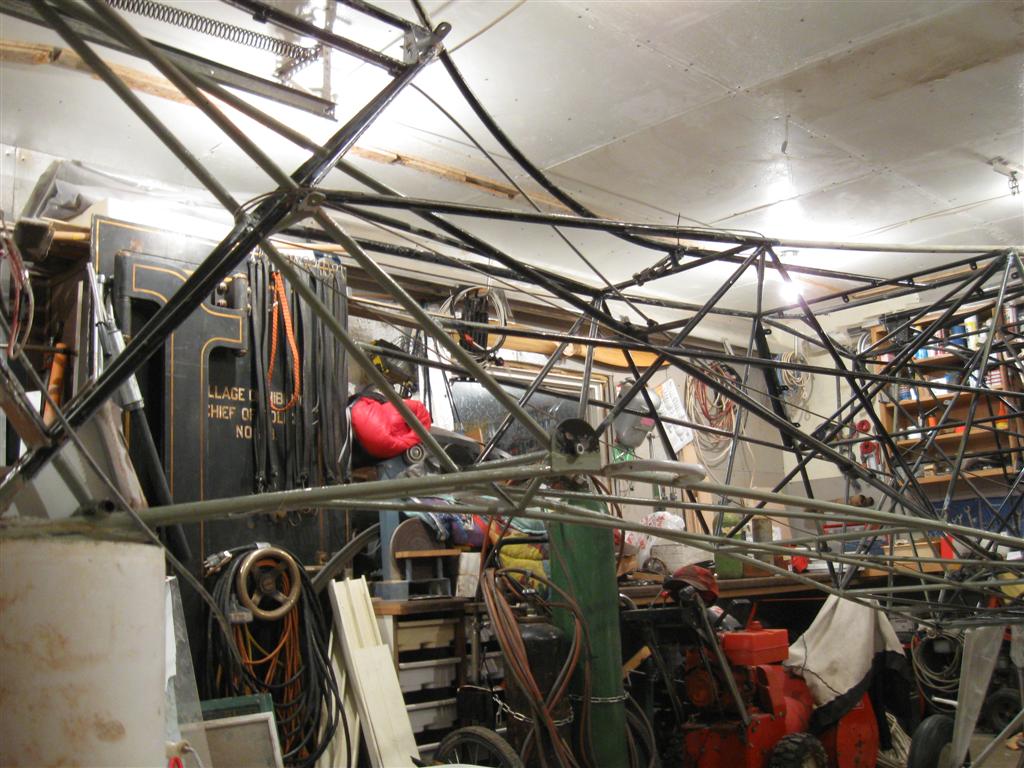
Just ran out to the garage and shot these pics of a radiator that came off of a Kitfox 3/ 582 project I once had. I'm sure it was supplied by Kitfox. My latest MK IV has foam around the standard Avid MK IV radiatiors that seals them to the cowl so as to force all the air though the radiators, and it seems to cool better than some other Avids I've seen. Take care, Jim Chuk

-
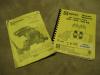
I just dug up 3 different Rotax 582 and 532 owner's manuals, and also my 170 page overhaul manual for 462,532,582 rotax engines. They all say that the carb or carburators should be set at a right angle to the crankshaft. That ofcourse would make them level if the engine was level. If you have either of these books, look at page 13 of the owner's manual, or page 155 of the overhaul manual. Is is possible that that is what the guy at Bing meant? Did you get the guy's name that you talked to? One time when I called them I got a young guy that didn't know what he was talking about, wasn't really the tech guy, I think he mostly took orders. The guy to talk to there is named Charlie. He knows those carbs inside and out. Take care, Jim Chuk
PS after I posted this message, I looked at it to see it came out okey, and noticed the pictures on the manuals. Carbs are dead level with the engine there as well....
I dont know. I would call bing and ask them the same question I did. I am not sure I am satisfied with their answer. You should just for giggles loosen one of your carb boots and tilt the carb at like 10 degrees tighten it back up and then start your engine with fuel on and see what it does.
Even in the AVID manual it says to set the carb at level flight.
-
I started out flying in ultralights with 2 stroke engines and that high rpm was "normal". First 2 Avids also were 2 strokes, then I put a Jabiru enigne in the first MK IV and cruising at 26-2800 seemed just fine and not taxing the engine at all. That plane is still waiting on the repairs from the emergency landing I had to make with it. The MK IV I bought last sping has a 582 in it, and it did feel kind of funny running it up to the high 2 stroke RPMs, but you get used to it after a while. I still like to cruise in the low 5000s for RPM though. When I think that the RPM is to high, I think about the RPM these nearly same engines run in snowmobiles and then it doesn't seem so bad. I think it's all what you get used to. Some guys cruise at 6000 RPM and think nothing of it. Take care, Jim Chuk
Started up my rotax 582. 5500 rpm is spinning very fast. Kind of scary. :(/> Hope I get used to that kind of rpm. Waiting for something to fly apart.
Do any of the other 582 owners have the same feeling?
-
I believe redline is 180 F. You should get a lot more air flow through the radiators in the air. What temperature is your thermostat rated to open at? Lots of planes don't cool well on the ground, so maybe you will be fine with those numbers.
My idle temp is around 155 - 165. My temp at 5000 rpm is 170 - 172 on the ground. Does this sound okay.
Thanks
-
Just to clarify things a bit in case anyone is confused by how I worded things. When I said check the float level, I probably should have said check the float bowl fuel level. Just dug out my Proper Care and Feeding of the Rotax Motor manual, and it says that the fuel level should be 1/2" to 9/16" below the top of the float bowl. Just thinking further on it, even if the float bowl fuel level was to high, the float setting might not be the problem. You said the problem started when you changed the float needle. If the needle was causing a problem, (not sealing properly) as the float bowl fuel level gets higher it presses harder on the float needle. If the extra pressure seals off the needle, fuel stops flowing, but now the fuel level is to high. Jim
I would check what the float level is first of all, if it's at the right point, the fuel shouldn't spill out of the carb if it's a bit out of level. If the level was to high, then it probably would. Don't be afraid to call Bing as well. Just reread your post again, and you say the problem started when you replaced the needle. Try putting the old needle back and see if the problem goes away. (but check the float level while you're at it) Take care, Jim Chuk
-
I would check what the float level is first of all, if it's at the right point, the fuel shouldn't spill out of the carb if it's a bit out of level. If the level was to high, then it probably would. Don't be afraid to call Bing as well. Just reread your post again, and you say the problem started when you replaced the needle. Try putting the old needle back and see if the problem goes away. (but check the float level while you're at it) Take care, Jim Chuk
I am not sure what is going on with my carbs. Again, according to Steve a Airscrew Performance, if the carbs are not level the floats cannot operate correctly, but that doesnt make sense to me when in the air making turns, climbs and dives. My carbs were spotless as well (brand new) but had sit for a long time so I ordered a rebuild kit from Aircraft Spruce and replaced all that I could. I even tested the carbs by blowing into the inlet and then lifting the two arms on the needle. No air would pass through. It was not until I leveled the carbs with the ground and not the engine that they quit leaking fuel. When the tail dragger is on its rear wheel the engine is at an angle. If the carbs are leveled with the engine they are angled and this is what Steve said was causing them to leak.
I hope some of you will continue to research this. I definately dont want to catch on fire in the air. I never had this problem until I replaced the needle operated by the float arm. I am going to dink with the tab so that the float closes the needle sooner. Let me know if you think that is a bad idea.
Thanks
-
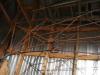
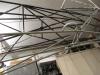
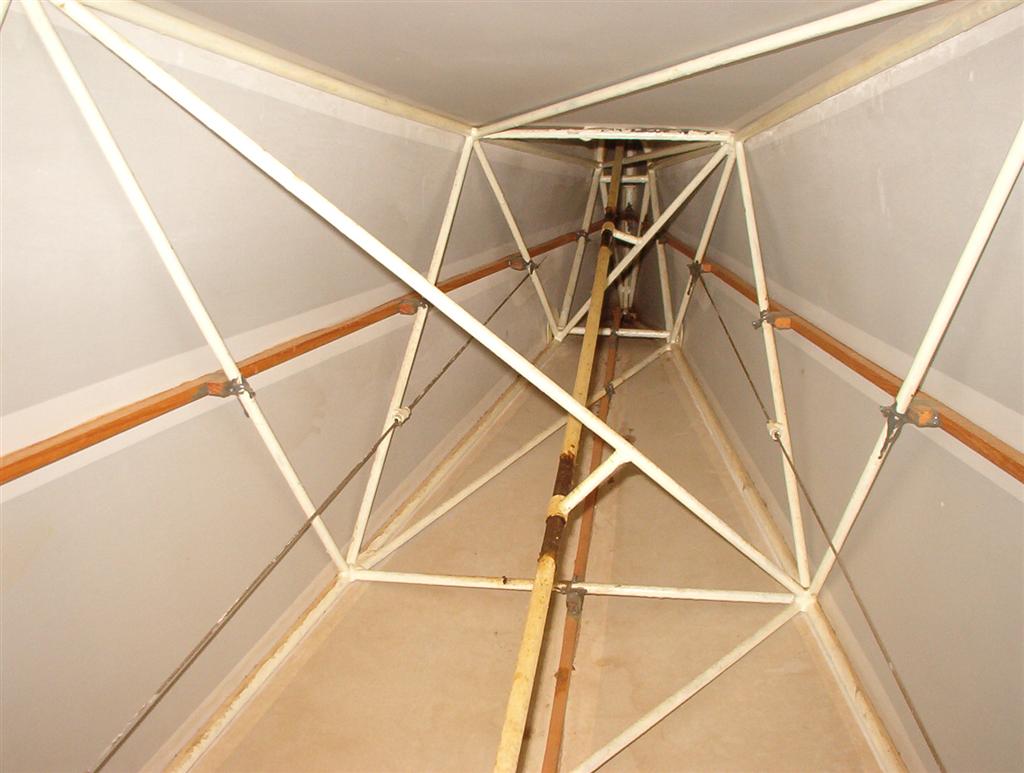
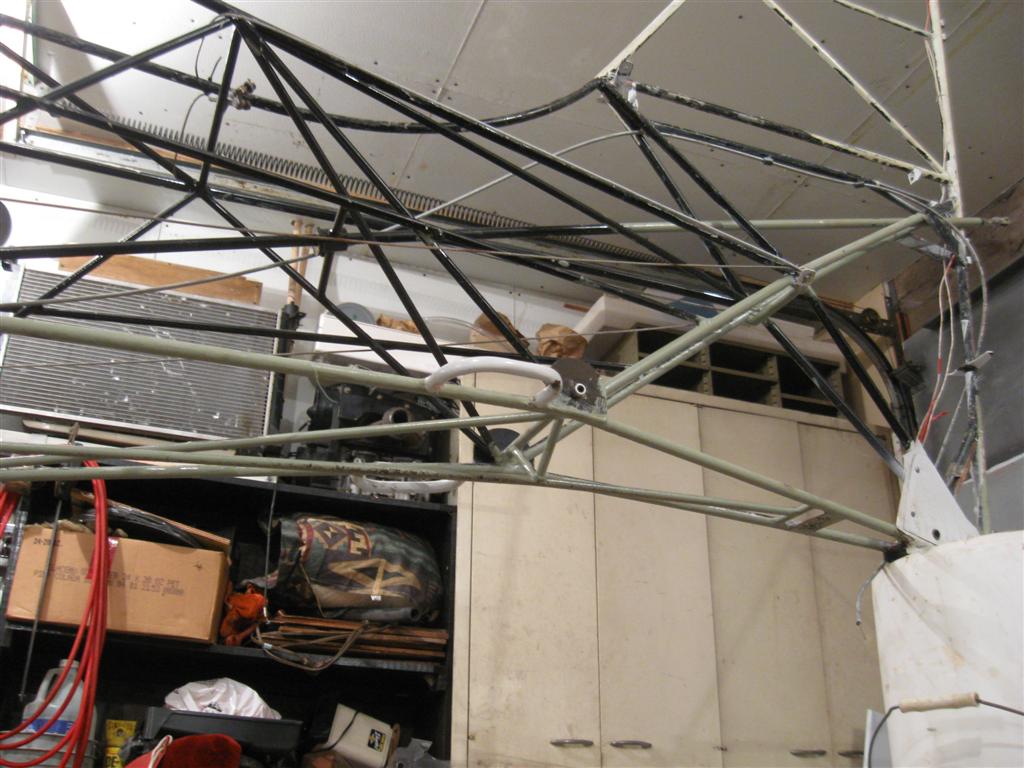
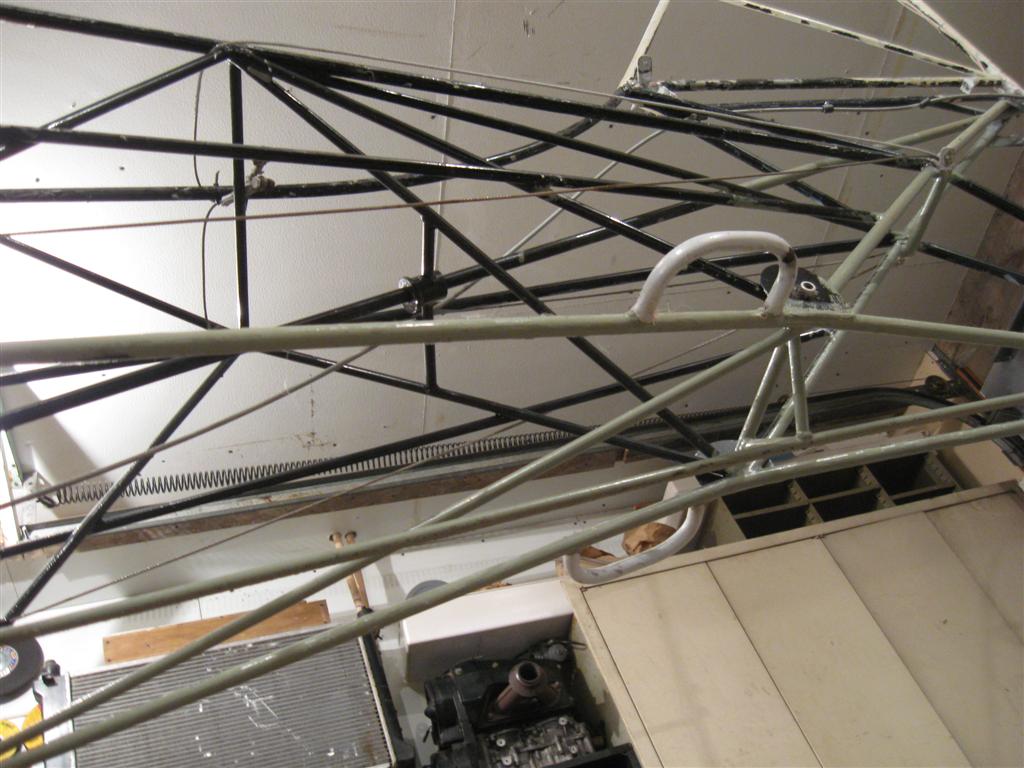
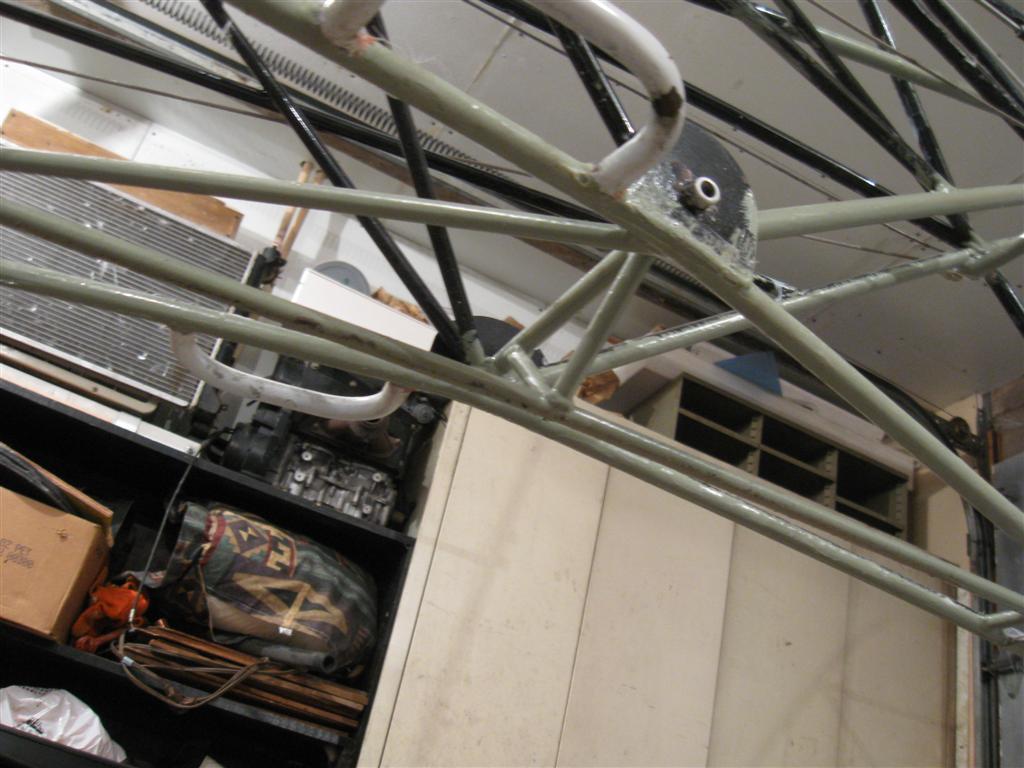
I did a bit of digging through some of my pics and also went out and took a few pics of a C model and my MK IV fusaloge that I just took the covering off of. The MK IV has the metal stringer as was mentioned. The C model does not have it. Then I found a pic I had of my B model that shows down inside the fusaloge and it has a wooden stringer. I'll post the pics of all three. No doubt the stringer on the MK IV adds some strength. Question is: do you need it? As the models advanced, of course they got heavier so perhaps that is why the steel stringer was added to the MK IV. I don't know that answer myself. Would be nice if Steve Winder was on this site and could answer that question. He was around the factory then and would know. We can all do as we like, but if I feel the need to put a door in the back, it would be on the side. If you are mounting a battery there, I would think it would be a lot harder to install if you did it from the bottom. Anyway, here are the pics, hope they are of some help. The C model fusaloge is the brown one, the MK IV is black with some green on the bottom tubes. I'm going to sandblast it clean after I get the tubes repaired. In the pic of the Yellow B, you can see the bottom of the plane under the handle is flat. I think the C would have been the same way with a wood stringer. Neither is like the MK IV at that point. Take care, Jim Chuk
I think the lowest piece of tubing helps strengthen the tail cone assembly in TD configuration. Tail wheel loading will put it into tension where it will help strengthen the entire structure. I wouldn't mess with it if it were me, but I'm not a mechanical engineer either...
Chris


-
I think Steve @ airscrew knows a lot about these Rotax engines, but I've never heard about setting the carbs out of level. I run a straight edge accross the tops of the carbs so they are straight with each other. That would of course also make them level if the engine was level. I've never had fuel comming out of the vent lines with the carbs set like I do it. I would recomend checking what the float level is. If I remember right, the fuel level should be 1/2" below the top of the float bowl if you take the bowl off without spilling any gas. I'm sure that's the level on the type 94 I had in my Jabiru, but I also think it is the same on the type 54 used on the 582. Another thing you can do is call Bing's tech assistance and talk to Charlie. He is very helpfull and happy to talk to you. # is 1-620-767-7844 Take care, Jim Chuk
If everything is stock you have something goin on there. Debris can hide very very well in a Bing 54 and it only takes a microscopic piece to plug up a jet. Pull your float bowls off and turn on your fuel and see if you can stop it by pushing up on the piece the floats move. It's possible to adjust the float bowl height but that involves tweaking the tabs and shouldn't need to be done on an all stock motor. Was it sitting with fuel in it for any period of time?
-
Being where you are at, I would suggest running the synthetic so it doesn't get to thick. I'm running Mystic synthetic 75/90 and it cranks over just fine in the cold of northern Mn. Take care, Jim Chuk
What type of oil do you suggest for the C drive on a rotax 582.
Thanks
-
If you have a clear hose going up to the bottle, you can stand the plane on it's nose and see if you get any air bubbles going up the hose to the bottle. Actually that takes two people, one to hold the tail way high in the air and one to watch for air bubbles. Take care, Jim Chuk
So I filled my rotary valve cavity today with oil. My engine is inverted and the oil resivour tank is above the engine. I removed the bleed screw and filled the tank to the line and let it drain into the rotary valve cavity. It took about 3 1/4 to 4 fillings of my little oil resivour tank to fill it until it poured out of the bleed hole. Guaranteed the rotary valve shaft with the brass gear is total submerged. One thing I am not sure about is the their may be a small amount of airspace from the top of the bleed hole to the top of the crank housing (engine upside down).
What are your thoughts.


homemade spring gear
in Avidfoxflyers General Hangar
Posted
I guess I may be using the wrong name for it, I was referring to the bush gear that everyone seems to want for their Avids and Kitfoxes these days. I did get a laugh at myself after I reread my post when I made the first reply to it. The title should have been homemade gear, not homade gear. LOL Take care, Jim Chuk