
109jb
Members-
Content count
266 -
Joined
-
Last visited
Posts posted by 109jb
-
-
Vey nice. Where did you source the 12 ply plywood?
-
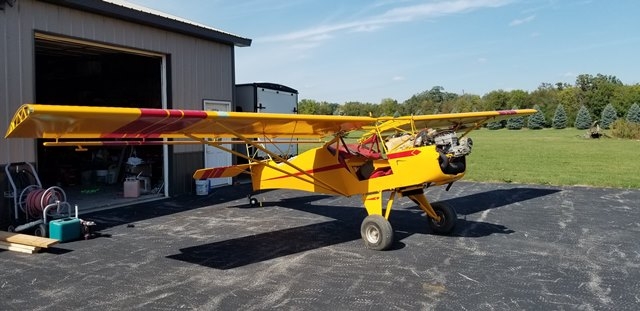
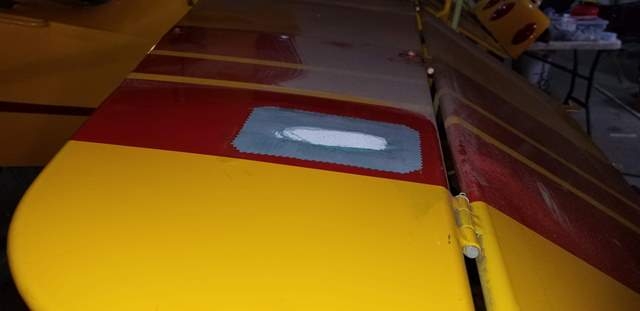
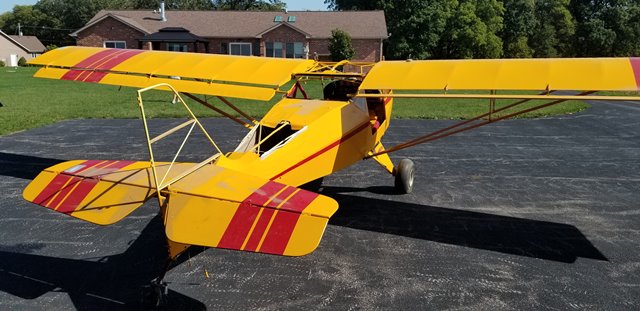
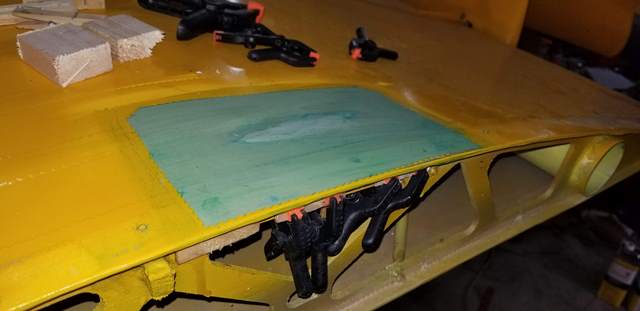
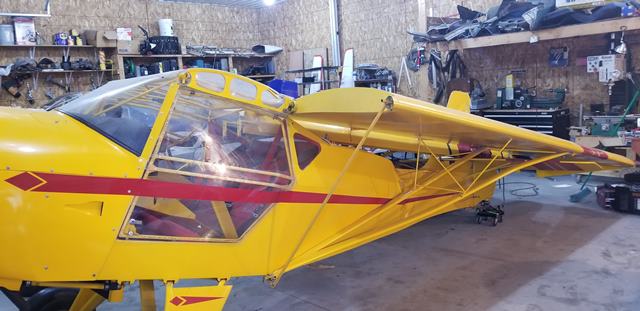
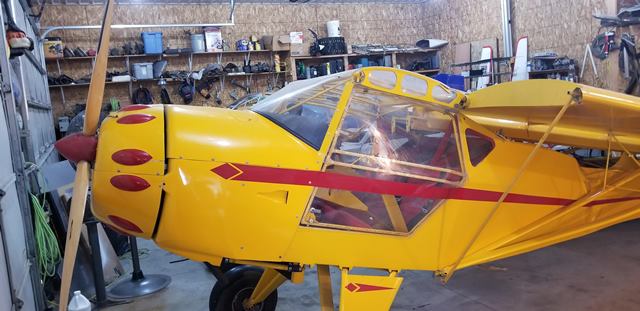
work is progressing one this one. Got the wing rib fixed and patched the holes in the stab and wing fabric. Just needs UV block and top coats on those. Still waiting for the tubing to repair the aft fuselage. There are a few pictures of the airplane outside with the wings in position just before a buddy helped me remove them to work more on the fuselage.


-
I found this somewhere on the internet and saved it as a pdf. Best writeup I have seen on the subject
2 people like this -
I've had the airplane for 2 days and here is what i have accomplished.
- Replaced tail spring with one I had
- started straightening of the aft fuselage
- removed windshield
- removed rudder
- removed fin fabric and straightened fin
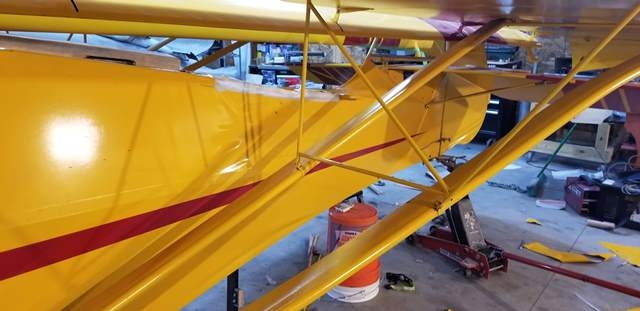
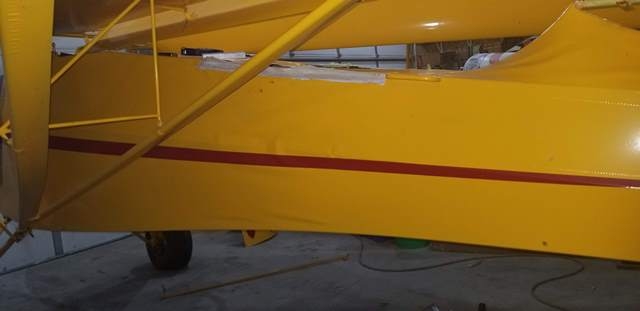
The fuselage straightening is being done like my first Kitfox that incurred a bent fuselage from trailering damage. I removed the top fabric and corner tapes from the bay that was bent. I then used my crude tool for straightening the tubes to slowly pull them as straight as possible. The diagonals straightened just fine, but the longerons are kinked a bit, so will need to be replaced in that bay. These pictures were before some of the tubes had been finish straightened, but even so the fuselage looks a lot better than it did before.
I'm now waiting for my tubing order which includes tubing to enlarge the fin and rudder to later kitfox 4 size. Hope to have fabric on the aft fuselage by next weeken.

 2 people like this
 -
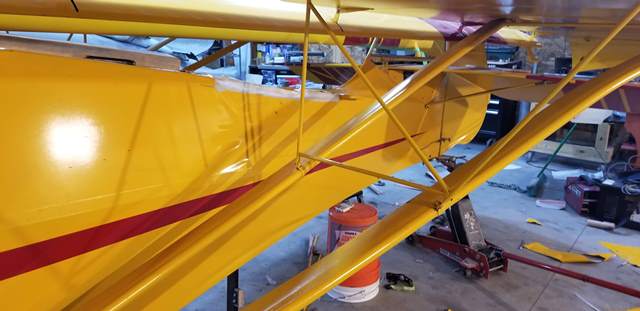
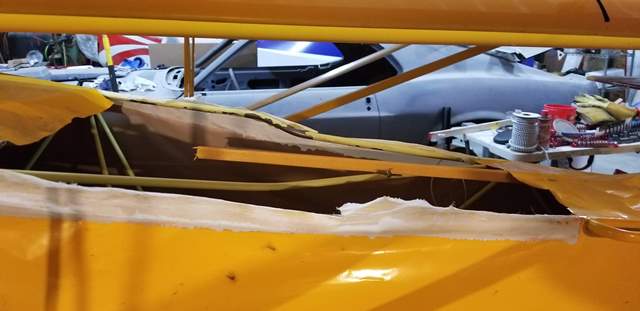
I've known about a farmer owned Kitfox near me but didn't know the man who owned it. Well, a few weeks ago we had a bad storm roll through our area and the shed he kept his Kitfox in partially collapsed onto the airplane. A friend of mine who was with a group that helped him lift the barn roof up told me about it. Last week I went to talk the man and found out the airplane had not flown for several years. He had stopped flying it when his wife got sick. He didn't have interest in fixing it himself so after discussing we made a deal and I brought it home. The airplane was on a trailer with the wings folded when the shed collapsed
I picked up the airplane 2 days ago. As you can see from the pictures, the airplane took a pretty big hit but it could have been worse. here is my assessment of the airplane and damage.
- Aft fuselage bent much like typical trailering damage
- Tail spring destroyed
- Rudder destroyed
- Fin bent
- Windshield broken
- A few slightly bent tubes in the skylight area
- Flaperons have some damage
- Left forward strut tube bent
- left fiberglass wingtip has hole from trailer jack.
- Left tip rib cracked
- Both flaperons damaged (maybe repairable)
- Various holes in fabric to repair
- Upper forward cowl damaged (repairable)
- One prop blade chipped
- Go through engine and systems
That list probably sounds worse than it is. The airplane isn't really in all that bad shape. The farmer was a darn good craftsman and it was a very nice build. A month ago this was surely a beautiful airplane. It is a Kitfox 3 fuselage with Kitfox 4 wings and mixer assembly, so it is essentially a Kifox 4 1050 in my book. It has a 582 gray head so I will be doing a pressure test of the seals before running it. This airplane should be a pretty quick fix, so my other Kitfox project will be on hold until this one is flying.

 1 person likes this
 -
Checked a few days ago on Ebay and the 21 inch Nanco N800 tires were up. Ordered a pair and they came today in case someone else was looking for them.
1 person likes this -
actually never got that rudder modified. I wound up getting a Kitfox IV Speedster project and sold the Kitfox IV 1050.
-
it is in the manual to put them in top and bottom.
-
Already have what I need and I was looking for MC-3 not MC-4.
-
If any of you guys that switched are willing to part with your Nanco N800's let me know. I'd be interested in buying them. They aren't available anywhere I can find.
I guess I'd sell ya mine. Where are ya located?
I'm in Morris, IL 60450
-
If any of you guys that switched are willing to part with your Nanco N800's let me know. I'd be interested in buying them. They aren't available anywhere I can find.
-
Will do. Thanks for the tip

-
One of my ignition coils on my 80hp 912UL has the white primary coil wire broken off flush with the case with no strands sticking out to solder to. So, I need one ignition coil. If you have one you are willing to sell please let me know how much you would want for it before I wind up paying big bucks for one from LEAF.
Thanks,
John Brannen
-
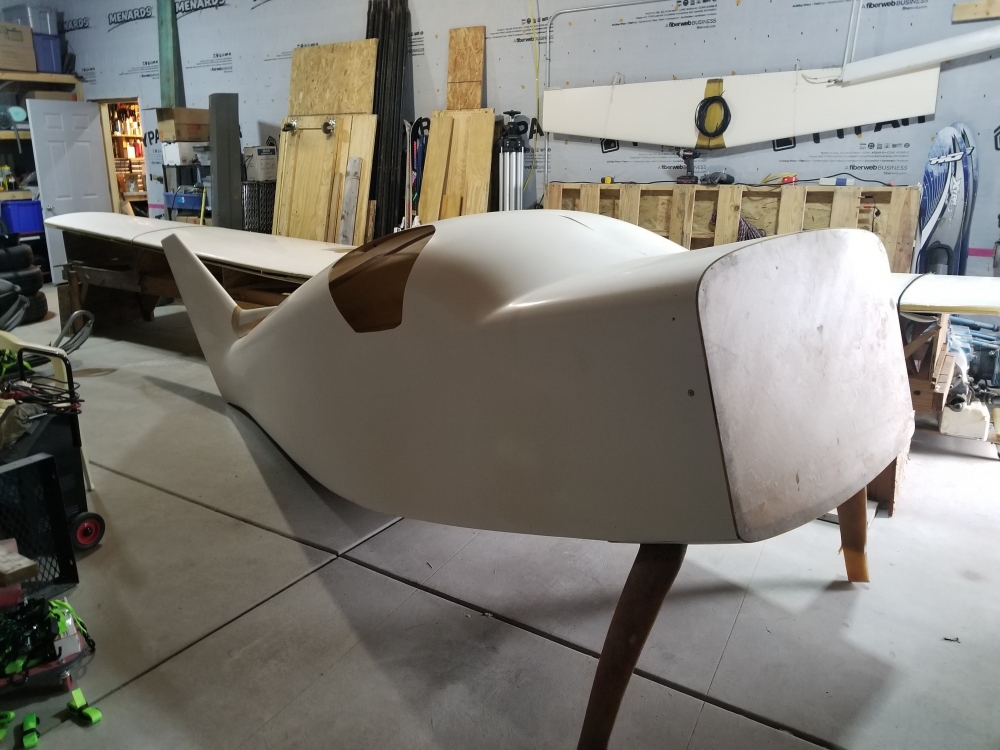
So I should probably stay off Barnstormers. Found a Glasair project with engine for a good price and got the boss's blessing to pursue it since this is an airplane I have wanted since it first came out. It was 1000 miles away from me so I jumped on a commercial flight, rented a 26 foot Penske truck and brought it hoe. Got it unloaded today. Came with an O-320-E2D. No logs or history, so will need at least a teardown and inspection but lots of work to do on the airframe anyway.

 3 people like this
 -
Are you willing to pull the cylinders and put the casewith just rods sticking out in the passenger seat? Then the cylinders and pistons can go in a box in the baggage compartment.
-
Hi guys. Working on my Kitfox 4 project with the 80 hp 912 UL and got to thinking. The airplane has an oil cooler installed, but looking at the Kitfox install manual, it has you just run 2 hoses. One from the tank pickup to the pump, and one from the bottom of the engine to the tank inlet. No oil cooler. I have also read about having to put on oil thermostats, tape over the cooler in winter, etc. I have also read about one at least that didn't have an oil cooler on a 912 UL. If the temps don't climb too high without an oil cooler in the summertime, I would rather not even put it on for simplicity, and not having to mess with anything for winter flying. Just wondering about those that have experience with running a 912 without an oil cooler. How do the oil temps behave in summer temps. does it stay below the 230 top end for the normal range?
Thanks,
-
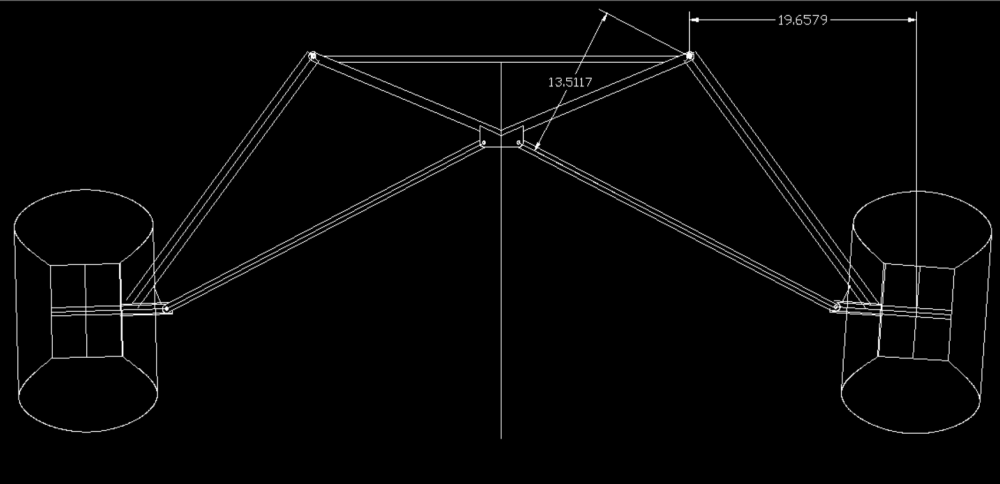
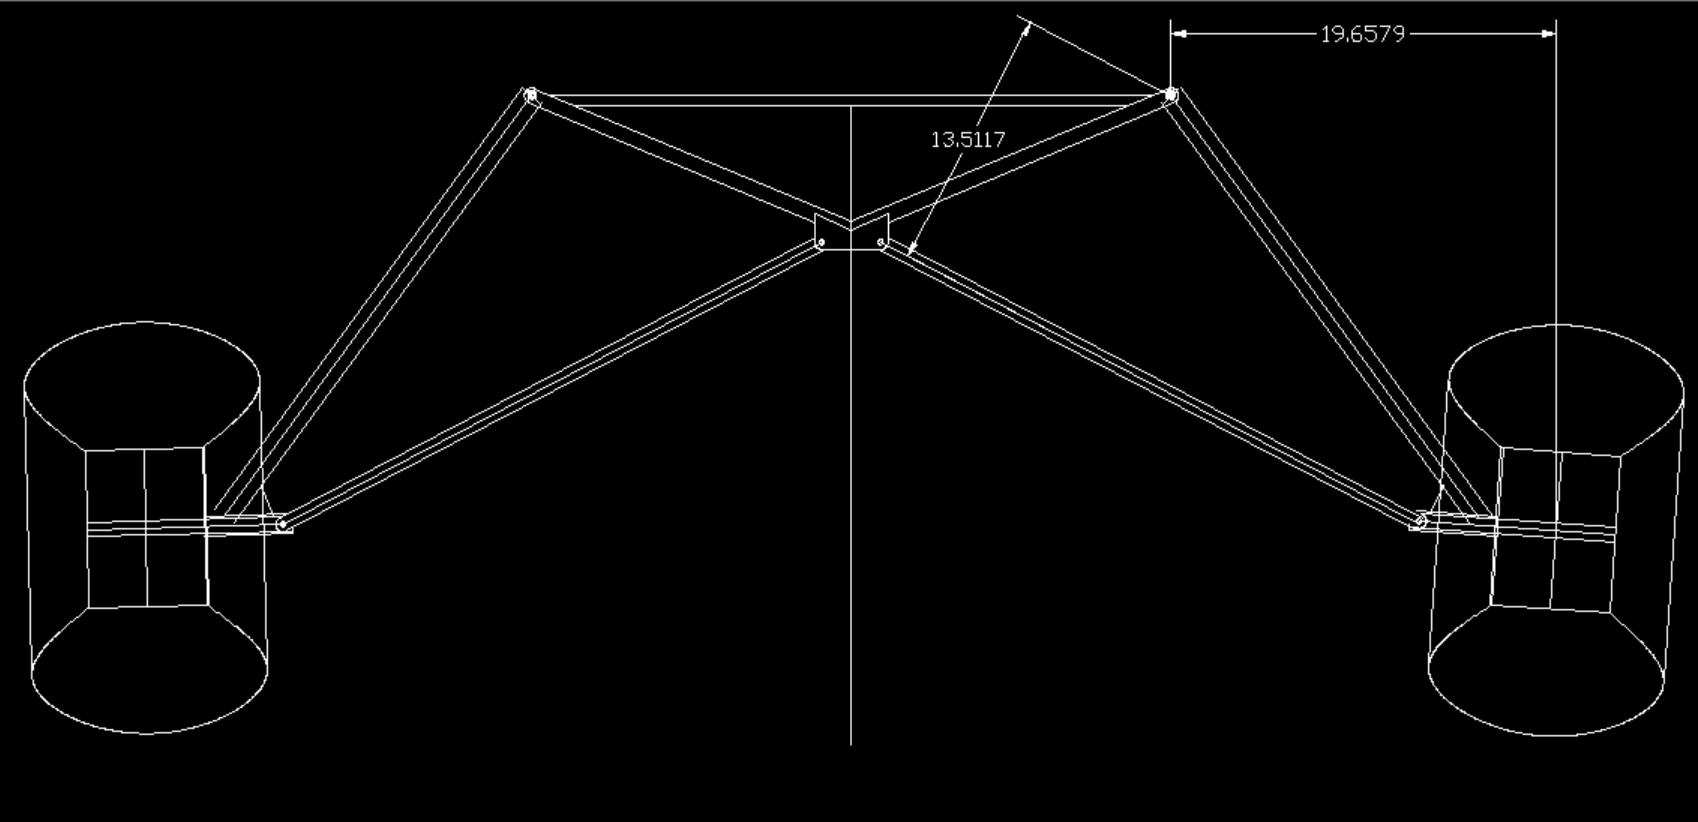
For my gear pictured below, the strut force will be given by:
(Strut tension) = (Upward load at wheel) * 19.66/13.51. Assuming a tooth jarring 3g load @ 1200 gross that is 1200 * 3 / 2 = 1800 pounds upward at the wheel, so the strut tension will be 1800 *19.66/13.51 = 2619 pounds tension in the strut
If I do like I guessed and use 5 pucks each 1.5" long for a total of 7.5" of polyurethane length.
F = E * A * (delta L) / L0 = 4400 * 2.356 * (-1) / 7.5 = 1382 pounds at 1 inch deflection
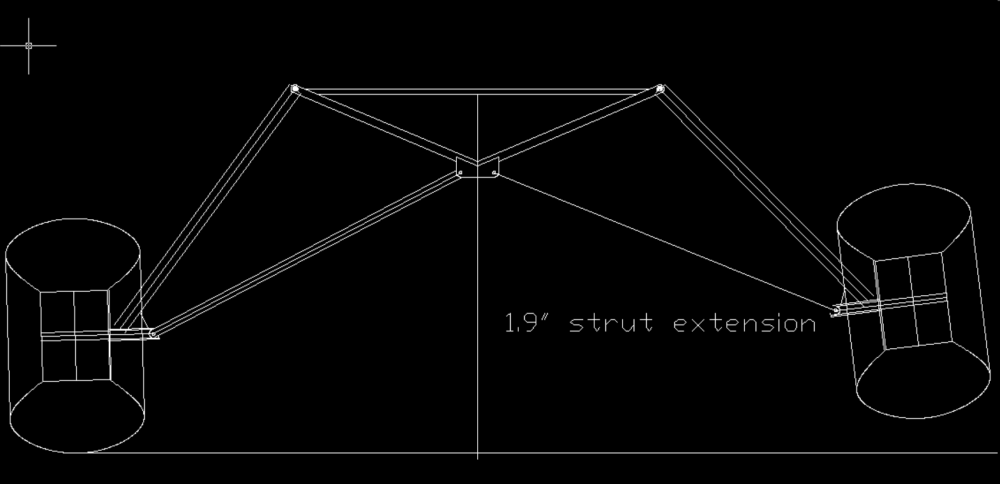
looking at the equation it will be linear, so 1382 pounds per inch deflection with a 7.5 inch starting length, so 2619 / 1382 = 1.9 inches of deflection
Looking at an additional puck for 9" total yields 1152 pounds per inch equating to 2.27 inches of deflection
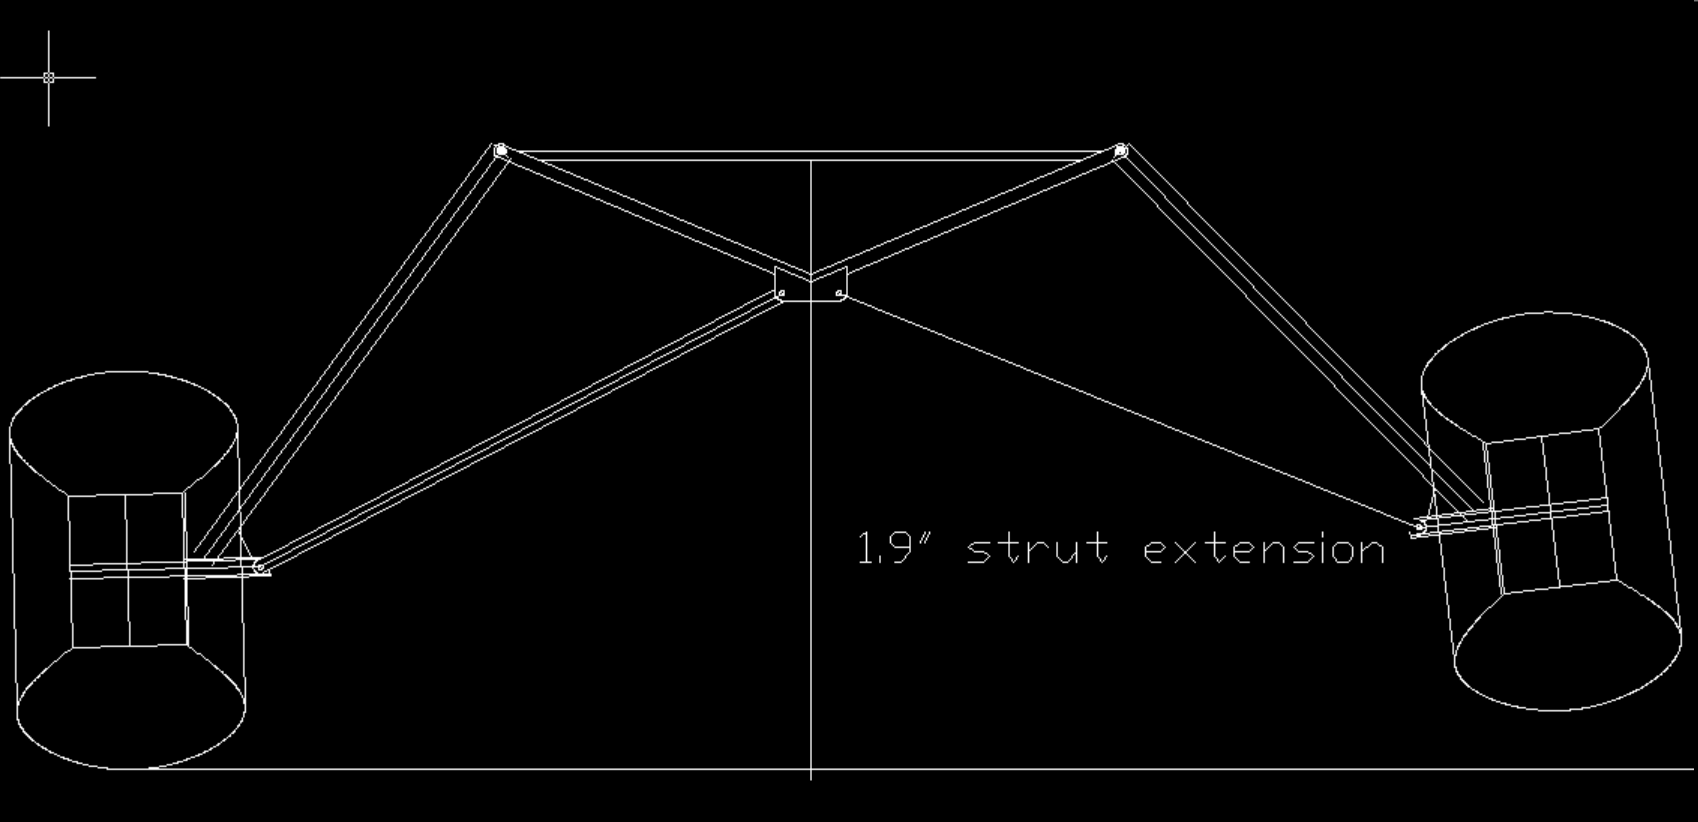
The second picture shows what my gear would do at 1.9" extension of the strut, which would be an upward travel of about 3.2 inches of the wheel, not counting any tire deflection.
Thinking I may switch to 9" of pucks so I can preload them a little. I'm thinking no sag at empty weight would be good and then once loaded will sag a little. My old Kitfox sagged a tiny bit when empty with the stock gear and stock bungees but they were old I'm sure. I would think new bungees would not sag. So at 9" of polyurethane I would give it about 0.26" preload which would support 300 pounds per side without sag, and that would give me 2 additional inches of extension before 3 g @1200.
 1 person likes this
 -
I do have a lathe but not with a 2" spindle bore. I will likely cut them a bit long and then put them in the lathe to clean them up.
1 person likes this -
Nice Bird! Which poly tube did you end up buying?
I bought the 2" OD, 1" ID, x 36" long, 90a durometer black tube from Mcmaster Carr that I had linked earlier in the thread.
edit: how did youyou cut yours? I'm debating on whether to use my bandsaw or was thinking my miter saw might work better
-
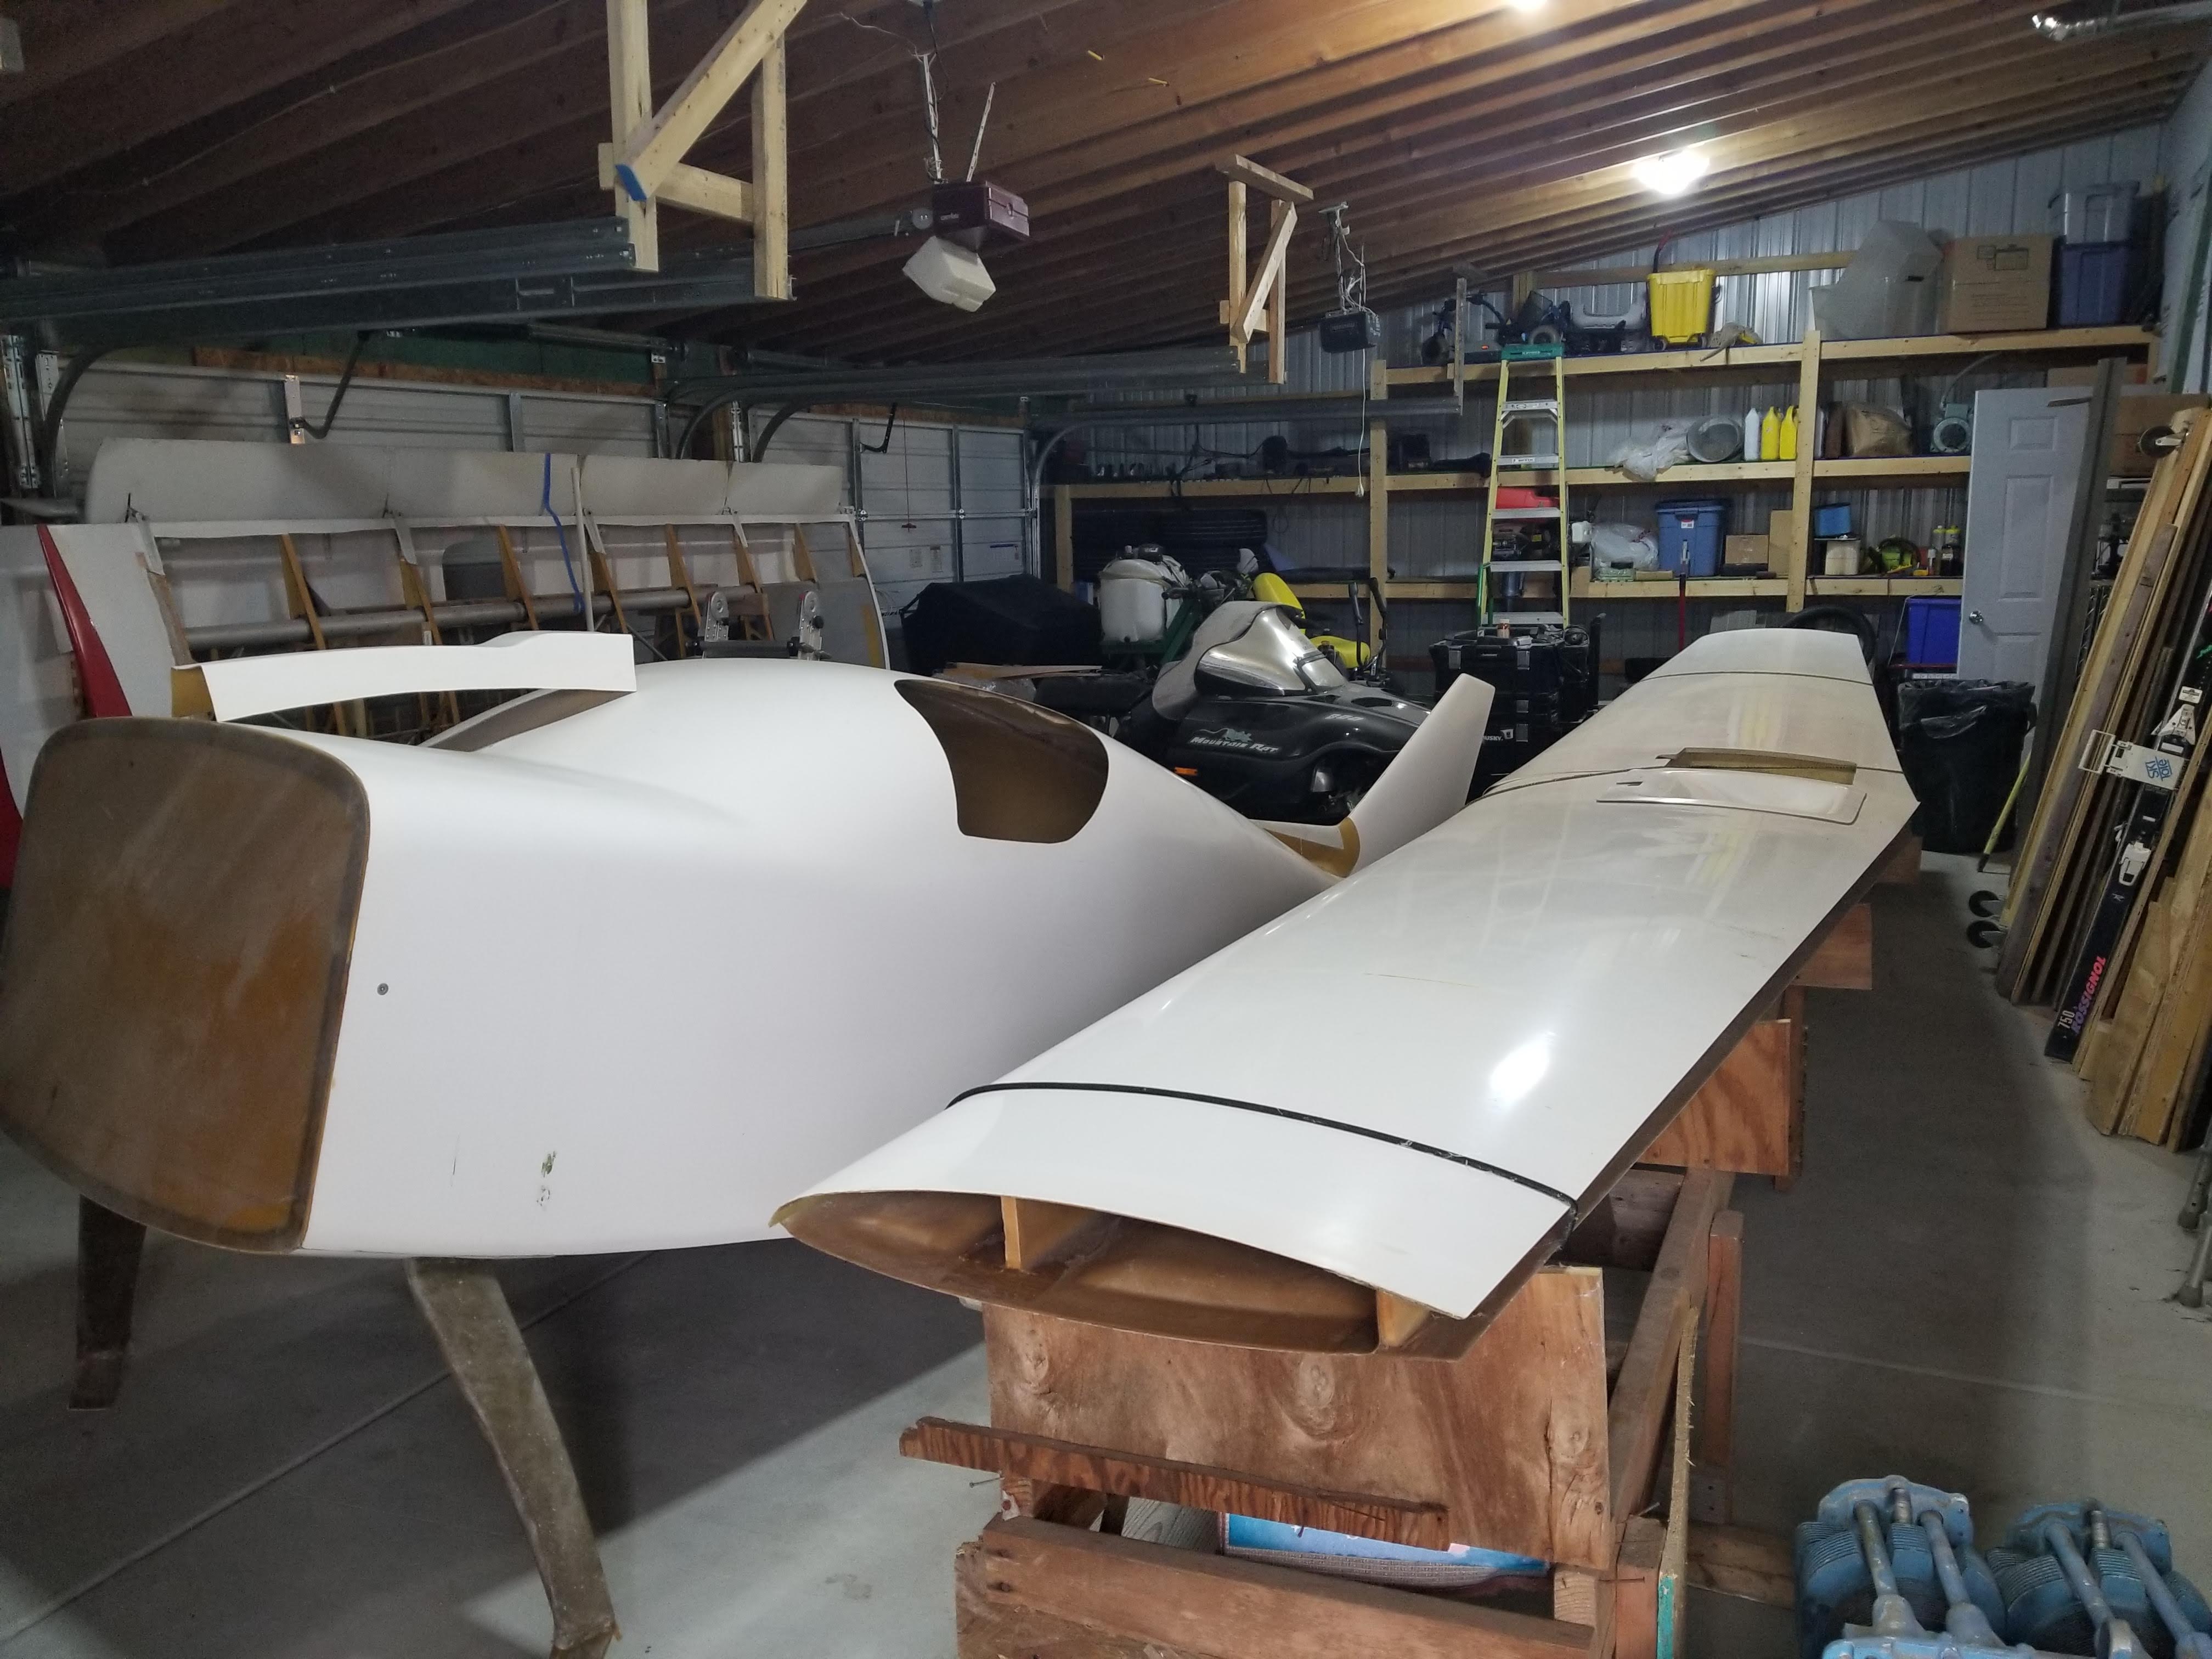
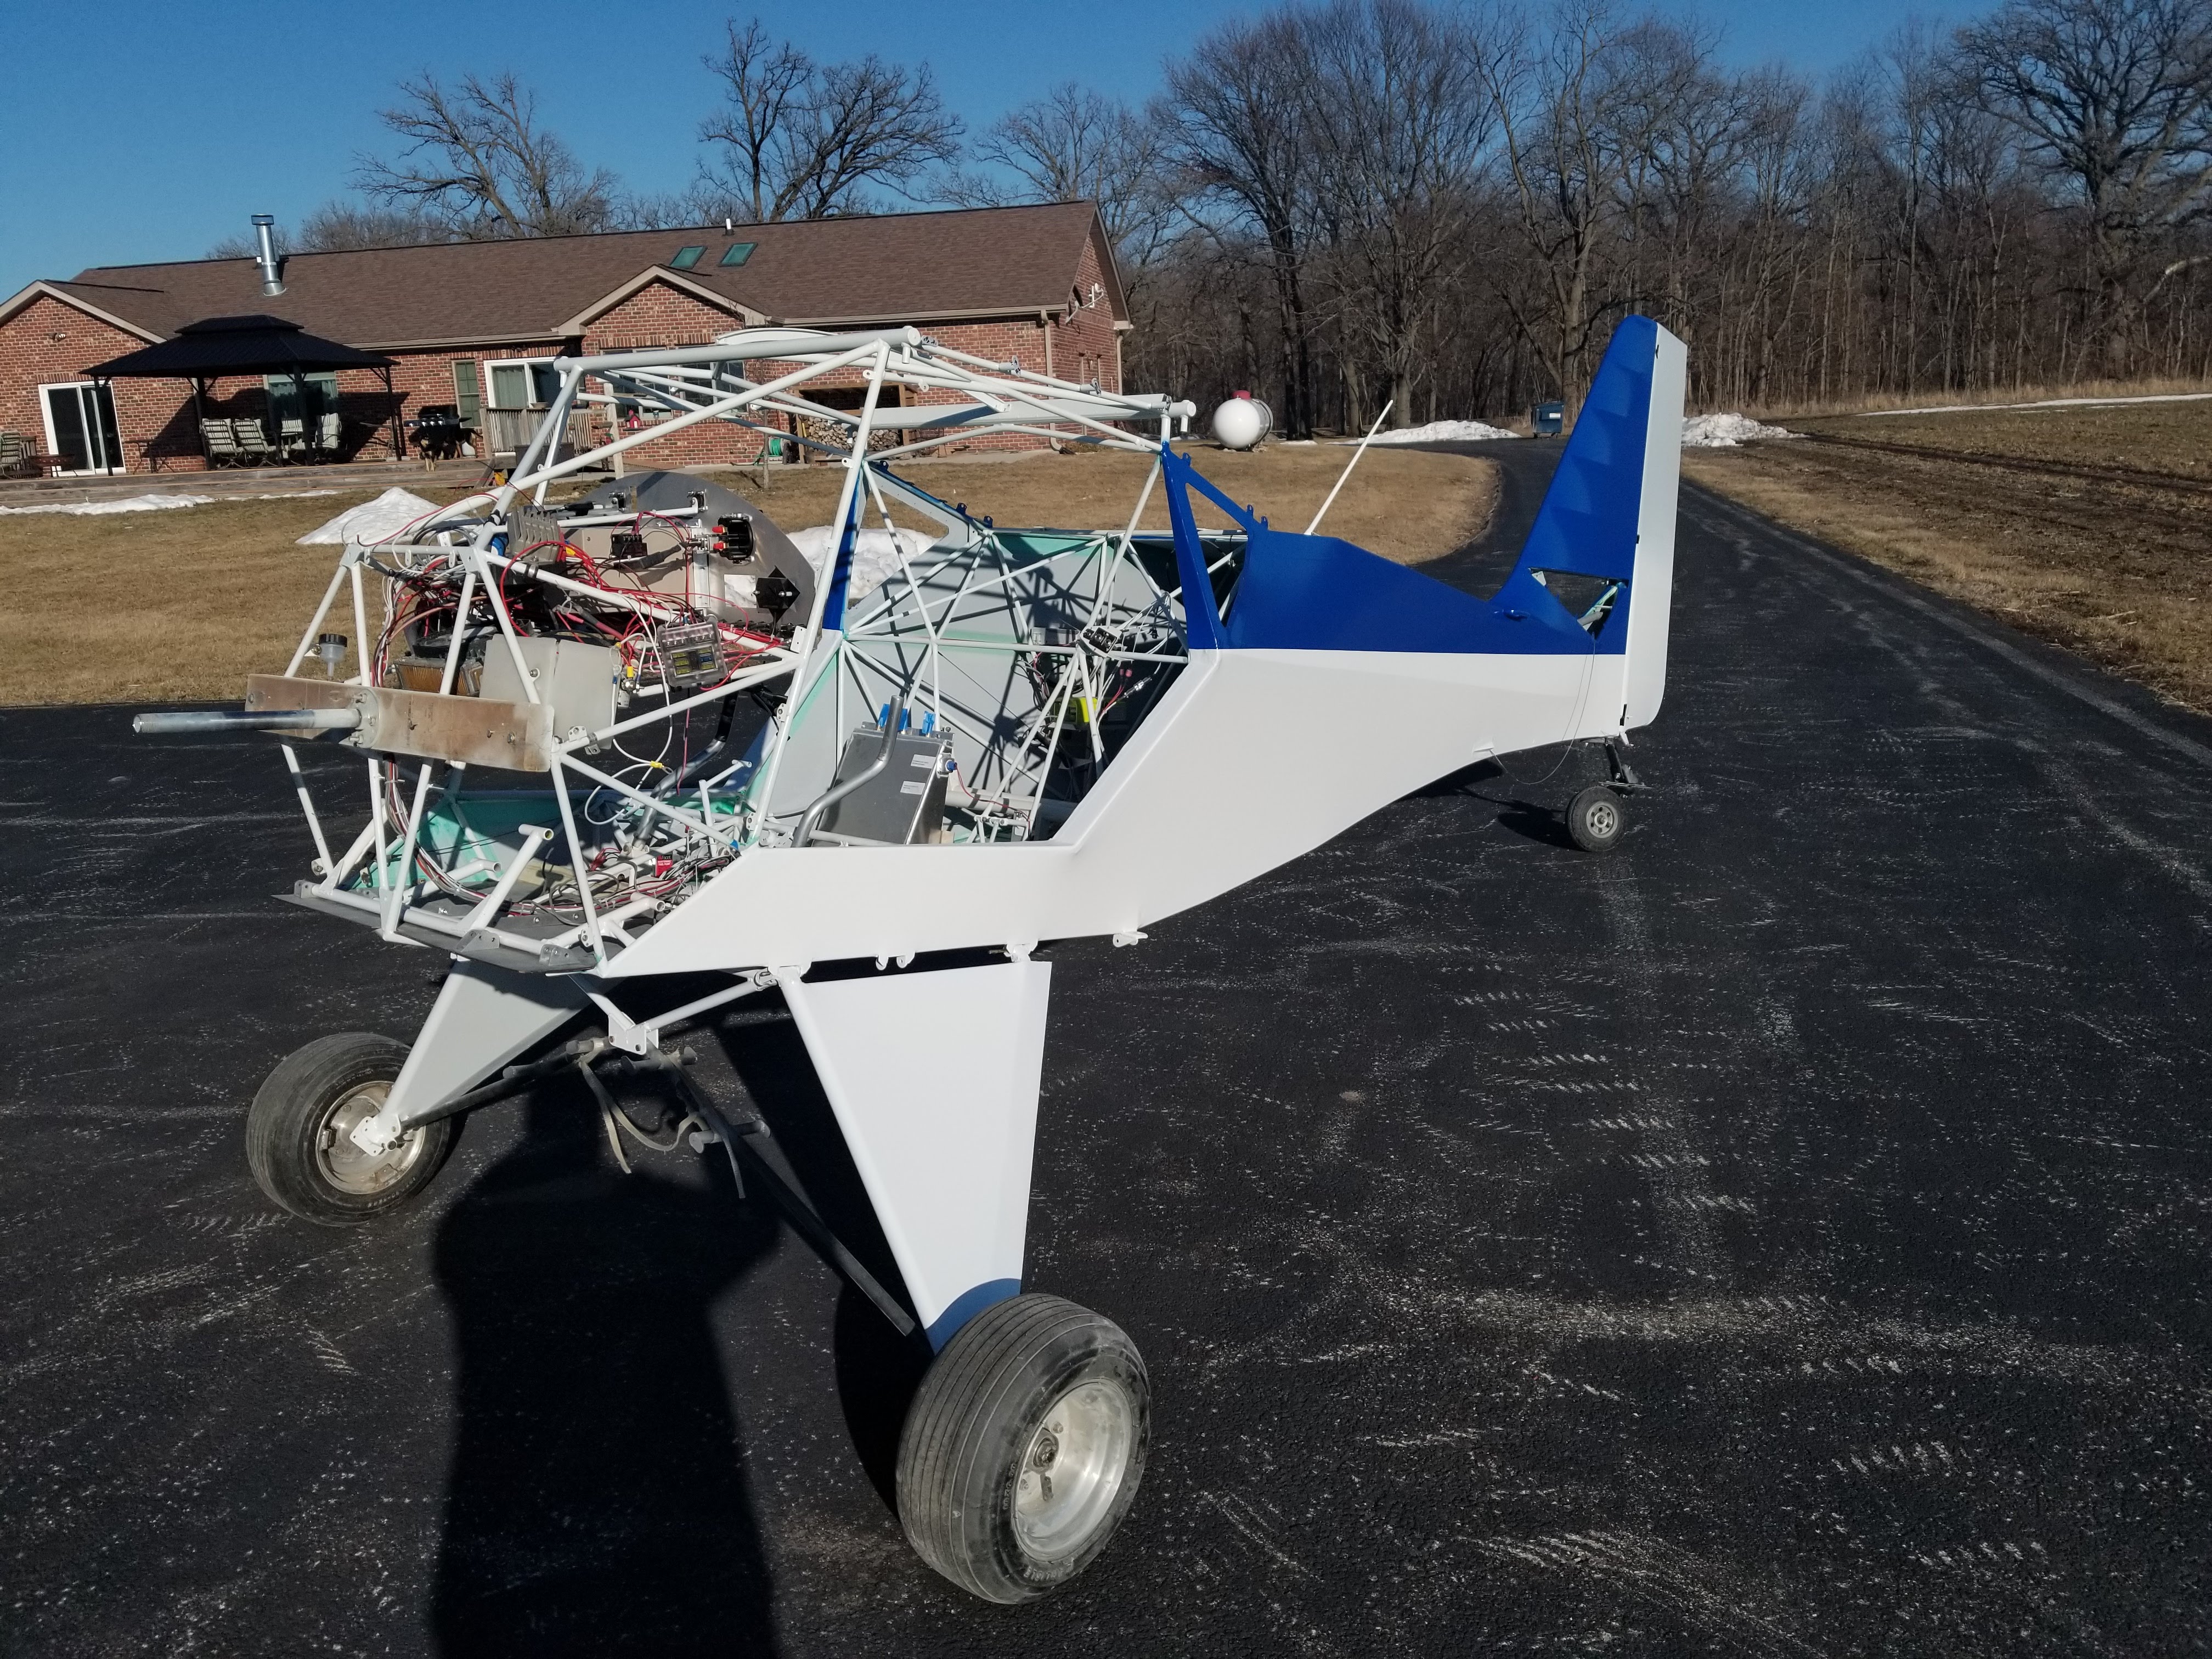
Nice. My polyurethane tube arrived today from McMaster Carr, and the 4130 tubing for the new struts is on the way from Wicks Aircraft. This weekend I plan to knock the new struts out. Maenwhile, here is what the project is looking like right now.
 3 people like this
 -
Dusty, One more question for you. You said that you drilled the pucks like a revolver cylinder. Do you recall how many holes and what diameter you used?
Thank you so much for your help and inspiration.
-
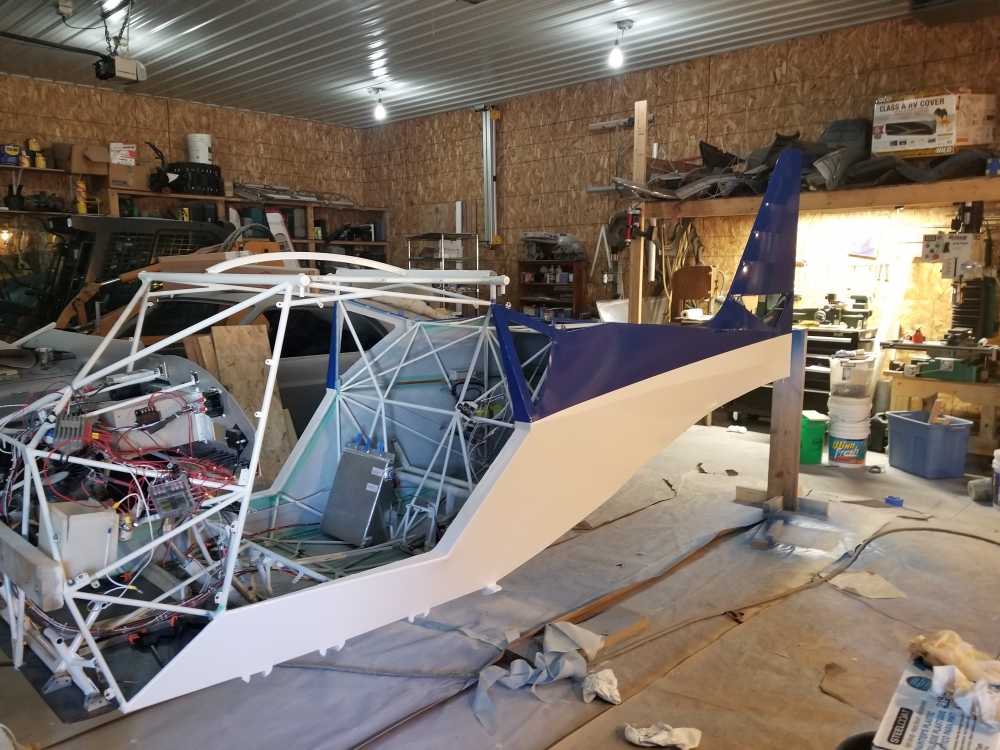
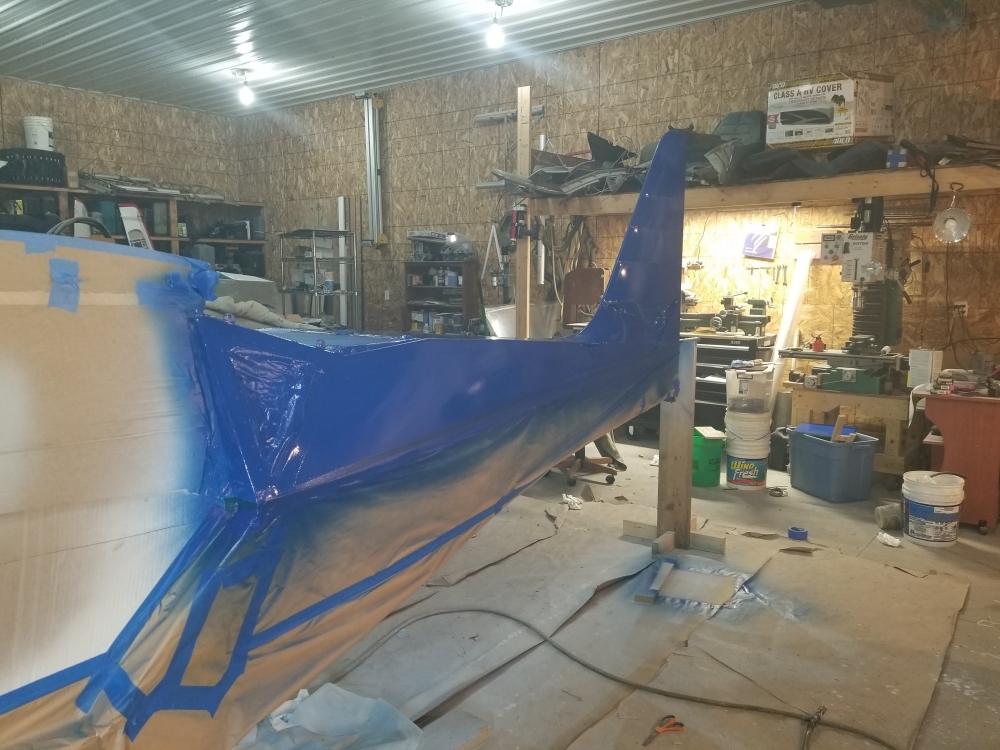
Got the final coat if blue on and got it unmasked. Came out nice. Has good gloss but a little orange peel that was expected. Latex is a win so far for ne.
-
Dusty: So I have a 36 inch long (914 mm) piece of the McMaster Carr polyurethane tube on its way. So I gather from your posts that the 4 pucks that are pictured are 50 mm OD (about 2 inches), 25 mm ID (about 1 inch), and 38 mm long (about 1.5 inches long. That would be 152 mm total length ~6 inches). My thought is to make struts that allow up to 200 mm total length, start with 4 50mm long pucks and see how it goes. This way, if too soft or too much travel I could insert a solid spacer to replace one of the pucks. What do you think of this plan, being the resident expert? Also, a question. Does your setup sag at all with the airplane empty.
-
Getting the color on her. The gloss of the latex is definitely better than polytone. The white is really hard to tell but the blue has a little orange peel which was not unexpected. It is about what I was expecting and is in the perfectly acceptable realm for my tastes. If I ever decide to I could color sand and buff it but I doubt I ever will. Overall I would call it a success but in doing the fuselage I have learned a few things and will be modifying the process a little. The results that Malcolm at wienerdogaero.com gets can't be argued with, but at least for me a few changes to his process make it much easier for me. For my rudder and landing gear legs I made the following modifications which work very well for me.
I am starting to thin the first coat of primer a bit more than he recommends in order to make it easier to get more complete wetting of the fabric.
On the primer coats on the fuselage I used the wienerdoaero method and brushed each coat on sanding between each coat with 320 grit dry sandpaper. I still brush that first coat on, and on the landing gear I also brushed several coats, putting the primer on in one direction and tipping it at 90 degrees. Ultimately I went to spraying the primer on. The primer is still thinned and sprays nicely, leaving a slightly orange peeled surface. The orange peel is much easier to sand smooth than the brush marks from brushing/tipping. On my rudder I am spraying all but the first primer coat and it is going very well. You can get a smooth finish brushing and sanding, but it is a lot more work in my opinion. Spraying i was also able to reduce the sanding interval to 1/2 by applying 2 coats (one cross coat) at a time, waiting until the first coat tacks up and applying the crossing coat. I have also gone to wet-sanding with 400 grit which again is much easier for me.
Anyway, here is crappy picture of the airplane after the first cross coat of blue was applied and had dried about an hour.
 1 person likes this


109JB got another wrecked Kitfox
in Kitfox IV
Posted
Yeah. It is going to be a pretty easy fix. Lots of little things though. To get the airframe all fixed up will be about $500 in materials. Somewhat bad news but not unexpected is the engine probably needs new seals. I did a crankcase pressure test and it leaks down way too fast. On my sleds they normally hold 5 psi for minutes but this one leaks down to 4 psi in 10 seconds. Soapy water shows it isn't the test setup, spark plugs, etc. Most likely seals. I'll pull the C-gearbox next to soap the front seal. I'll probably do a top end rebuild kit for about another $500 but at least another weekend of work to pull the engine to get to the rear seal..