.JPG.08f9e23d729418efb8a3e9fd398de605.JPG)
1avidflyer
Contributing Member-
Content count
4,231 -
Joined
-
Last visited
Posts posted by 1avidflyer
-
-
I should have mentioned, none of my Avids had/have a blanket either. Take care, Jim Chuk
I didnt mean that the stock firewall with blanket was not OK - I just dont like the dirty blanket on outside.
I would guess that most inspectors have a lot more to look at, and assume your firewall meets standards.
I really dont think that one will ever put a micrometer on a firewall to see how thick it is.
In an extreme case, say a wood or plastic plane, with a plywood firewall and no blanket, would surely not get passed, so the FAA standards can be applied to a homebuilt, IMO.
I dont like flames in the cockpit - never had any - dont ever want any!
Thanks,
ED in MO
-
I've owned and flown 4 different Avids that I didn't build. All of them had galvanized steel firewalls. They also had all been inspected and passed as airworthy, one DAR at least was an FAA employed inspector. Twice I had FAA inspectors inspect my Avids, once when I changed an engine, (major change, earlier experimental rules required an FAA inspection,) and one Avid that I bought had never had the Phase 1 hours completely flown off and the location of the Phase 1 area had to be changed, and that also required an FAA inspection. Nothing was said about the firewalls durring those inspections either. Actually the FAA guys didn't spend more than 5 minutes looking at the planes each time. That has been my experience, your's may be different. Take care, Jim Chuk
-
No, I'll stick with the tailwheel, I fly from my grass strip in the summer, and put the plane on straight skis in the winter, so I'll probably pass on the change to tri-gear. I also would have to get a different endorsement for my sport pilot license to fly the tri-gear. Take care, Jim Chuk
-
Hi Doug, don't think this really applies to your situation, but I believe the Avid main gear legs are different for tailwheel verses tricycle gear. With the tailwheel gear, the axel is ahead of the front gear attachment point, and in the tricycle gear, the axel is about in the center between the two attachment points. I think the tailwheel gear is also taller. Take care, Jim Chuk
-
No problem Doug, I did call Grove today, and learned this. Gear is called Avid Tri Custom. Explanation is this, Tri= Tri gear, Custom= gear was built 66" wide rather than 62" standard for this application. Here is the killer for you, gross weight is for 950 lbs. I asked them for today's price, and it is $1195 for the gear, add $200 for gun drilling for hydrolic brakes, I think I remember the axels were $75 each on their website, and I think my gear mounts might be homemade. Not sure what a fair price would be for this stuff, it's all in excellent condition. Take care, Jim Chuk
-
Hey Doug, thanks a lot! You answered both of my questions. On page 5 and page 9 of the sheets you posted, I see how the Grove gear mounts on to the plane. Looks just like what I saw Saturday on that Kitfox 5. Also, the nose wheel set up looks just like the one I have as well. Wonder what Kitfox gets for one of them?? $$$$$ I'm sure! Thanks again, Jim Chuk
Hi Jim - that nosegear looks like a Kitfox product to me. On a Kitfox, the top of the shock attaches to the engine mount, not the fuselage (see pg. 16 in the attached .pdf).
-
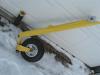
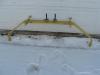
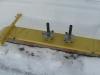
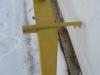
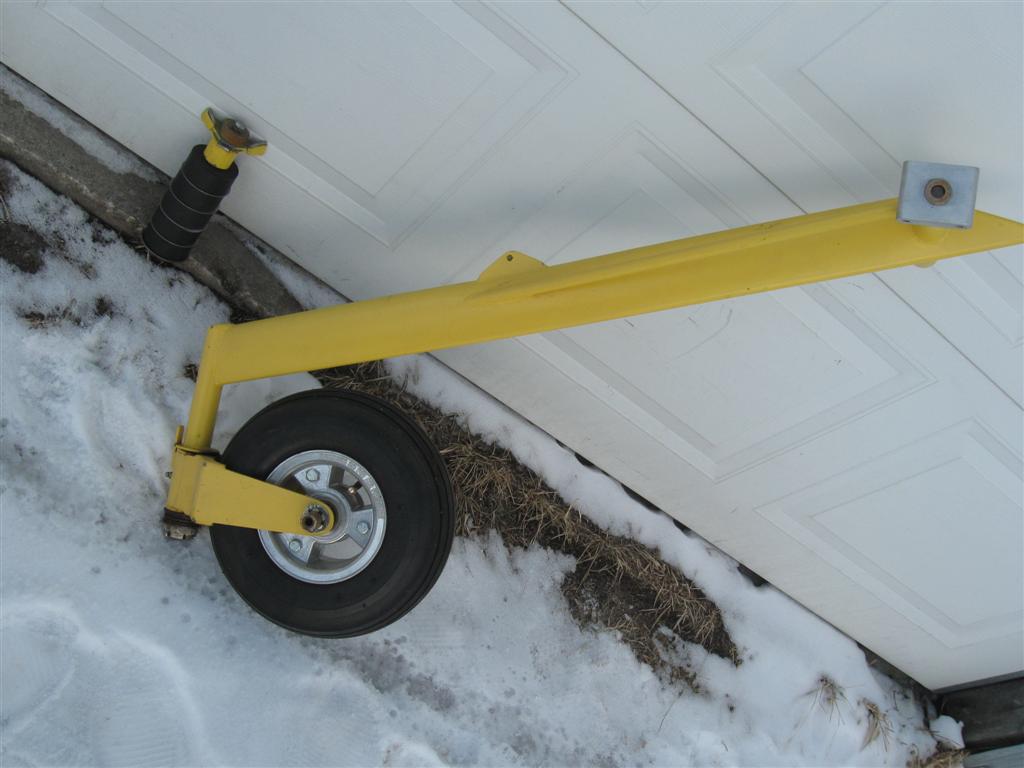
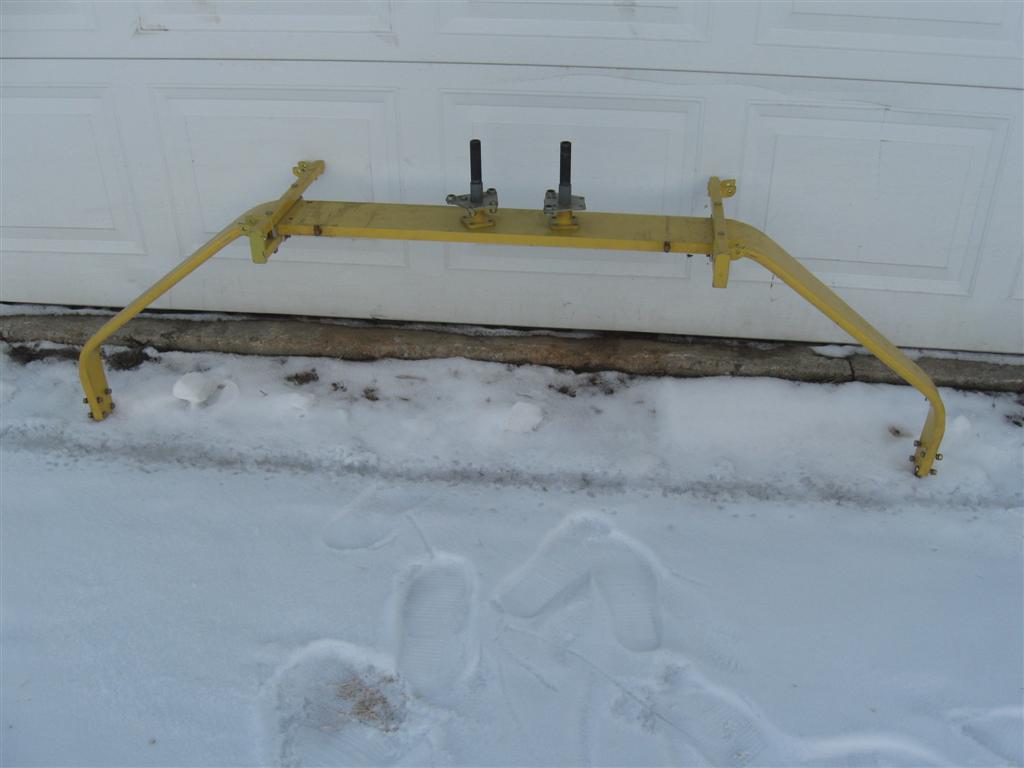
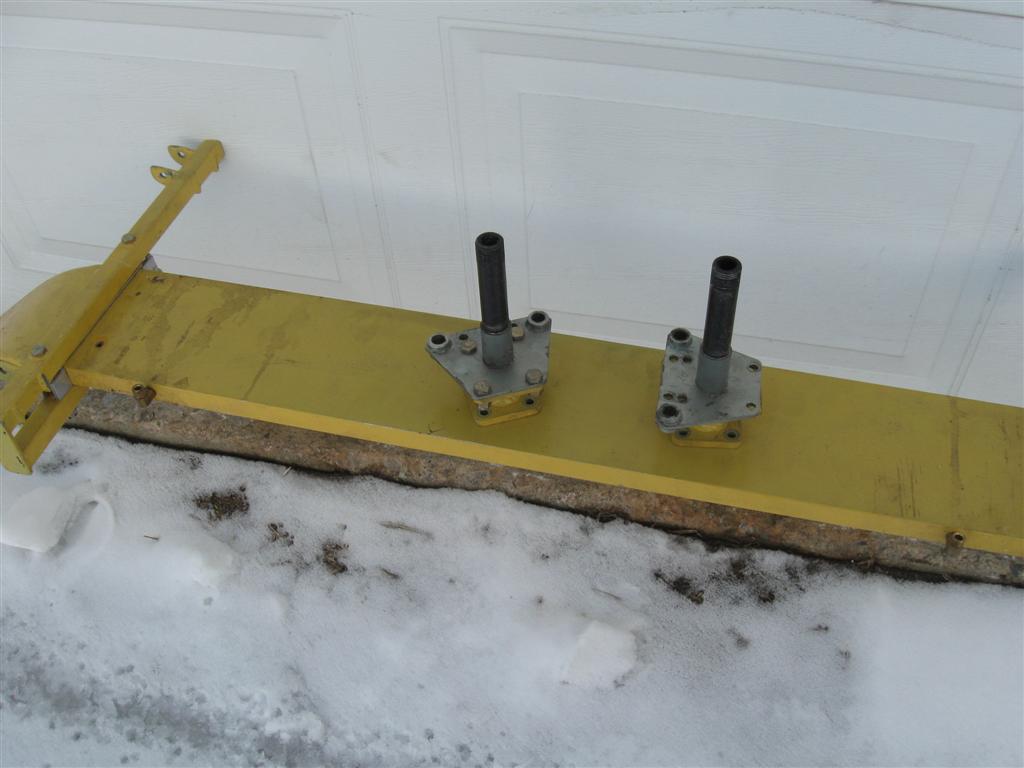
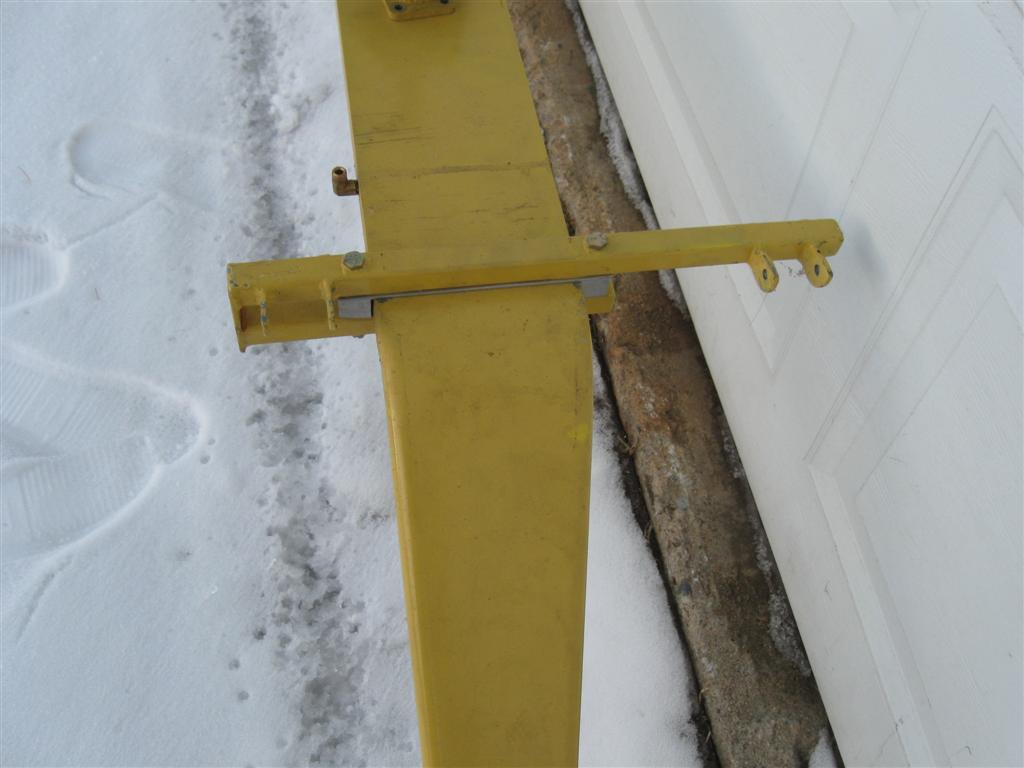
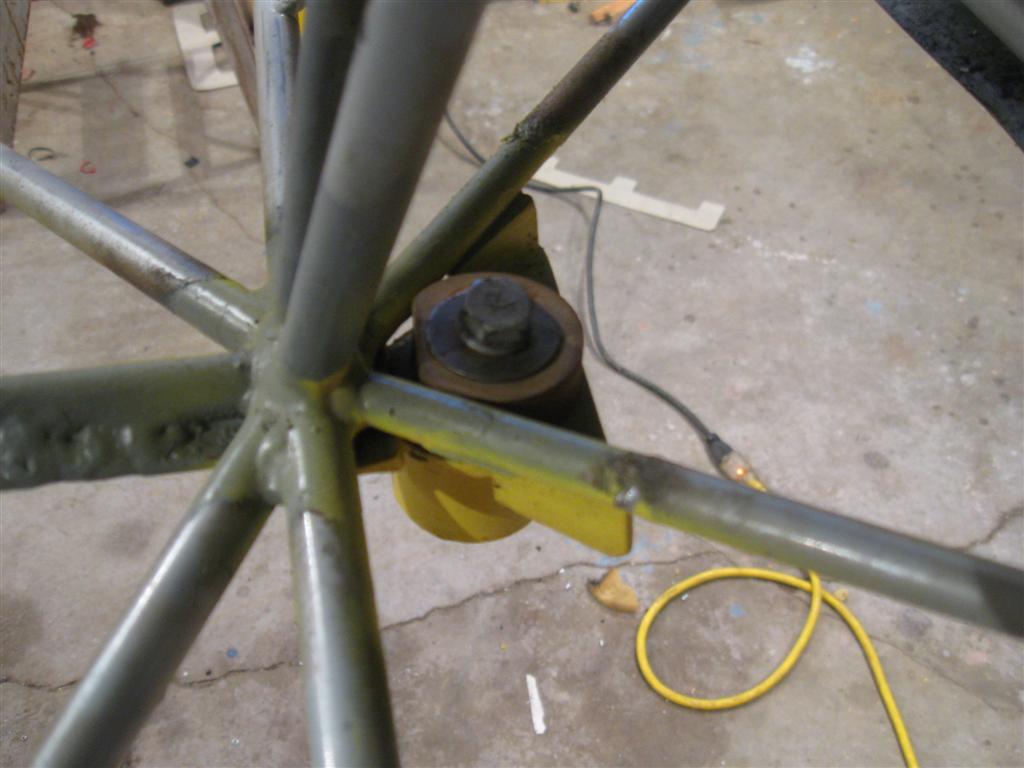
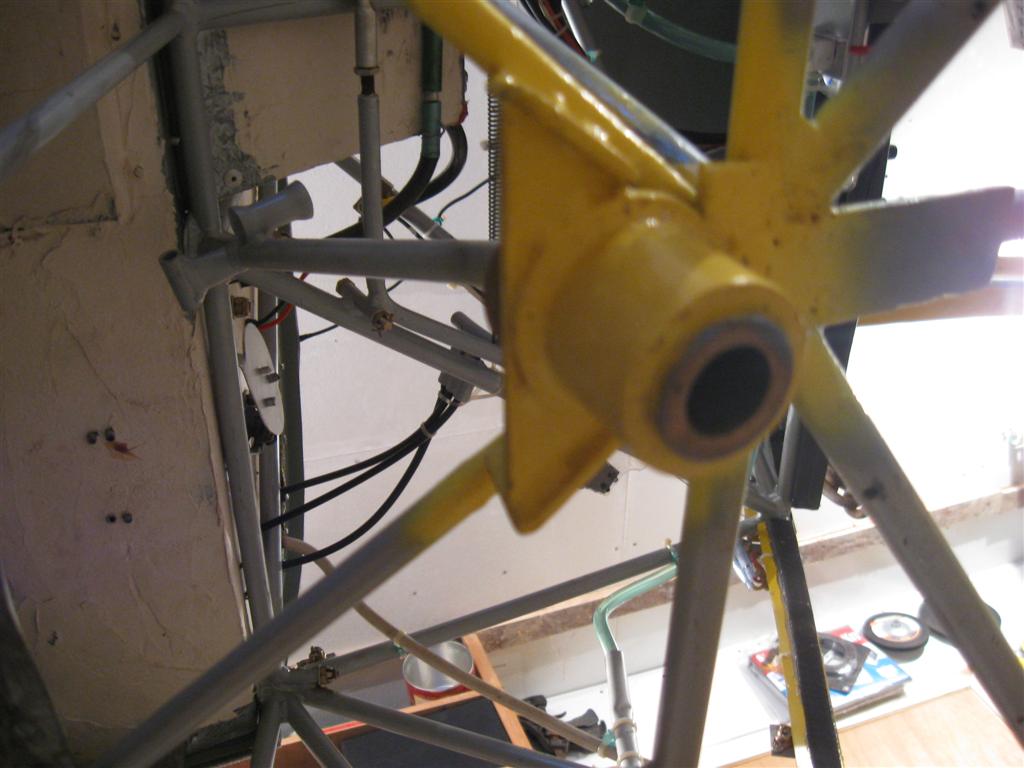
Hi all, I got this gear with my last Avid MK IV purchase. The gear was on the plane at one time, but it was back in taildragger configuration when I bought it. Not sure what I'll do with the gear, might sell it????/> Thought about using the Grove gear as a conventional setup, but it's kind of short, and I'm not sure if it is heavy enough. Anyway, here are the dimentions. overall width = 66", 34" wide at the top, 18" from top of gear to floor, probably would be 16" from top to center of axels. Gear is 3/4" thick, 5" wide on top, and is 2" wide at the very bottom of the legs. Drilled for hydrolic brakes. The nose gear mounted on two tabs that were welded to the bottom tube of the seat truss, and the suspention went up to a round bracket that was welded to the bottom of the cluster of tubes that includes the tube your right foot rubs against when you are flying the plane. Hope that last sentence is understandable. Anyway, I'll post some pics as well. Anyone able to tell me anything about this gear. Is the nosewheel a copy of anything you recognize. I think it's different that the factory Avid setup. Thanks, Jim Chuk


-
Hi Ed, Not sure if you understood my post, I was wondering what the grove gear bolted to. The clamps didn't hook onto the original gear mounts. The clamps were mounted ahead of the original gear mounts. All I could see from the side was the clamps going around the grove gear, and the two bolts going up into the fusaloge. The clamps were touching the fabric which was flat on the belly of the plane where the clamps mounted. It could very well have been a home made design, I don't know. He does have an O-200 in the plane. Maybe that's why the gear is mounted further ahead than the standard gear attachment points?
 I'll start a new thread where I will post pics of my nosewheel/grove gear. Take care, Jim Chuk
Jim,
I will have to check my book, but believe the KF5 mount is the same as the 6 and early 7, with complicated round ends and radius blocks. The early KF7 had a complicated setup and I have a set. The later and current 7 has a simple clamp radius block setup, and I have a set of those. I also have the set of mounts for the earlier Foxes which bolt to the original gear mounts. How thick and how wide is your gear?
What does your nose mount fit, and how is it made and how does it attach? Can you post a photo or two?
ED in MO
-
I saw a Kitfox 5 at a ski flyin this weekend that had Grove gear on it. Didn't get to look inside to see what it attached to, but the mount and gear were ahead of the regular attachment point for the standard gear. There was a two piece clamp that went around the aluminum gear with a 5/16" (I think) bolt in the front and back of the clamp. I'm guessing it bolted to plates that were welded onto the longerons, but couldn't see that. I have a Grove gear that was set up for nosewheel and wondering about putting it to use. It is shorter in height than a tailwheel gear though. I have the nose gear also, maybe I should just sell it all to someone that wants to go that way. Anyway, if someone has pics of the grove mount I was describing, please post them. Thanks, Jim Chuk
-
Jim, I'v e got the 3:1 gears and wondering if you remember which blade number you used?
Chris, Am I understanding that you want it to be able to wind up to about 6000 in the neutral position? Will Ivo take the blades back if they are'nt the right match?
The IVO blades I had were the low pitch ultralight blades. 70" or71" three blade IVO. I don't think it was cranked very far from nuetral to turn 6250 static. Right now, I have a three blade 72" taper tip Warp Drive on my 582 MK IV, and I think it ight be to much prop for the engine. Tempted to switch to 2.62 and 2 blade to see if it will do better. Take care, Jim Chuk
-
With the 2.62 gearing if you go with 3 blade 72", my guess is you might have to much prop. If you have to flatten out the blades to much, the prop won't perform as well as it could. A blade that's running flat still makes some drag, and not much pull. I remember when a flying buddy of mine bought a Kolb with a 377 on it. They had a 3 blade 62" IVO on it. Performance wasn't very good. I told him I thought it was overpropped and we took off one blade. What a difference! Then that plane performed just great. I guess time will tell, but don't be afraid to try it both ways. I had a 3 to 1 gearbox with a 70" or 71" IVO three blade prop on my first Avid with a 582, and it performed great. Take care, Jim Chuk
Thanks Chris! I am 2.62:1 and the prop is currently a 72". Hoping its close so I don't have to monkey with it too much!
-
Being the frugal guy I am, I have a mustard sqeeze bottle that I use for bleeding the brakes on the plane. I tip the bottle upside down, so there is just fluid in the clear line and open the bleeder screw and sqeeze the bottle. Works fine and the price was right! Take care, Jim Chuk
Okay. I've done this several times.
1. I don't know. Maybe napa or similar quality auto parts store. I am now boycotting HF. I use a buddies oil can.
2. No. Never heard of such a thing. If the ports aren't open when the peddle is all the way back, you have other problems.
3. Huh? That's nonsense. These are two separate systems, left and right.
4. I watch vent through open door and go just until I see fluid come out of the vent. Any helper would work. Even the wife...
5. As you pull the line off to snug down the bleeder, a little will come back out of that bleeder, this will be enough to give a little air pocket at the top of the res. Then put plug back in res. The res is vented to allow fluid movement so leaving the plug off does little for you but add to the mess.
You're done. Test for hardware tightness and peddle pressure then go flying.
-
No, I'm Bob McCAA...another one of them heathen Sc
When I build again I will use heavier strapping at the top and bottom of the spring strut.
Mac
Can you tell us why you want the heavier strapping? If I remember right, you used 1/8" strap. Or am I misunderstanding your post. How well has the gear stood up otherwise? Any comments you can add about your gear would be welcome I'm sure. Thanks, Jim Chuk
-
Dang still banned
I think one can view topics on that forum without logging in. Jim
-
I also have the WIB gear using the bungees. If you find a way of modifying to the spring type keep a good record for the rest of us. Thanks Russ. N844RS
I was on the Team Kitfox forum today, and a guy had remodeled his bungee gear into using the springs. He hasn't used it yet, but if you want to have a look, dig up the Firewall Seal thread. I kind of went off topic with the thread when I looked at his gear and asked some questions about it. Take care, Jim Chuk
1 person likes this -
I am sure you will get some better answers on this - My Kitfox 1 & 2 with the 2 cycle engines had the 6 gallon tank behind the instrument panel - another 6 gallon tank behind seat might be feasable, but dont think any larger would do.
ED in MO
If you are going to pay for an aluminum tank - Why not an aluminum wing tank, or one of the newer FG alcohol-proof tanks, or the plastic tanks?
Kitfoxes and Avids both used aluminum wing tanks for a while, had problems with leaks developing. I think it may be from the flex in the wings that caused the tanks to start leaking. I think most of the people who have had problems with fiberglass wing tanks were the people who were using fuel with alcohol in it. I think the lastest fiberglass tanks use a fiberglass resin that is less effected by the alcohol. Take care, Jim Chuk
-
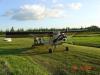
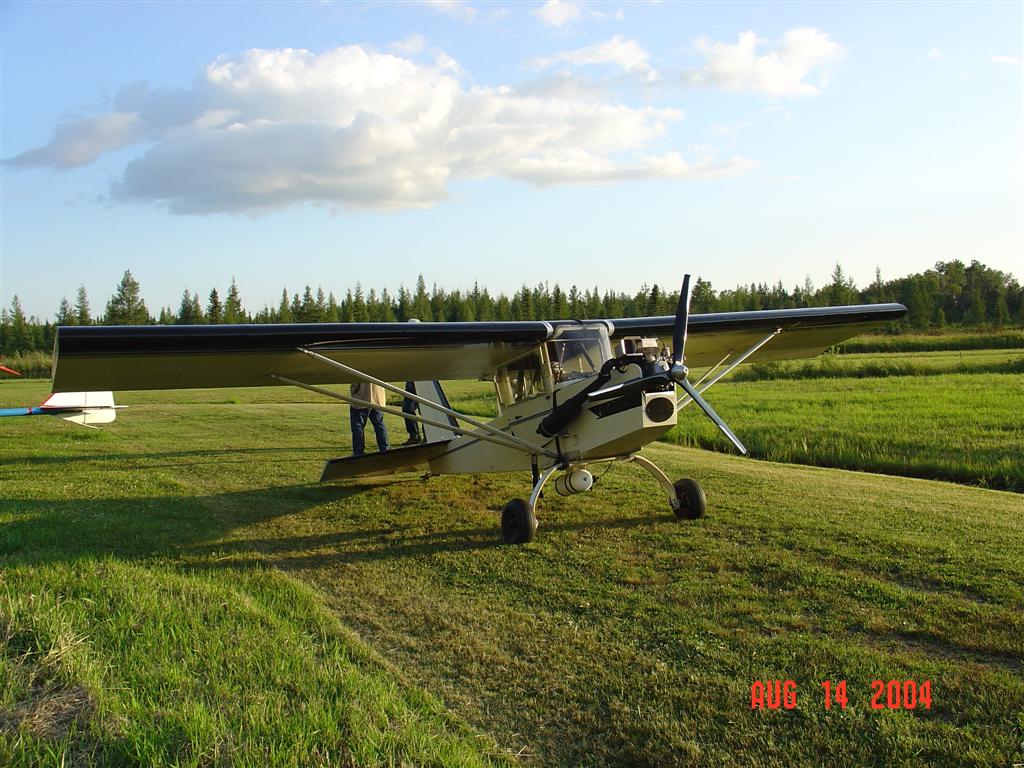
Not sure if it would work the same way, but about 10 years ago I got a fiberglass gear from a guy out in Pennsilvania for my Himax. It was conciderably lighter than an aluminum gear, and it sure made the plane better. Course the Himaxs were usually built with no suspension at all so anything that didn't break and wasn't rock solid was an improvement. I tried to talk him into looking into building a gear for an Avid or Kitfox, he would have probably done it if he had a plane to work with, but didn't so... He does have a nice website where he explains and shows how to build a fiberglass gear as well as other things. Also writes a good story on how run a two stroke to make it keep it running. His web site where he shows that is http://curedcomposites.com/gear.html Maybe the guy that might build the leading edges might want to take a look at it as well. Here's a pic of my Himax with the fiberglass gear that I used to have. Take care, Jim Chuk
Not wanting to piss is too many bowls of cornflakes here, but in light of recent events, added to some engineering consideration, I am more and more happy with my choice to go with a Grove spring gear conversion on my plane rather than any one of the number of "bush gear" options.
Just saying...
-
Sounds interesting, for me, especially the leading edge parts. If they were made in 3' or 4' long pieces, they would be easy to ship as well as easier to make. Just thought about that some more, and if the leading edge is made to go back as far as the false ribs do, it would be better in a 3' length, cause the splice would land on a rib. Take care, Jim Chuk
I got to talk to Randy Apling at Plaschem for a good while yesterday and he is interested in building the belly pod patterned after the original Avid pod that Avid Heavy has, but doing it out of Carbon Fiber. I will pick up Jeff's pod this weekend and take it to Randy to see what he thinks about using it for a mold plug. We also talked about making the mold so it could be widened to fit the Avid+ and Magnum, and to make it with edge flanges so it could be fit to the variations between the Avid and KF generations. I plan to put it up to the Avid+ fusalage to see how close it fits to it;and if Dave or someone with a KF in this area is available, it would be good to see how close it fits to the KF. Randy says the stock SuperCub belly fiberglass pod is about 22 lbs and his Carbon fiber pod for the Cub is 12 lbs. I think Jeff said the Avid pod is around 18 lbs so in CF is should be under 10 lbs.
Randy is also building an all CF leading edge slat system for Cubs, including the mounting standoffs. The next set he finishes we are going to take to the hangar and see if they could be used on the Avid wing with a new standoff designed for the Avid wing. If not that. he also builds CF leading edges for Cubs that save 10 lbs off of the stock alum leading edge. I showed him the sketch that Jim posted on the alum leading edge for the Avid and he said that would be easy to build out of CF. I think I will be using one or the other on my new Avid wings. He is reallly interested in adding to the parts he builds for experimentals and I think there is a reasonable amount of us in the Avid/KF community who would be interested in this stuff so I will keep you posted as this develops.
-
Beefing up the seat truss is a good idea. That is definatly a weak point. A suggestion from the Avid factory was to fill in the triangles in the seat truss with plywood and it was a requirement if you went with the wide gear. A number of different controls and such run through the truss so you have to plan for them. The fusaloge stretch is also a good idea especially if you intend to put a heavier engine on the plane at some point in the future. As long as you have the fus. uncovered, now would be the time to do it. If you go to www.airdale.com you can see a fus. being stretched. Click on the Avid box on the top of the page. If you have never flown behind a 2 stroke, before, be sure to learn about how to operate it before flight. They are VERY sensitive to high EGTs and will burn up if EGTs are run hot (especially at full power). Also, cold seizure can be a problem from running hard before the engine is warmed up. You really need to run a thermostat in cold weather. Hope I didn't scare you to much on the engine part, and one other thing, welcome to the group! Take care, Jim Chuk (another MK IV flyer)
I just purchased a Mk4 with heavy hauler wings. It had been landed hard and ground looped. Damage to fuse has been repaired in a worksman like manner and I need to replace 2 end ribs and the wing tip, included in purchase. This is a very nice plane and I would like to keep it that way. I have been going through th NTSB and air Canada accident reports for these planes and there seems to be 2 common causes of accidents, engine failure and landing gear collapse. I am haveing firewall forward (582 c box 3-1) zero timed at Oregon Aircraft Designs.
Tha strength of the crossmember under the seats looks questionable. I plan on plating both sides with light sheet metal to increase shear load, maybe 2 lb weight penalty. I have a set of super cub landing gear that happen to be very close to the same size as my float attachment points. These would raise my fuse about 4 inches and widen my track about 18". I am not sure that I want the drag of the carbane and oleo struts but do need advice on it. Does this seem a reasonable upgrade?
While all my cover is off it would be a perfect time for a fuse stretch. I am a low time tail wheel pilot and want my daughter and my grandson to learn to fly in this plane. I have a Cherokee 180 but there is no way that either one of them can afford to fly it, besides the gear is on backwards. Does this increase the directional stability enough to justify the work. Weight penalty look very negligble. Advice for and against would be appreciated.
Plane is very well built but was completed in 1994, has 186 hours on it. Empty weight currently with BRS is 537 lbs without floats, no idea with floats, gross with BRS and floats is 1200. There must be some collective wisdom on failure points, upgrades, best tweaks for the plane. Not looking to redesign the plane or add a bunch of weight, but it will be carrying precious cargo and should be as safe as possible. I have purchased a BRS for it and am interested in the collective wisdom for mounting it.
Last but not least, where do I put my fly rod?
thanks
-
I built the latest set of bungees for my Avid+ using the 1/2" bungee material from AC Spruce and made them 100". They seem to be just right for my heavier Avid+ but it is about all two people can do to wrap the 1/2" bungee material.
Like Jim, I used safety wire to tie the end loops and there is a slick little tool from a company called ClampTite that makes the wire tied ends perfect, tight and secure every time. It is worth buying the tool and the bungee material to save a bunch in the long run.
http://www.clamptitetools.com/press.html
This morning, I measured the factory bungees for my Kitfox 4 project, and they are 4'9" inside of loop to inside of loop. Also, I just got my shock cord from ACS for the new bungees from the FedEx truck. In the box with the bungees was a bunch of flat 4130 if I decide to build anything that doesn't need bungees. Take care, Jim Chuk
-
Dave it's a long story. Private message me and I will tell you about it.
I just ordered 36' of 3/8" bungee from Aircraft Spruce. Enough for two Avids. It's $1.22 per foot. I've made my own bungees several times before with no problem. Used safty wire to tie the loop at the end of the cable. Take two wraps of wire and pull the wire tight, make a twist or two in the wire to hold things in place, and then make a few more wraps with the wire, pulling it as tight as possible. Then twist the wire half a dozen times to hold it. You only need 16 feet of bungee to do one Avid with the 7 wraps, but I don't put the second loop on till everything is wrapped around the truss. That way you don't have a big loop you are trying to get though a hole that gets smaller with each wrap. Also, if the bungee is an extra foot long, it gives something to hold on to when you make the last wrap and go over the hook and your buddy has to hold the end of the bungee while you tie the loop with the safty wire. One other note, it really helps to mark the bungee with a magic marker where it will cross the top of the truss and the bottom of the gear tube. That way you know you are pulling it tight enough. A little math figuring number of wraps and overall length. Length is 90" or 92" inside loop to inside loop for the Avid if my memory is correct. Take care, Jim Chuk
PS, the Kitfox bungees are only about 5 or 6 feet long
1 person likes this -
Leni,
I am not the guy who posted on yahoo. My strut is a down sized version of the Bearhawk strut. I have not seen the John Roberts Rage Gear just a picture but it is evident the Fox Shock is paired with a Bungie.
The guy who put the file in the Yahoo group used the name whizzer something. Looked at his profile and all it said was Mac. Jim Chuk
-
Not trying to argue with you in the least, I did mention that the tubeing prices were from my 2008 catalog. Not my design either. I did price the springs mentioned and they were 47 each. This all started by me running accross this file and looking at it a while back and then I couldn't find it the other day. Well I did find it, in the files of the Avid flyer Yahoo group. For lenghts of 4130 tubes ect, I used what the guy said or estimated rough lengths. Wall thickness was mostly .058 with some .049. The guy said his gear weighed 17 lbs. I think that's heavier than Brett's if I remember right. Maybe way heavier. All your points about welding are correct. Not sure I would trust my welding skills either. Take care, Jim Chuk
I think your cost factor for the tubing at $100 is WAY low. $250 would be closer. What wall thickness tubing were you using? 4130? What about the plate/sheet that is needed? That crap is really spendy compared to the tubing.
The prefabricated spring conversion for a (experimental) Cub is available from Wag-Aero, p/n M-222-101, $555.00
You will be hard pressed to fabricate the landing gear with all of the spring mechanism for less than $500.00. It does require machine work to do the spring mechanism and if you have machine equipment at your disposal that will be the cost, but if you have to sub that out, double the price.
Do you have a welder? Are you skilled at welding sufficiently to trust your life with it? Do you have the tools, equipment to jig the whole thing? That's not an option, either. This is not a small shade-tree project.
Being part of the R&D I know that the Medium/Heavy springs are too stiff. I don't remember what Brett finally went with, but they were a much lighter rate die spring.
Anyone can build anything. Nothing is impossible. I just want to point out some items maybe not thought of.
Factoring in labor the $1200-1500 that is the going rate for this gear is not out of line. I don't know if Brett is still in business or not. (He won't return my calls either...) Lowell Fitt at Highwing LLC is making cabine style gear. I think they are getting in the $1500 range for theirs.
-
Just looking at the pictures of the 'home' made gear again, and I can see how you could probably convert the bungee gear. Cut the three tubes off each gear leg that go to the bungee area, weld tabs on the gear legs just above the axles, and now all you have to build is the carbane parts. Hope I'm saying that right. I think if you can see the pics of the home made gear, it might be apparent how to do it. You might save half the work and loose a good set of gear someone else might buy. Jim Chuk
I also have the WIB gear using the bungees. If you find a way of modifying to the spring type keep a good record for the rest of us. Thanks Russ. N844RS
Rotax 583
in Rotax and other engines
Posted
The FAA mandated passenger warning on the instrument panel that is required on experimental aircraft tells a lot. It says, This aircraft is amature built and does not comply with the Fedral Safty Regulations for standard aircraft. Interesting note, you are supposted to point this out and read it to any passenger before flight. Jim Chuk