flywise
Contributing Member-
Content count
374 -
Joined
-
Last visited
Posts posted by flywise
-
-
(why taking the wings off for space???They fold in minutes ).
I recently took the wings off my KF1 to do some work on it. It had been sitting in my garage for months with the wings folded and it was amazing how much more room i had to walk around the plane with them off.
Hey , yes you're right but.....then you have to find some serious space to store the set of wings on a support! hahahah!!!!
-
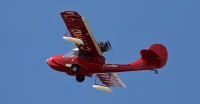
Look at this one I found on e bay. Seems a bit fishy to me....only 2 Hrs TT. I could imagine the owner having done a ground loop and being frightened (why taking the wings off for space???They fold in minutes ). The Catalina is real easy on water but needs attention when landing on pavement. This one never landed on water!!!!!!
Looks good though..
-
This looks very much like a sequoia Falco aircraft....beautiful
-
Why not take a standard aircraft cable pulley?? Just take the right size and you're good to go.
https://www.aircraftspruce.com/catalog/appages/phenolicpulleys.php?clickkey=9427
-
Flywise:
I can relate to what seems like excessive prices for Rotax parts. most of the friends I fly with are always bitching about the prices.
Of course, some of this can be accounted for:
Rotax engines are ther most popular experimantal engine
Parts are Euro based and have to be shipped from Europe so add shipping.
That said, the Rotax engine itself is robust. It's the gear box and sprauge clutch that seems to give my friends headaches.
I have be flying behind the Jabiru 2200 in my Avid Flyer MK4 for over 3,000 hours and when I compare my engine with that of my Rotax drivers, I am amazed at the simplicity of the Jabiru and inexpensiveness of replacement parts. Many of which can be purchased from NAPA auto parts.
The weak point of the Jabiru is in the heads. I have had to replace the valve guides and valves. In we have had an exhaust valve head come off and damage the chlinder on mine and my friend's Jabiru.
Jabiru is up to a generation 4 engine. This added roller cam lifters and oil feed to the rocker box through the push rods instead of through feeds from the side galleries to the rocker box as mine is.
I do like the fact that I can pull a head in 10 minutes.
Different 4 strokes for different pilots...
John M
Hey John,
I have looked at the Jab engine and what put me off was the fact it is a direct drive and revs pretty high.... your propeller speed is between 2800 and 3100 rpm in cruise !!! On the rotax 912 your propeller speed in cruise is 2100 rpm thanks to the reduction gearbox and that allows for much more efficiency (larger diameter propeller). Also the Jabiru engine being the same weight has 15Hp less.
What upsets me with rotax is that they overprice parts not built by them and can be found much cheaper by the original manufacturer (Bing parts/ ducati parts/ ignition cables, NGK ignition parts, spark plugs, intake filters, fuel pump etc...)
-
Flywise,
Were you able to clean up the rust and make an improvement or do you have to destroy the coil when you take it apart?
Thanks for sharing,
Randy
Hey Randy, I cleaned it all up, re-installed all the bits and my engine /ignition works like a charm now. You have to be careful not to break the plastic clip when you remove it and also when you re assemble the trigger you have to make sure the center pole piece is fully pushed in ( no play in/out) .
I don't think a small amount of surface rust matters but if there has been water or condensation inside the trigger and the center pole piece is rusted between magnet-metal plate then I believe you will have a problem (less magnetism in the pole piece)
Cheeeers
-
I can answer that TJay. The designers name was Dean Wilson. Not sure exactly how the story goes but in the search for a bumper for the amphibian design he used a Wilson Basketball for that bumper. With each new kit came a Wilson Basketball still in its original box.
Also I'd like to add that when flying this thing you have a ball....
1 person likes this -
Hey Vance,
looks like a nice Magnum. Just noticed the aircraft still on the trailer has no wing supports installed (links wing front spar to lower strut attachment). I hope your dad did not trailer it without as the wings were not designed to take the "road " beating without..
Here a picture of my wing supports installed
Looking forward hearing of your first fights....when I first flew the Magnum I was surprised how much rudder I needed to coordinate my turns.....much more than my Catalina.
Regards, Laurent
.thumb.jpg.bfb5bbf5b2681802a869014c6b287807.jpg)
-
750'000$ liability only cost 380$ a year.......with Air1 insurance
1 person likes this -
Do you measure any resistance between the coil wires and the pole piece or ground? Seems that should be an open circuit. If you do measure resistance between the winding and pole piece or ground that could be the problem even if the coil resistance is within spec.
Hey Chris,
you'r absolutely right, between any of the two coil wires and ground (or the wire cover metal mesh) you must have open circuit.
-
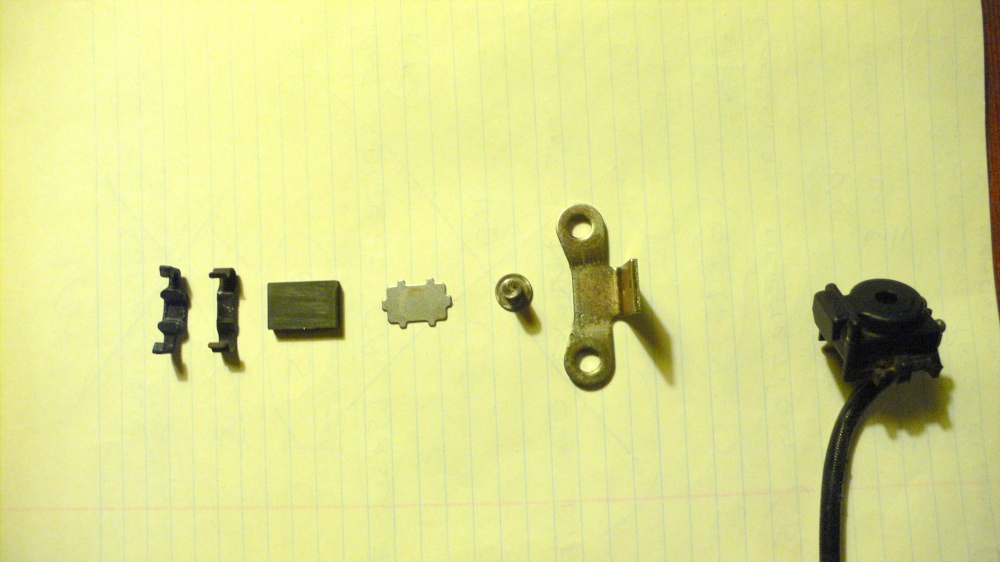
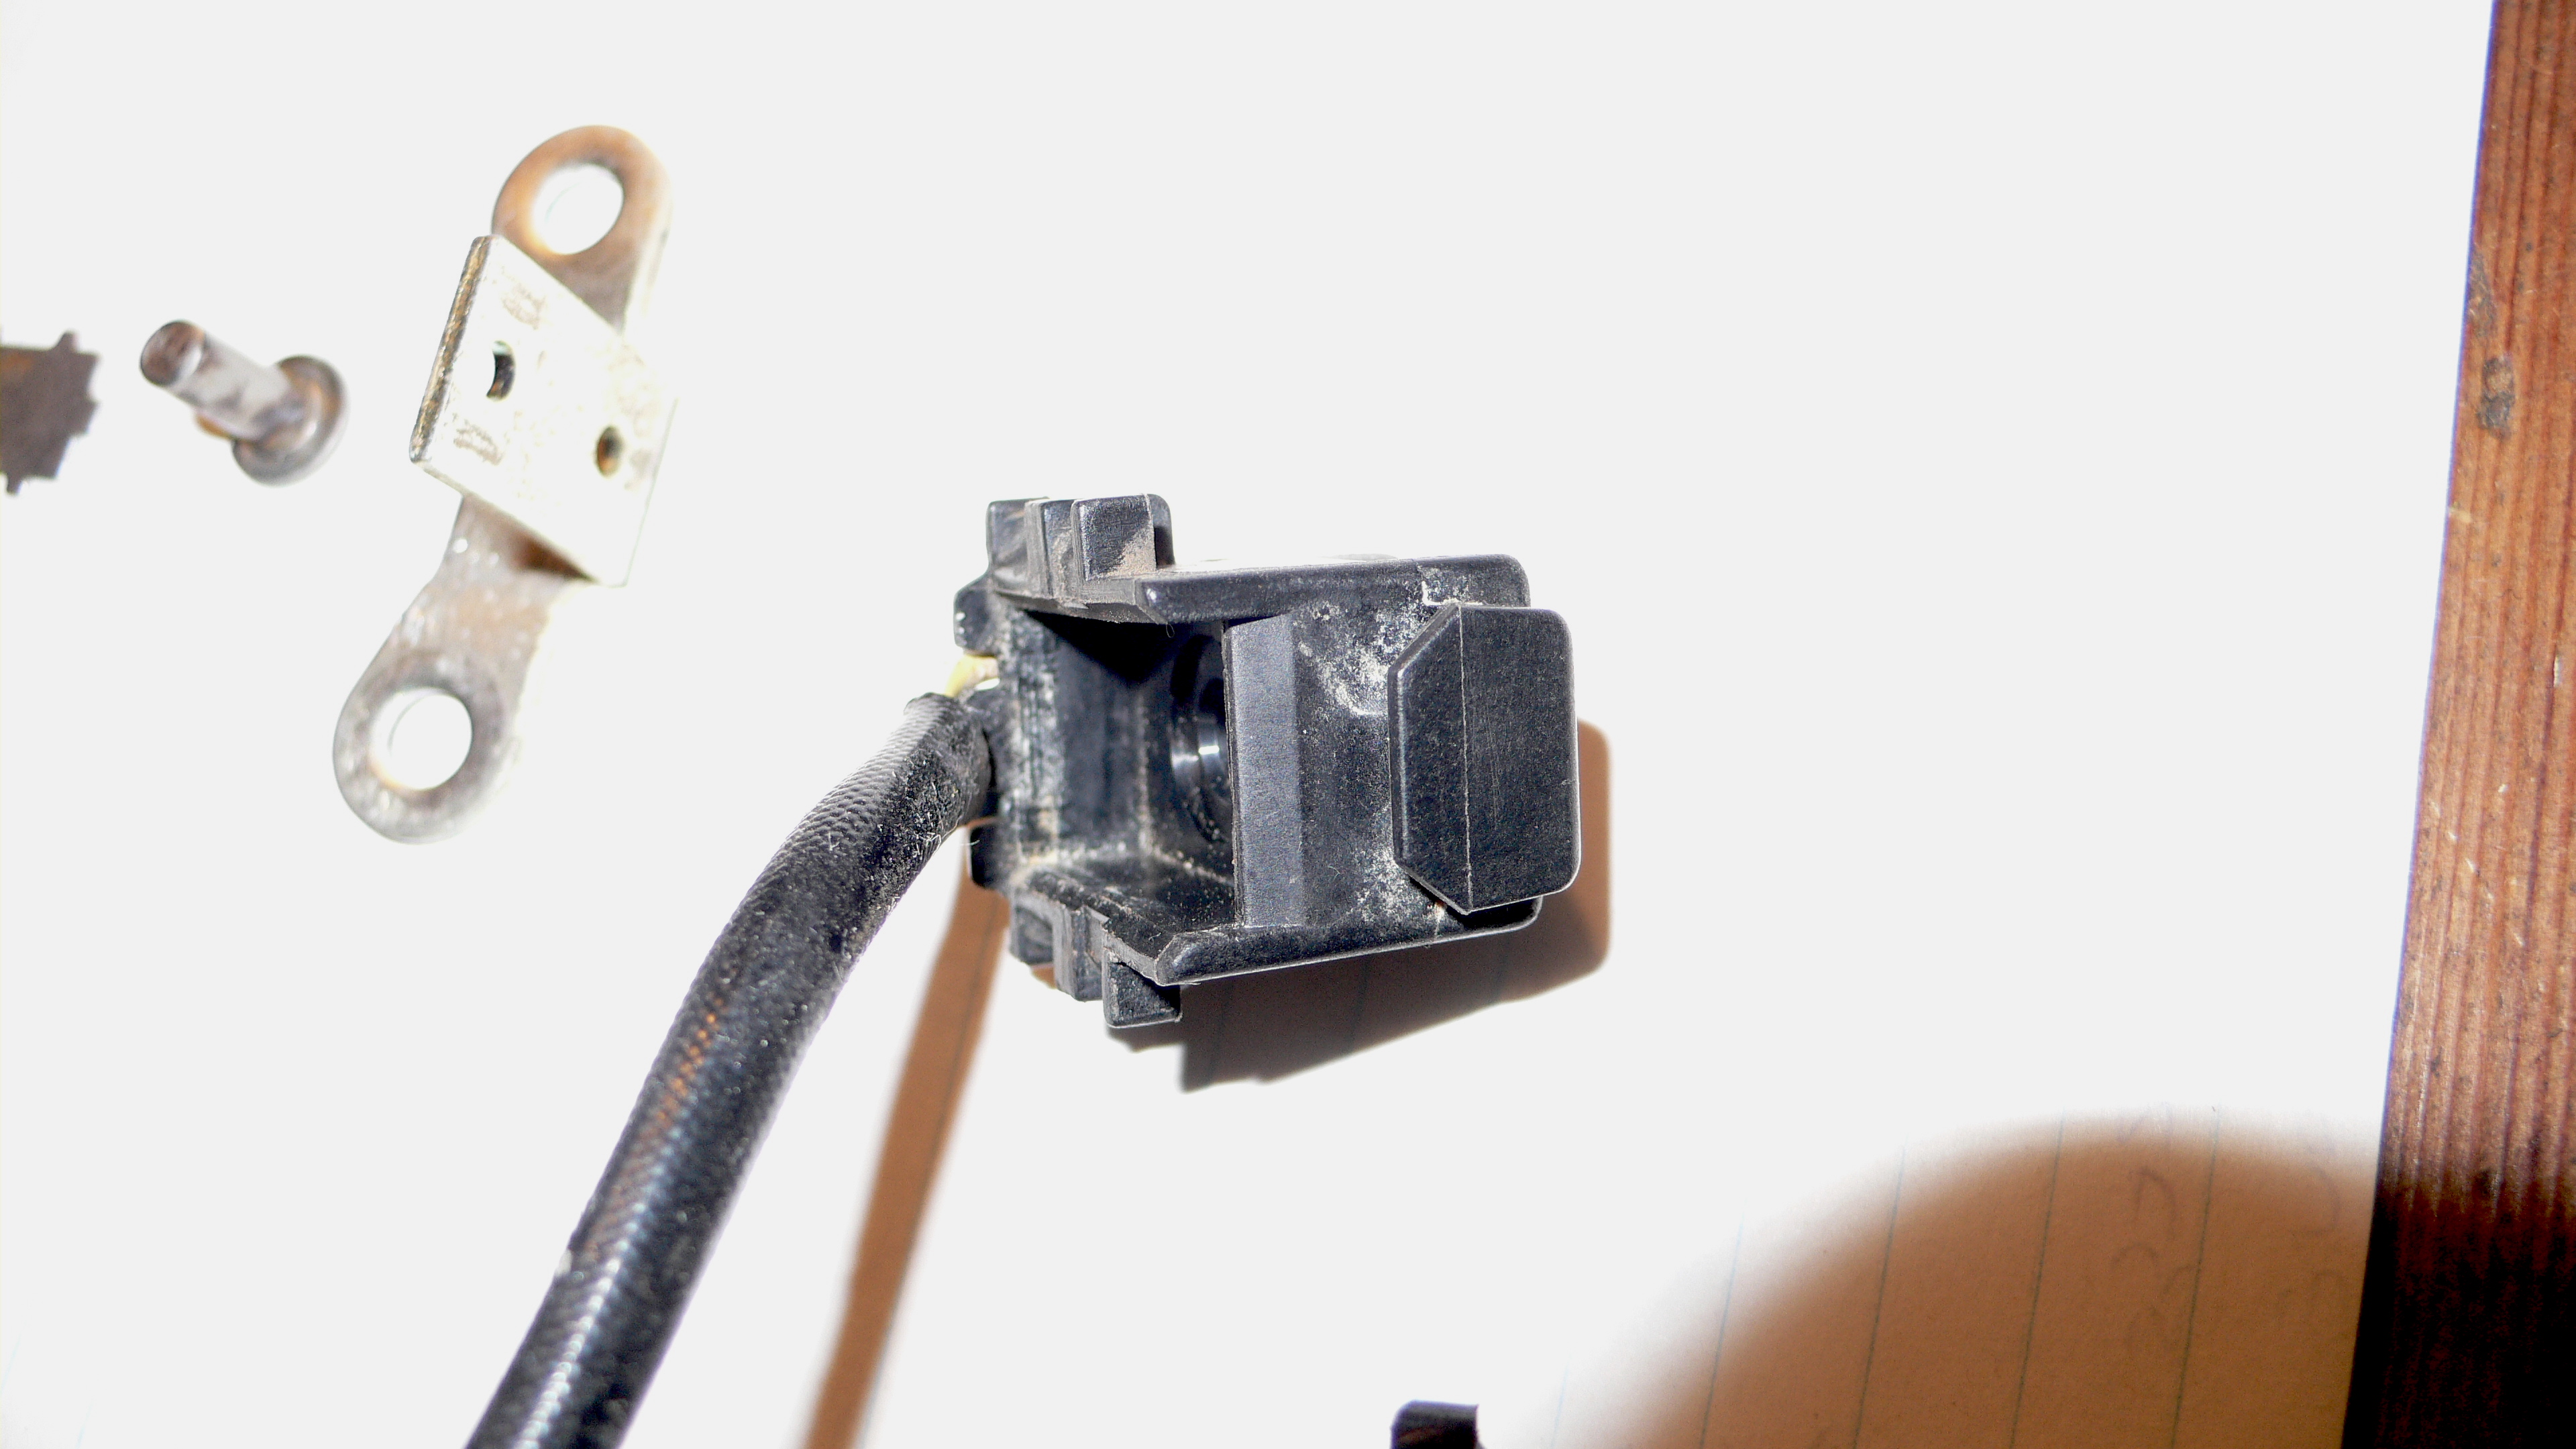
Hey
I would like to share my findings regarding the expensive rotax 912 trigger coils. It all started with a 300 rpm mag drop.....
The manual states the values regarding the resistance across the winding of the trigger coil (inside the plastic housing) and when I measured mine it was within limits. Then I measured the resistance between the center pole piece and ground....I had a high resistance and each trigger had different values (there is NO info anywhere about that measurement). I thought it should be an open circuit there ....and as I am curious by nature, a few hours later I had the trigger appart to see how it is built inside. Looking at the simplicity I would like to see these triggers cost 8 $ each.......and not the 200 $ rotax is asking us.
Also I found some of the center pole pieces to be covered in rust as there is no seal between the plastic casing and the pole piece going through. The high resistance I measured is normal I think as the center pole piece is in contact with the magnet and the magnet is stuck to the metal bracket. I actually am measuring resistance through the magnet.
That's it for my latest head scratching activity

 2 people like this
 -
I love it......could you give us an idea how long the editing work took you?? Do you need a particularly powerful computer??
Thanks
Genial, salutations Laurent
1 person likes this -
Hey Pascal,
also look at the latest rotax list of stolen engines.....it is a must when you buy second hand.
https://legacy.rotaxowner.com/si_tb_info/serviceletter/sl-912-013.pdf
-
Hey Pascal,
when I was looking for a second hand 912 there were 8 engines out of 10 not legit/scam. I found a very effective way to sort out the real vs scammers by saying I was very interested, ask for additional close up pictures. If I got the pictures I would propose to meet in person to pay & pick up the engine (or tell the seller a german friend of yours will meet him) . At that stage I would request the address and personal info. Most scammers will end the communication there!!!!! If the engine is legit, I would ask the seller to bring it to an engine shop and have the shop take the engine, pay for it (you'll have to send the money to the shop) and crate it to send it out to you. Most shops will do it for a fee.
Hope this helps
P.s I found all lower priced 912 engines to be scam!!!
-
That damage is classic when your tail spring bolt breaks.
Thanks, I stand corrected. Great to learn stuff. I thought a tailwheel hitting the rudder would inflict more damage.
-
Looking at your damage I don't believe the tailwheel hit your rudder. Instead I would bet someone (not clever) tried to move the aircraft lifting the tail using the bottom of the rudder as a "handle"....the only/easiest place to lift if the wings are folded.
I might be wrong but here my 2 cents
-
Huge, soft tires must play a major role!
Just had to say it....I have no shock absorption at all on my rig (avid catalina) besides my 8.00x6 'small' tires...every landing I try/have to make it a soft one, go arounds are normal for me...
Big tires and bush gear gives more margin for sure.
-
specs please.....useful load, stall speed, cruise speed, landing distance, endurance and of course empty weight ( I do have to be able to carry the thing...)
1000$ is a bit light ..... I would rather pay 10'000 $ if the specs are good
1 person likes this -
Hey Jim, if looking at the registration this would be in the UK (Great Britain/England).... I would say plenty of power to pull that glider into the wide blue sky
") Probably a rotax 912ULS under the hood.1 person likes this
Probably a rotax 912ULS under the hood.1 person likes this -
Who do you deal with to get those Jo bolts? I looked at Hanson Rivet, but didn’t see a contact number. I have no idea how to cross reference a SS43FS rivet.
You can try these guys
https://trsaero.com/monogramaerospace/products/blind-bolts/visu-lok/
The visu-lock is easiest to install without special tool as the threaded rod section has a flat allowing you to install a wrench so as to turn it ...
You will see the strength on the above website....make sure they are not too strong as the aluminum spar is relatively soft and might deform when you install a too tough lockbolt
The SS43FS rivet is a stainless steel and all I found is a quote from Dholly, see below:
" the first number after the material code (i.e., SS=Stainless Steel) indicates the diameter of rivet in 32nds of an inch (i.e., 4=4/32" or 1/8") and 2nd number indicates the length of the rivet in 1/16ths of an inch (ie., 3=3/16").
Therefore, SS43FS would be a 1/8"D x 3/16"L Stainless Steel rivet. Not sure if FS refers to head type, but I suspect using a standard round or universal..."Now regarding the strength of a 1/8"D x 3/16"L Stainless Steel rivet, I found a company providing aircraft grade ss pop rivets with all the data (it is mostly in mm so you will have to translate into inches). See page 18 onwards for SS pop rivets.
https://m.europages.com/filestore/gallery/df/f/19339320_b8fe5d0d.pdf
Also note that the Jo bolt system can have different names like "Jo-bolts, Visu-lok®, Composi-Lok®, OSI Bolt®, and Radial- Lok® fasteners use the drive nut concept and are composed of a nut, sleeve, and a draw bolt
Here a little write up for you:
http://www.flight-mechanic.com/structural-fasteners-special-purpose-fasteners-blind-bolts/
-
Hey Doubleclutch,
Welcome, you have landed at the right place, people are awesome and usually there will be a solution for a given problem.
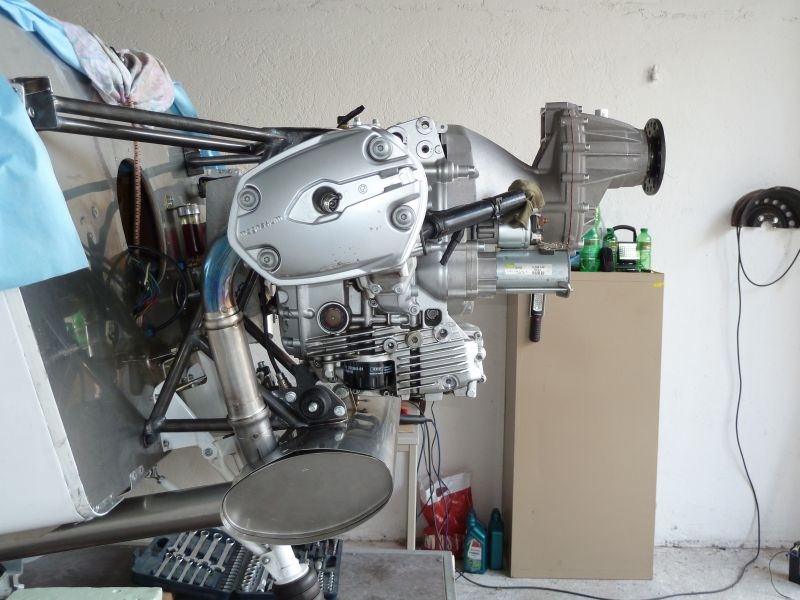
I have always wondered about the BMW1200 engine conversion....anyone tried that?? Parts are cheap and engine (110Hp) is reliable
 1 person likes this
 -
Thank you very much for your reply. I Googled Jo bolts and I guess and would have to buy the whole shebang tool and all for 2 rivets. Did you buy the kit? I saw $490, rivets were about $2.50 apiece.
Wyatt
Hey Wyatt, just get the correct size Jo bolts...you can install using a couple wrenches / pliers...no need for the tool (no space anyhow)
Hope that helps
-
Hey Wyatt,
your 'impossible ' rivet install may be solved by installing an aircraft grade Jo bolt. Below you'll find a video to show you how they are installed. The principle is the same as a pop rivet but instead of just pulling a shaft through the rivet body, the Jo Bolt uses a threaded shaft and a disposable nut (breaks when pull pressure is obtained). In the video they show you the install using a tool (no space for you) but I have installed Jo bolts with success using two spanners (one holding the nut and one turning the threaded shaft until it breaks). It is a bit slow to install in a tight place but I am sure it would work on your strut fitting .. The Jo bolts are much stronger than pop rivets.
1 person likes this -
One thing I wish some one would have told me is to attach the inboard hinge and the far outboard hinge then pull a string line under the flaperon to set the other two. You do this because if your a tiny bit off. when you move the flaperon up and down it will bend the trailing edge of the wing up and down. I noticed that when I did mine. so I pulled it off epoxied the holes shut and started over. Live and learn I guess.
Hey Tjay,
you're perfectly right but I also found out that if you do a perfect alignment job being static on the ground, then in flight with the wing flex you will have quite a bit of binding when you deflect the flaperons one way or another (trailing edge moves in flight). For me I found the solution was to have a bit of "slopp/play" in the plastic hinge bushings (but no play in any control linkage).
My 1/2 cent
.jpg.1734af5bf1b9e5b5fae07d0b19993957.jpg)


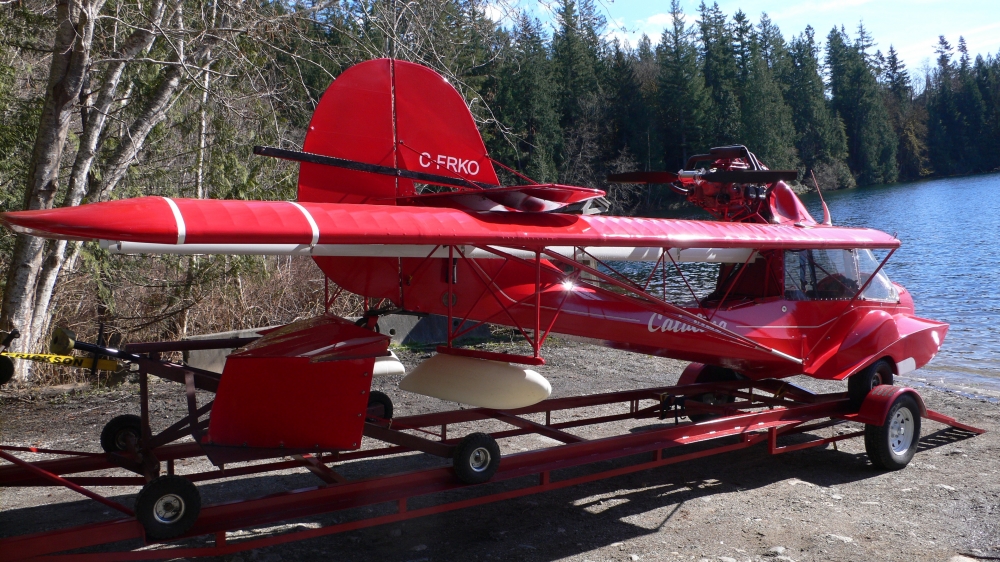
Avid Catalina for sale on ebay
in Avid Catalina
Posted
That does make sense...
& nice way to hang the wings