motortommy
Members-
Content count
25 -
Joined
-
Last visited
Everything posted by motortommy
-
motortommy added a post in a topic wing spars for Europe
Yes that`s also my thinking. I´d love to buy from the factory (spar $195) but packing & freight add another $1420 Plus the risk that something stupid could happen during the long journey...
@Manu: Thanks! will check ULM Tech
-
0
-
-
motortommy added a post in a topic wing spars for Europe
might be an option, but to be honest I like to go `genuine factory` with my rebuild. I have already a sleeve I want to get rid of...
-
1
-
-
motortommy added a post in a topic wing spars for Europe
Hi Skelly,
I´m in need of only one for a mk4, means without extruded stiffener...
Thanks.
-
0
-
-
motortommy added a topic in Avid and Kitfox parts Suppliers
wing spars for Europeas I´m probably in need for a new Kitfox IV spar, I contacted the factory. While pricing for the spar itself would be quite reasonable, transportation costs are infernal.
So meanwhile I found a mill located in Germany producing following spec.
2,5"x.065 162"
EN AW-6061-T6 seamless drawn
EN 573-3, EN 754-1, 2+7
EN 10204/3.1
Where`s the beef? Minumum slot they produce would be 7 pcs. Price would be around EUR 300,- per spar.
Please PM, if you`re located within Europe and interested.
- 10 replies
- 1,504 views
-
motortommy added a post in a topic New wingtips...
So was it worth the effort? Yes and No!
For the spent money (materials, tools, …) I could have bought likely a set of factory tips, including horrific transatlantic shipping cost. Further it took me roughly 3 months (sure not fulltime) from scratch to finished part, but:
- my wingtips were in desolate condition, badly repaired and way too heavy (left 2.3kgs/right 2.7kgs)
- even the modern style tips I borrowed still weighed 1.5/1.7kgs
- my new parts weigh 1.5 per set, means only by replacing the tips I saved 3.5kgs including preferred new look for free!
- I wanted to try, if I´m still able and willing to work with fiberglass (after having 25years break) as my planning is to touch seatpan, cowling, wingtanks, panel,… as well
Finally after tearing the whole plane down for months finding more and more issues I didn`t like, it was mentally important to create something gaining strength to proceed with the project. These wingtips were the first new homemade parts I made for my plane…
OMG it´s difficult to express…hope you get my point.
Thanks for reading!
-
6
-
-
motortommy added a post in a topic New wingtips...
Part4
vacuum process was successful!
honeycomb bonds perfect w/o bubbles or unglued spots. Next was some grinding to get a nice fit and smooth transitions...
...test fitting the molds together to check fot both clearance an space for glue. The honeycomb offers a nice surface for a strong bond.
Then again into the vacuum bag after the inner top layer was applied. coffeetime!
Now the sandwich is ready, including both inner and outer layers enclosing the honeycomb. Cutting protrusions and preparing for bonding.
Finally the halves were glued together using additional 1" reinforcing tape covering seam and edges. Now it`s getting hot! Both wingtips, still in their molds went into a heated box for tempering the epoxy resin for about 8 hours @ 75 deg. C.
l
Exciting moment. Final demolding! No trouble, no damage! YES!!!
Even slightly better than calculated. Final part is 730grams means 1.6lbs?! Further only 40grams variation between left and right part. That is marginal for homemade handcrafted production
Finished part, ready for paint preparation
End of story
-
3
-
-
motortommy added a post in a topic New wingtips...
Part3
So after cleaning the molds were polished and coated carefully several times using release agent. Finally first parts were made. I decided to go with a sandwich construction consisting of only 3 very thin layers of fiberglass enclosing an aramide honeycomb core. Each wingtip is made up of two halves which were glued together later using a reinforcement tape.
Some may ask why no carbon fiber?
I wanted to have both lightweight but also robust wingtips. To achieve this with pure carbon layup, more layers soaking lots of resin (=weight) would be needed. Pricy and IMHO no advantage here.
Further, I wanted to try a sandwich construction using vacuum technique anyway in view of future components like cowling, seatpan, etc., I`m planning to do.
All four waxed molds have gelcoat and first layer of 80gram on - let it set.
If proceed w/o wait following vacuum pressing would cause imprint on top surface…
Next is matching/cutting the honeycomb core. Nice material easy to work with, though expensive. The uncovered area will later touch the aluminum stripe attached to the outer rib.
Honeycomb is glued in a wet bed of an underneath additional 80gram layer. Covered by perforated film (blue) absorber fleece (white) and a peel ply stripe. Afterwards the package was carefully put into a poly bag. A vacuum pump will soak excess resin through the foil into the absorber. Less resin means less weight!
Pump is working at least until resin has set (better 5h). Check for leaks!
Time for beer or coffee!
To be continued…
-
6
-
-
motortommy added a post in a topic Another Kitfox IV rebuild project
John. Thanks! I immediate saved your .pdf via Facebook. I also spent nights studying cub-style landing gear. As both commercial options (groove and cabane gear) are out of scope, I probably also will end up making my own...Thanks again for your time creating the file.
Question regarding the bungee. Is your planing to go with the wraps? What about using fabricated rings? Both options: How to determine correct force/tension?
-
0
-
-
motortommy added a post in a topic New wingtips...
Part2
See how the black resin molding compound faded more and more as the fiberglass layup builds. I decided to make a strong mold which also can handle tempering. Maybe overkill, but I need to make at least 2 sets
Exciting moment. Will the top half release? Original part unscathed? As with 2-piece molds it is better not to demold until finish both halves, I could not withstand to ckeck. If something would have gone wrong only one surface would be damaged…
As everything turned out as expected, I continued. Lower half (removed parting) and certainly opposite wingtip.
Almost ready. Some trimming and bolts to secure alignment added. No need for ground board anymore...
Finished mold righthand, white is original wingtip (still with insert)
stains are residues of release agent, I forgot to remove before photoshoot
Next. Let`s make parts…
To be continued…
-
7
-
-
motortommy added a topic in Technical tasks
New wingtips...part1
my original Kitfox droop style tips were repaired already several times and therefore way too heavy. Further I like the look of the more modern ones. So it was very welcome to get a set borrowed by a buddy for creating a mold. Due to great stiffness to weight ratio I decided to use a honeycomb sandwich construction (for the first time).
The better the master form the better the mold the better the final produced part. So it was nice that I was allowed to repair, sand, paint and finally polish the samples.
Next step was to fix the quite flexible part safely for further handling onto a wooden board (by the way the borrowed parts belonged to a plane in service so any damage or drilling should be avoided)
As a 2-piece mold was necessary it was kind of tricky to arrange a ´parting plane` where the mold later splits
after some trimming the small left gap was sealed with modeling compound.
Cleaning/waxing - ready to cast the top half!
to be continued...
- 8 replies
- 2,356 views
-
motortommy added a post in a topic case of disaster or to live one`s dream
Jim. I followed your rebuild closely. Lots of valuable input there. Thanks!
-
0
-
-
motortommy added a topic in Introduce yourself
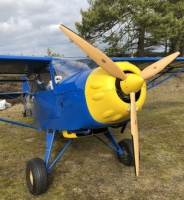
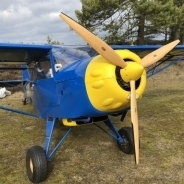
case of disaster or to live one`s dreamLong time following the forum I`d like to say hello officially. I`m Marc from Germany (strange spelling explained) and like to share some content rebuilding my Kitfox IV, nickname ´case of disaster´ Further thanks to everybody for countless valuable input I could gain from….
No sure if I should start just another maybe tiring rebuild thread or better to concentrate on specifics?
Anyway this is my new to me project IV #1860, I bought last year and which is currently torn down almost completely
good old times 1993-2009
mishap
after rebuild 2010-2019
- 4 replies
- 1,331 views