
Willja67
Contributing Member-
Content count
174 -
Joined
-
Last visited
Posts posted by Willja67
-
-
i have seen several failures of the tabs that hold the tail spring in alignment at the vertical fin post when stressed. The Avid MK IV DESIGN is much more robust and I suggest that if your fuselage is not covered that you consider making that modification and for that matter even if it is covered. They never seem to fail at a convenient time. If anyone is interested I can provide pictures of the Avid and also how we modified Larry's old plane (Old Yellow) after the tab failed at Johnson Creek last year. If you land perfectly every time then maybe you don't need to think about this little upgrade. This happened again today to another KF at a flyin that I attended. I wonder if KF has made improvements in their later models, 5 and beyond?
i just looked at a drawing on the Kitfox site and they are still using the same design on the S7, to bad.
Funny, I was just thinking about my tailwheel installation when i opened the site and saw your post. My goal is to have my bird to Oshkosh next year and I'm trying to address all known issues before that time so yes I'm very interested in some pics of your tailwheel mounts.
I frequently entertain somewhat off the wall ideas for the improvement of my plane. Often they're just dead ends but sometimes they lead to a different idea that does get used.
My interesting idea today is to move the tailwheel forward to the next place on the longerons where some diagonal tubes are welded on. The advantages to this are a steeper deck angle for better takeoff aoa and in the event the tailspring fails in some manner the rudder doesn't get crunched. Disadvantages are that tail wheel steering goes away, you may end up crunching the aft fuselage which is probably harder to fix than a rudder and if you really hang it on the prop coming in you might just get your rudder anyway (probably less of an issue for avids than foxes because of the rounded bottom on the rudder) and you would have to do some modifying of your aft fuselage.
Since most aircraft are running differential brakes losing tail steering isn't a big deal, just add a mechanism that locks/unlocks the tailwheel based on stick position like the P-51 Mustang.
Anyway that's my crazy idea for today.
-
Read the post, i havent cut it yet, i said i wanted to cut it to make a storage compartment, havent done it yet it on shelf, everyone bad mouths them aluminum tanks, ive tried buyin a 2nd one a few time here and other site, soon as i ask about one everyone tells me how i shouldnt use it, buy one, ect,ect,ect, by the time they stop ive had enough talk so i give up on the idea.
Anyways ill part with mine also, its perfect and i tested it, it has no leaks, by the way they weigh 5.4lbs each.
You said you had one you pulled from a wing I inferred you were offering me that one( kind of difficult to tell what you meant since you also stated you wanted to use it for a storage compartment). And i wondered if it had been damaged during removal. In any case i just bought Jim's tank.
-
I have one from a right side wing. 6 gallon I believe. I think the cap was used on another tank, but here is a picture of it. JImChuk

Jim, pm sent.
Buck,
I'm interested in it as a fuel tank, so if you cut it out of a wing I'm guessing it's probably not going to hold fuel without being repaired?
-
Anybody have the original aluminum wing tanks for the kf 1-3 just gathering dust on a shelf? Hopefully hasn't been sloshed but if so I'll deal with it.
I'm not going to be using them in the wing. I have another idea I'd like to try.
-
Guys, aluminum weighs 1.81 oz per cubic inch. 1/16" thick aluminum 1" wide therefore weighs about 4 oz per linear yard. Nylon webbing weighs .71 oz per yard, so aluminum weighs 6 times more than nylon.
Tell me again how light it is.
16 thousandths or .016" not 1/16".
2 people like this -
He could have made it heavier, but that would take even more work. Cement, maybe.
You're kidding right? This is .016 aluminium and according to what I've read (haven't has a chance to weigh one personally) it weighs maybe a pound and a half. It was designed by Leonard Millholland who has certainly proved that he knows what he's doing with the legal eagle, double eagle, and maybe other designs I'm not aware of. It's certainly lighter than the fiberglass seat pan for my model 1 would be if you cut it in half.
1 person likes this -
Was browsing another forum and came across the Legal Eagles seat:
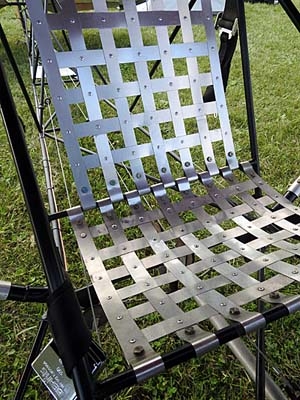
Also found this video:
Very intriguing and looks nice and light. Also since I don't have a sewing machine more practical than trying for a fabric seat. And since I plan to do most of my flying in warm weather the ventilation aspect of the seat is very appealing.
1 person likes this -
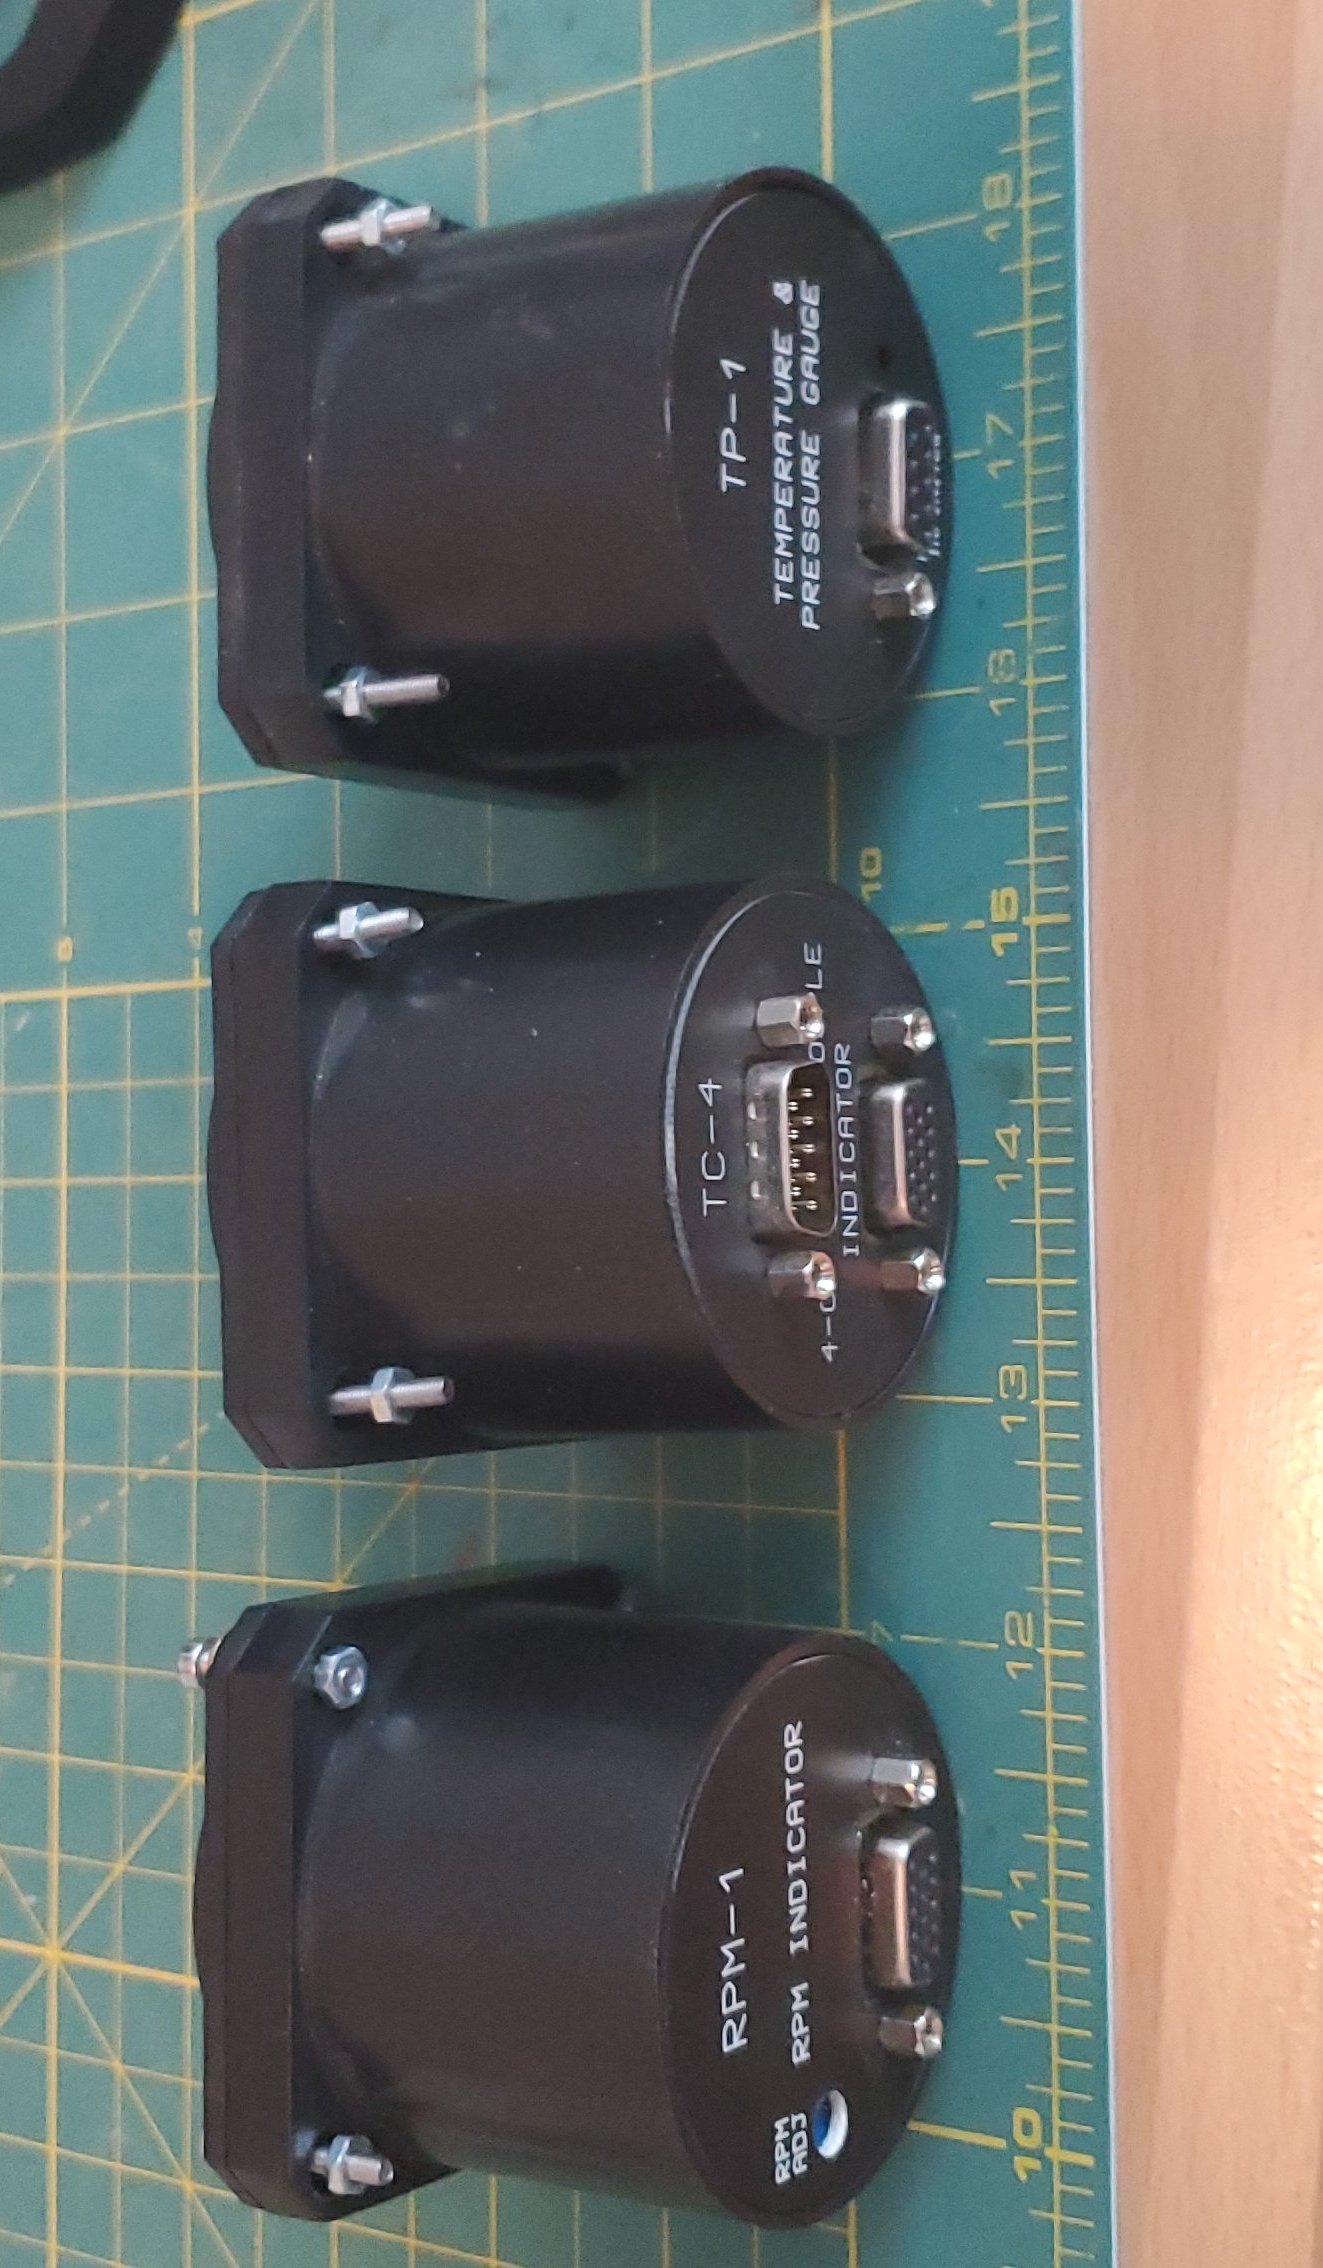
Well im in need of a water temp gauge,( i broke off one of the studes on the back doing wireing) have to remember im workin on planes not equipment. Hahahaaa, and not sure yet why, but my EGT gauge dont work at all, and inhave the wrong tiny tach i need one for two pulses per rev. What r the gauges u have there? Mayb they can fix me right up
Thanks Bucky
One of the gauges is a tach, one is EGT AND CHT, and the other was used for water temp and pressure. Everything you need to monitor your engines health.
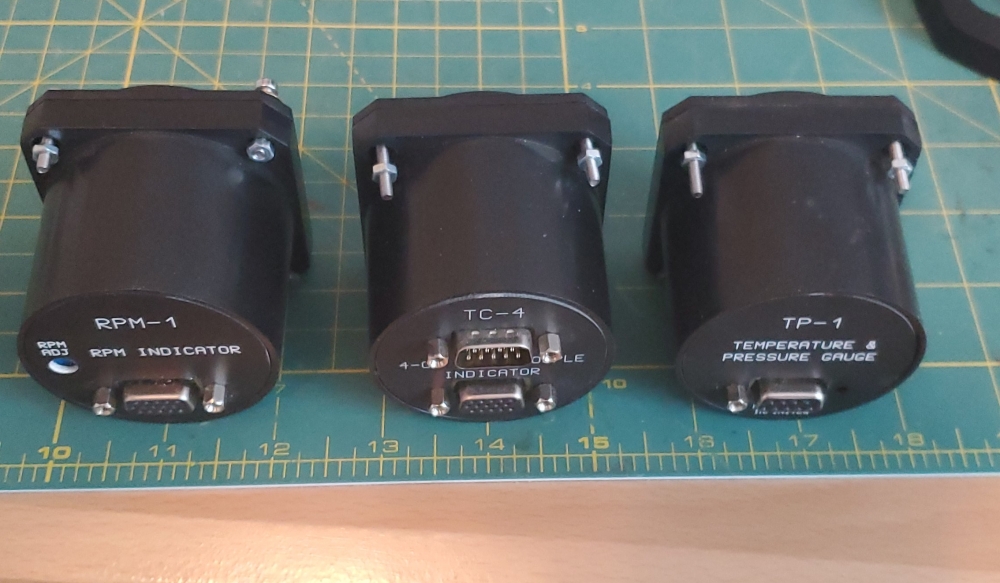
I looked up theprocess on these and brand new they're about $300. They had minimal use so I'd say half of new is reasonable so $150 each.
-
Jim, It looks like you have a clamp up at the top of the double spring, seems similar to what I did to help keep the second spring aligned. This might help Willja67, too.
Yeah I noticed that. An adjustable mount as opposed to the fixed mount on mine.
Btw my name is Will.
The plane just came home from the welder a couple weeks ago and i was hoping i wouldn't have to take it back.
-
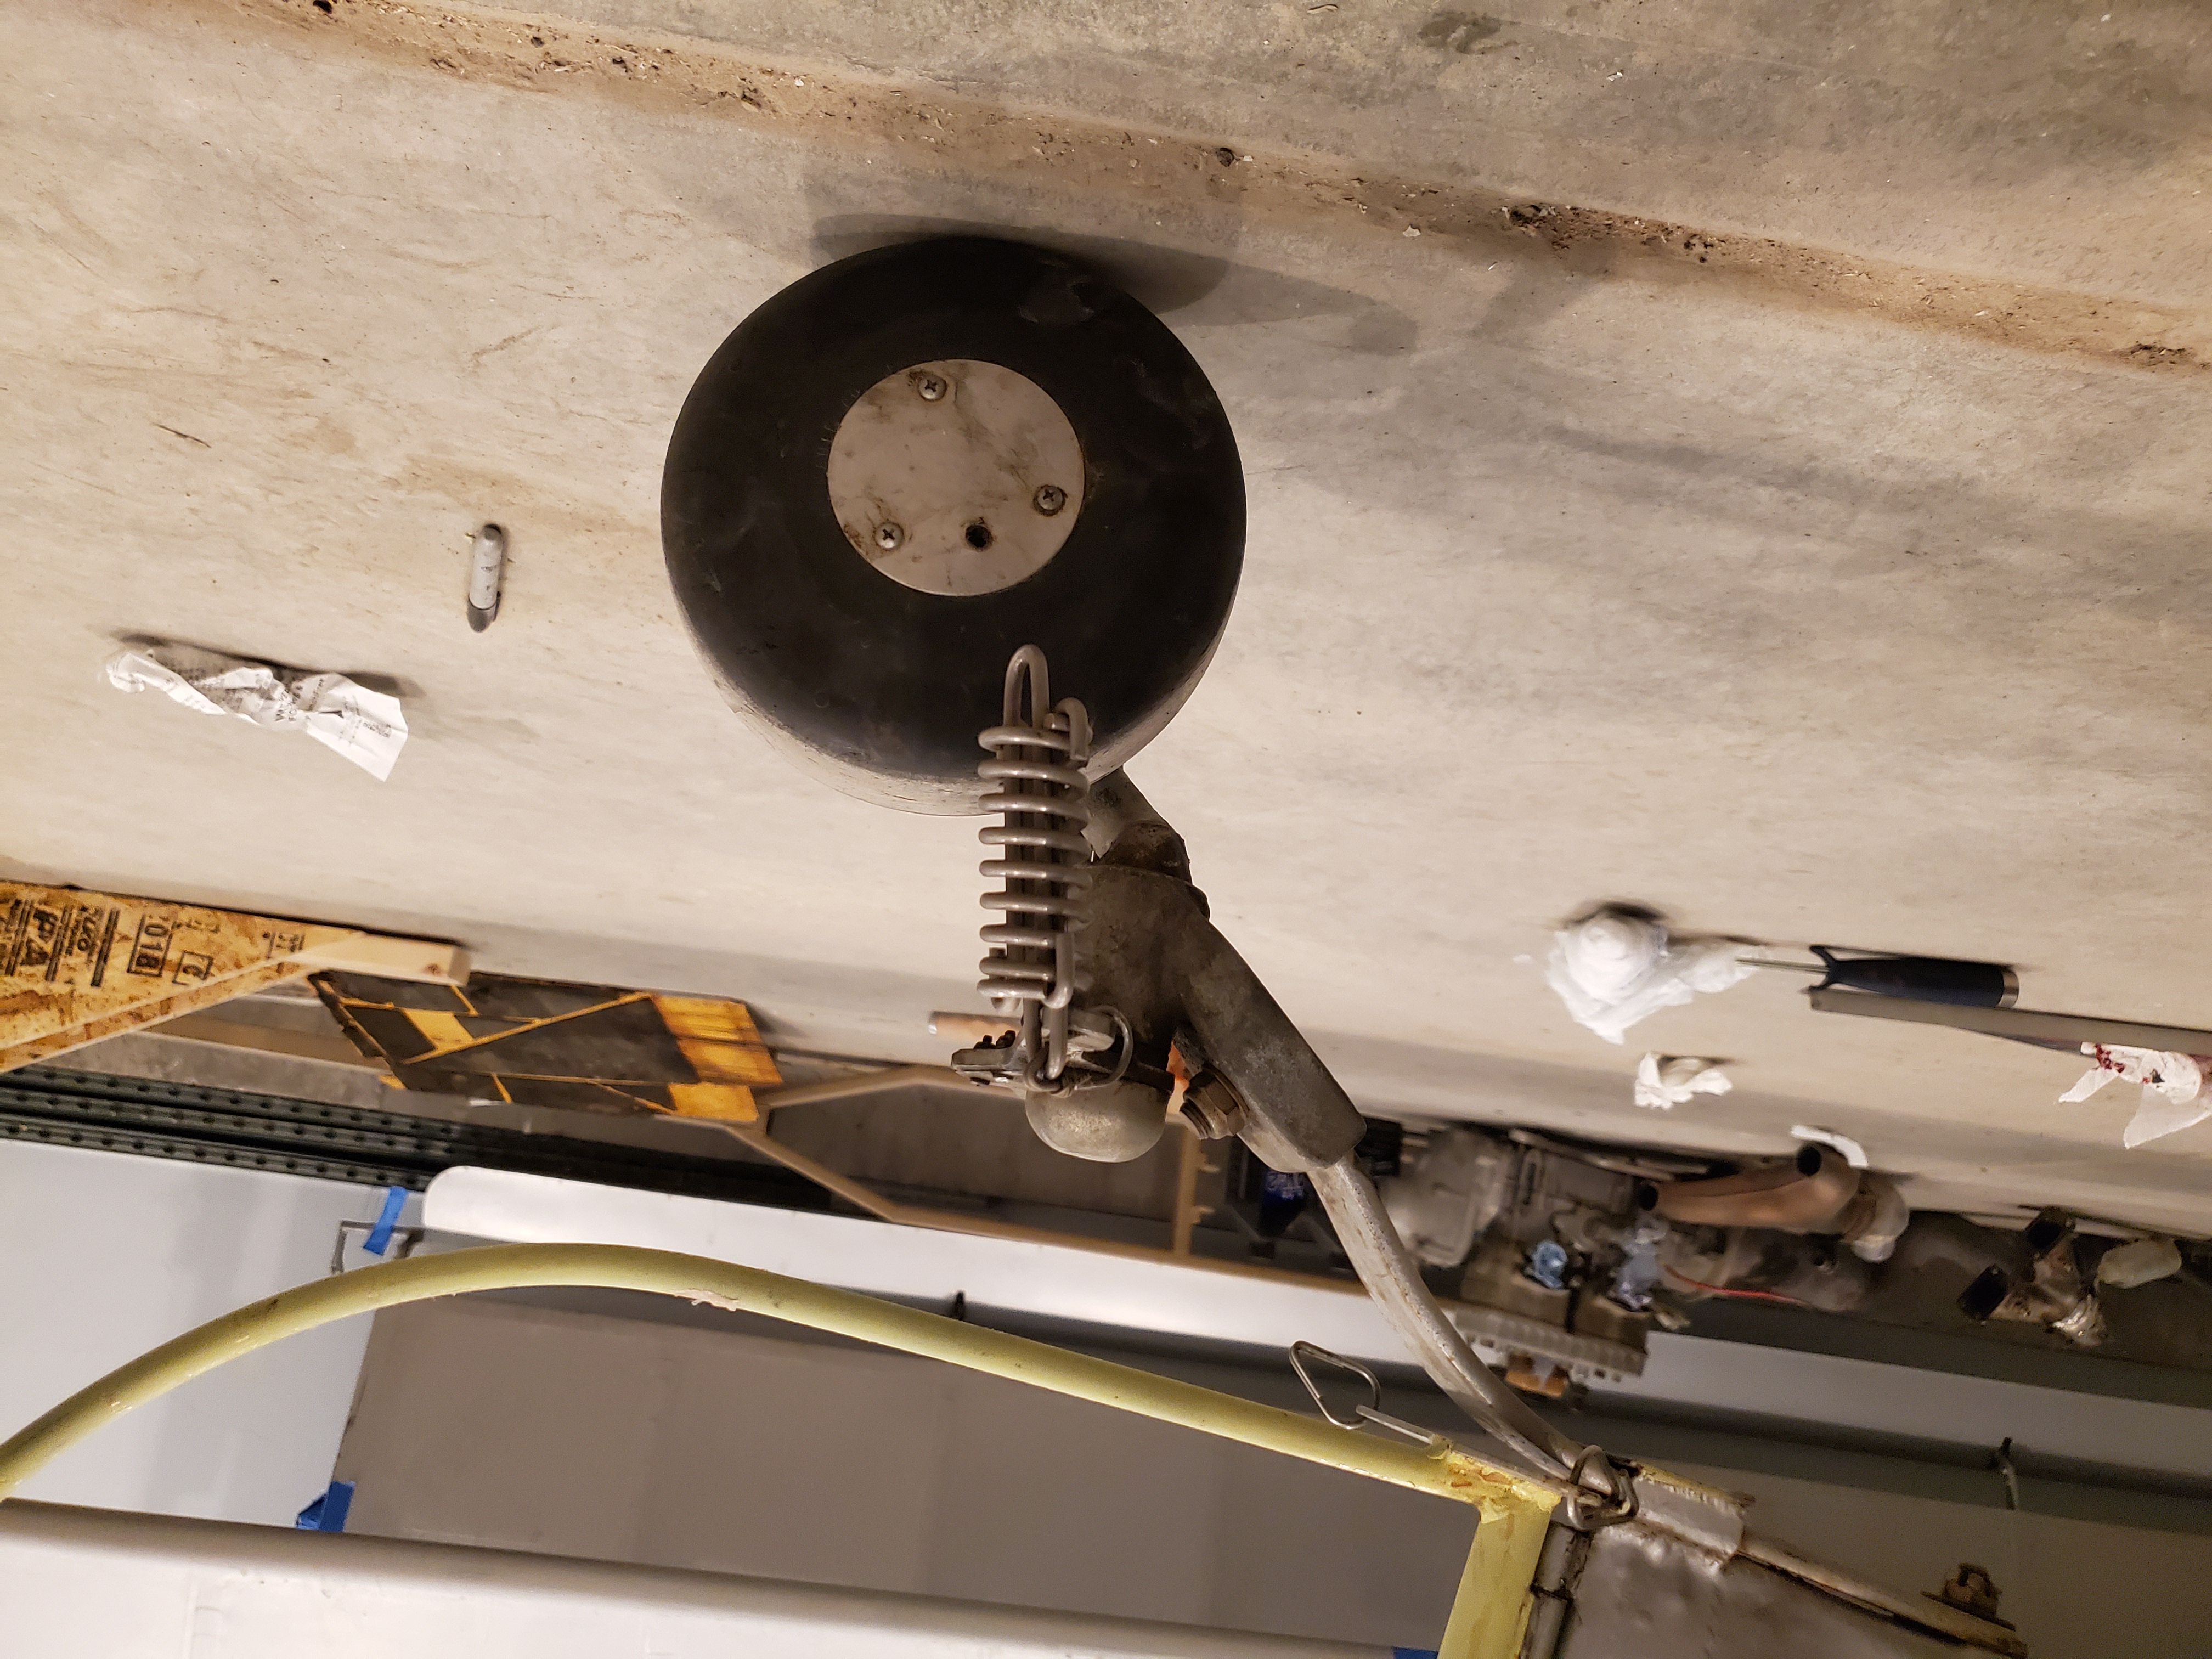
It looks to me like the spring changes angles right where the tail wheel assembly slides onto it. My suspicion is that the spring is starting to permanently deform.
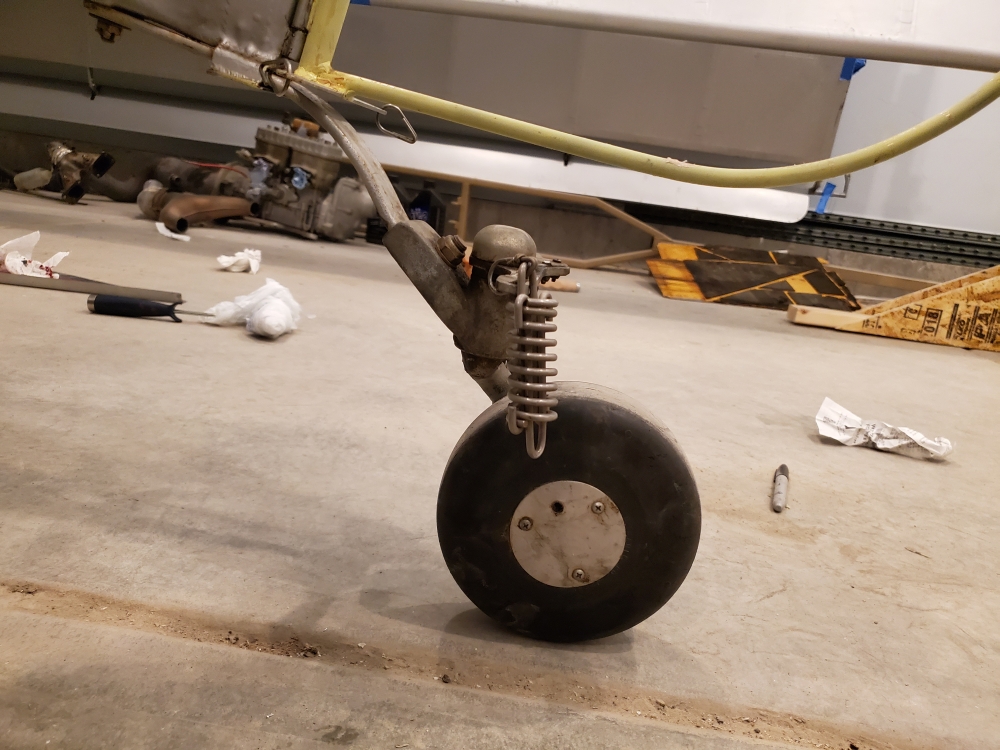
If that's the case I'm guessing a hard landing or 2 might crunch the bottom of my rudder. I've heard that it's a good idea to double up the spring but given that the rectangular thingy that attaches the spring right at the bottom of the tail post is only large enough for the spring that's there, I'm wondering how that's done? The current spring is about 3/8" thick and the rectangular thing it's maybe 1/2" inside height.
-
That plate might be what I was thinking of. I must be remembering wrong. Blame it on the 70s. I'm 70 now.
Well maybe not. I was thinking the cargo pod would be completely behind the gear since i was looking at the cabane on my new gear and thinking nothing would be forward of that but with the older gear you don't have that limitation. This is the only style of cargo pod a quick search turned up. I was envisioning something more like the cubs have.
Better not land too hard you could rip that right off with the bars the bungees wrap around.
-
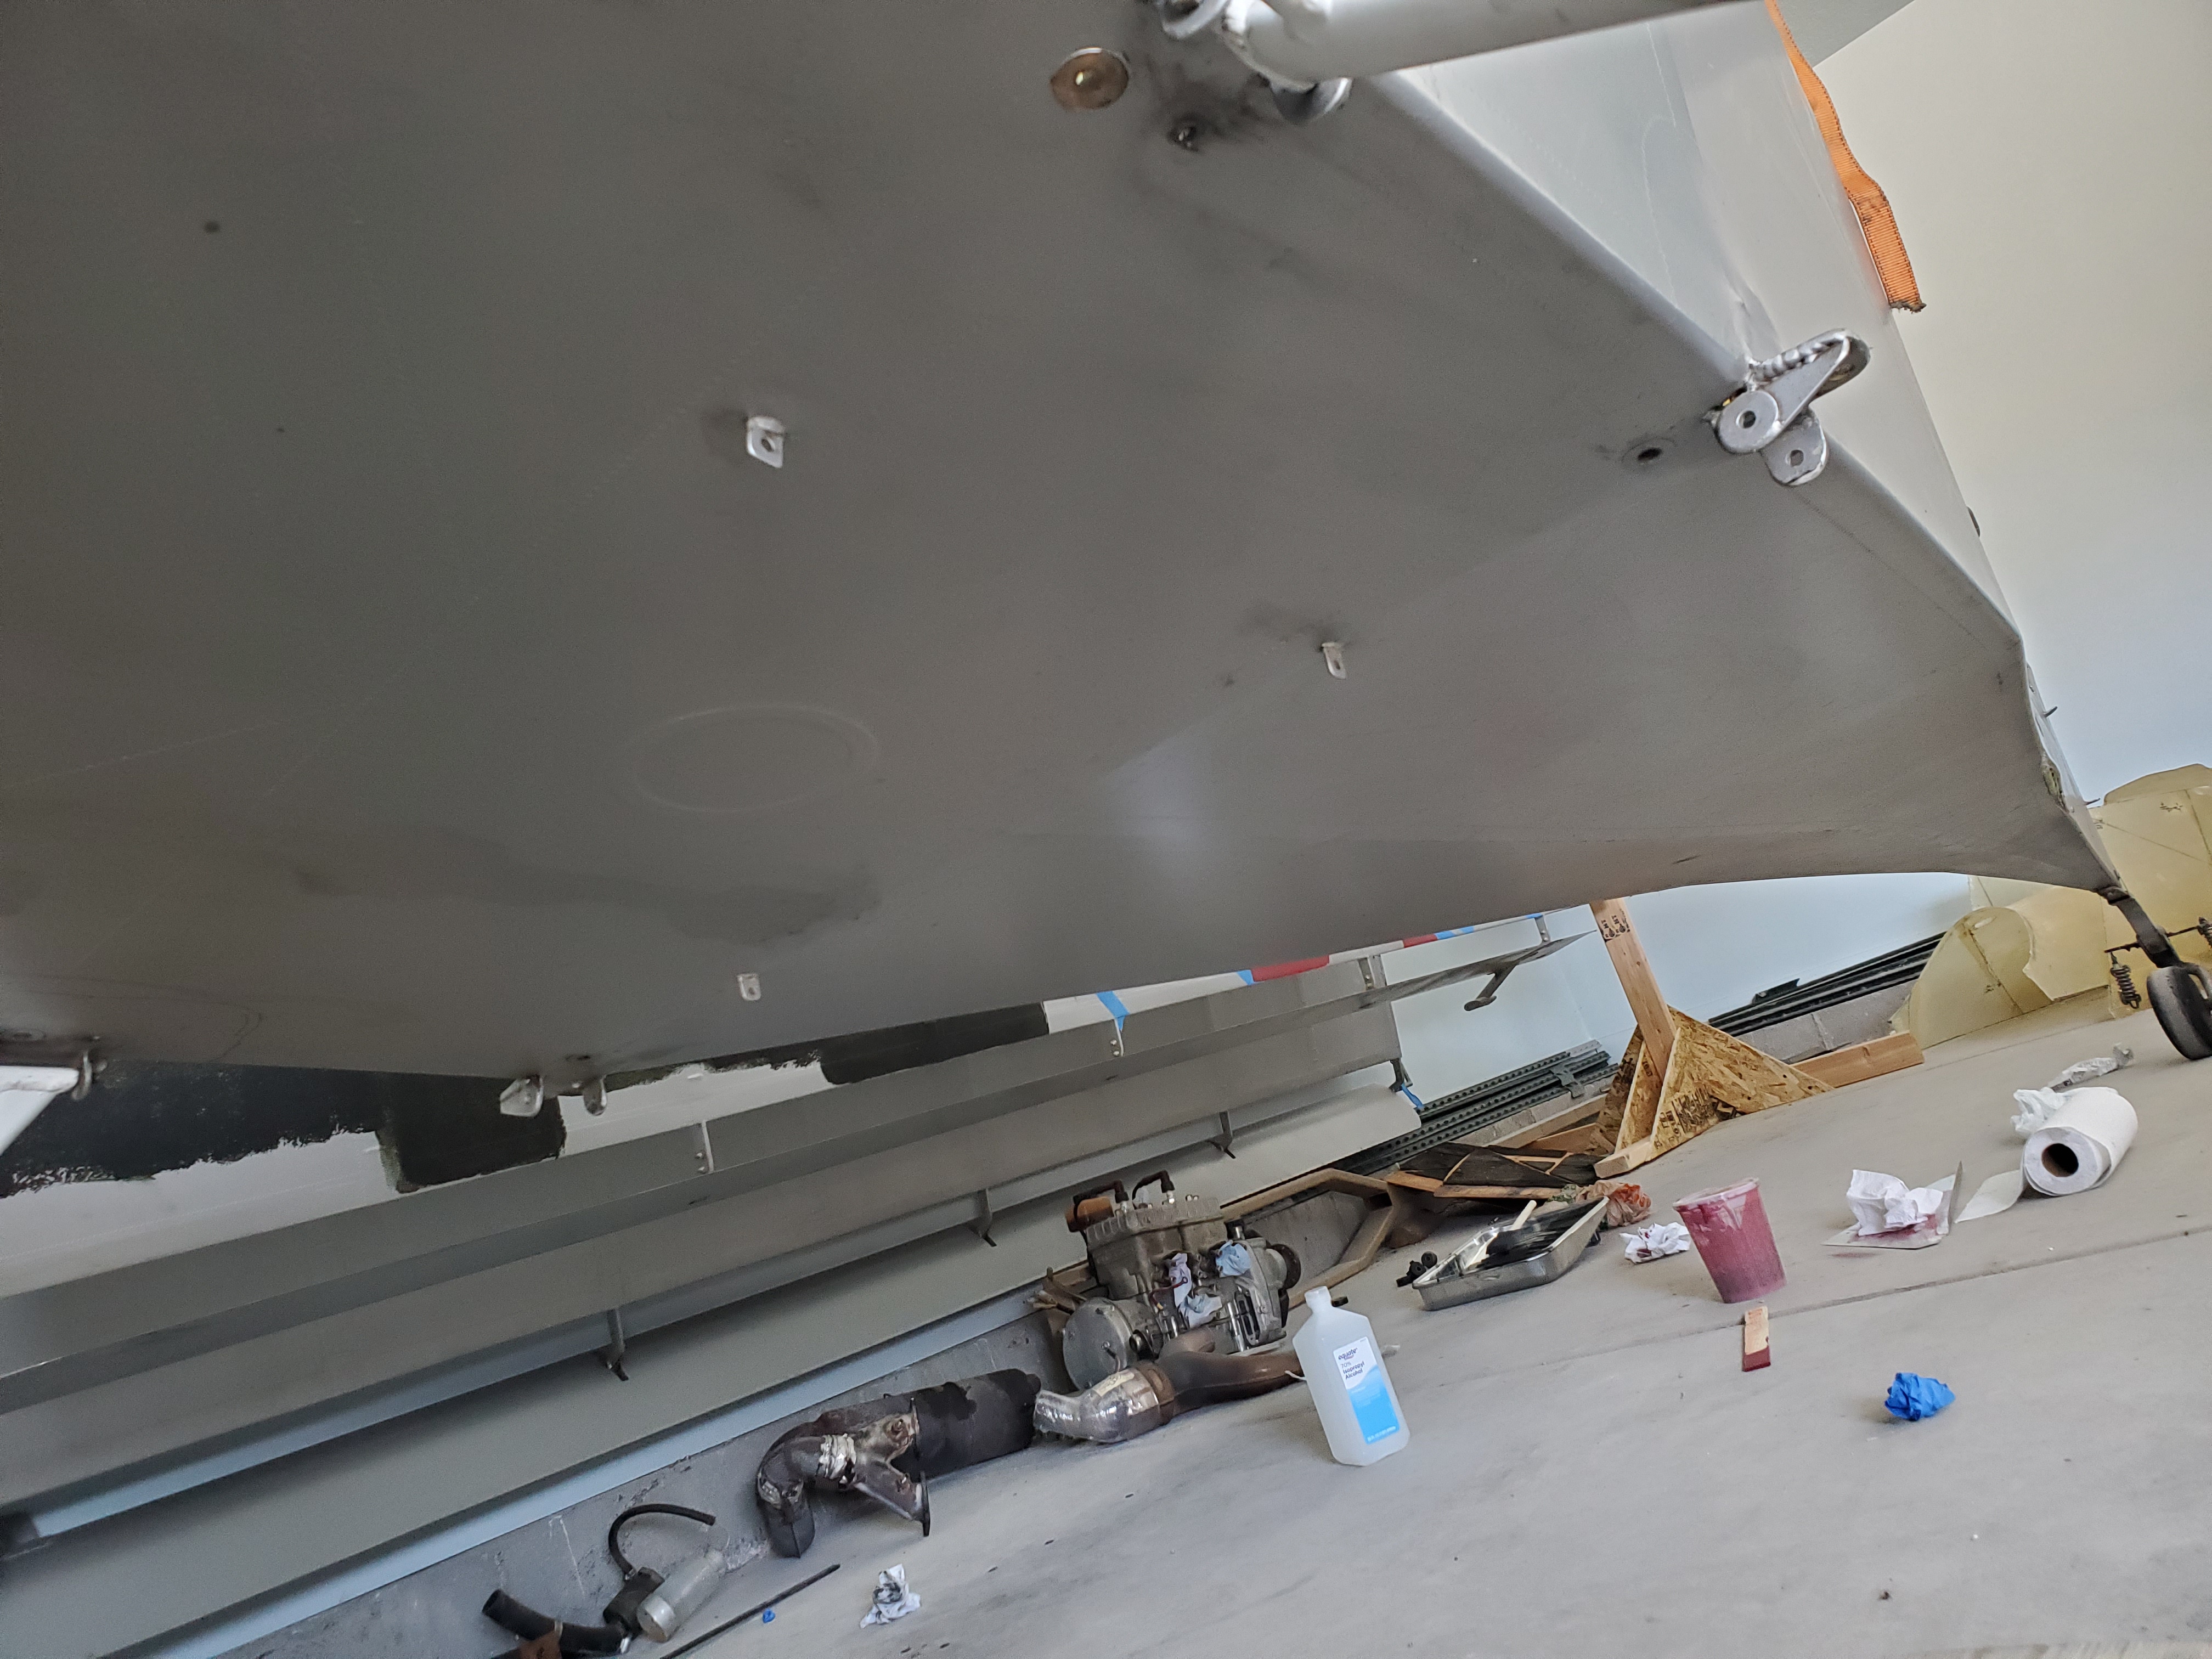
As said above, they are to attach a cargo/belly pod. There is a forth attachment point just in front of the right side of the control column. For some reason ...maybe to do with the shape of the belly pod or something...that attachment does not hang downward through the fabric like the other three. It is just a flat piece welded on to the fuselage tubes. It has a hole in it to put an eye bolt through for the fourth attachment point. I back drilled a hole through it and up through the floor board before I covered the fuselage bottom so I could find it if needed later on.
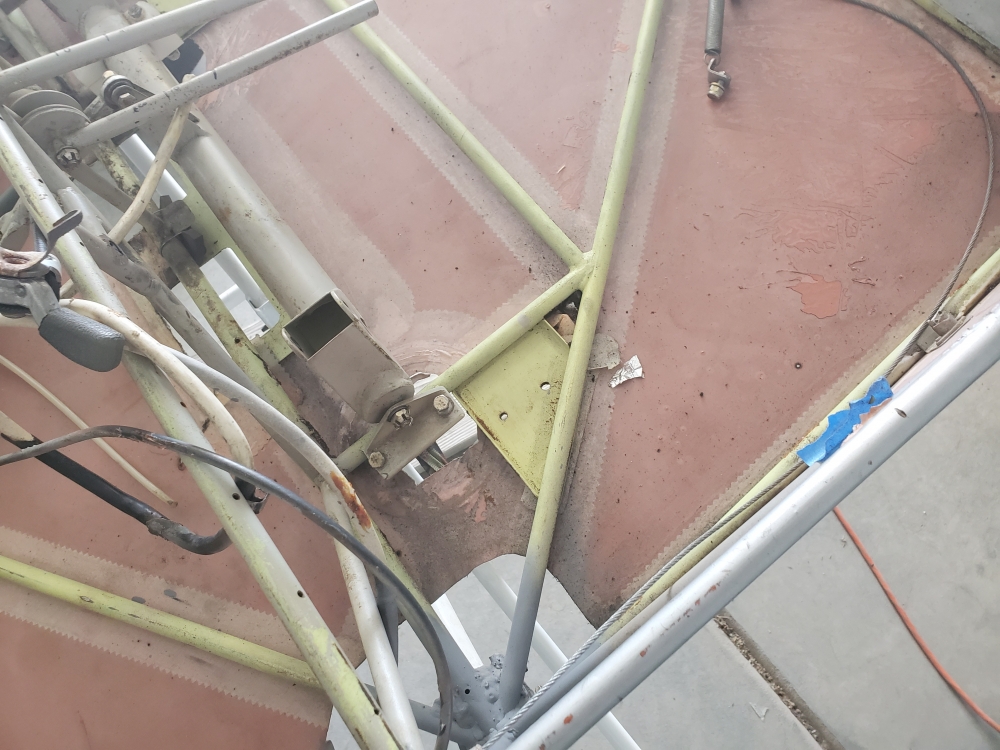 I assume you mean this sort of triangular area? That's where my radiator bolted to, kinda hard for me to visualize how a cargo pod could be bolted here especially with the original landing gear.
 -
My guess would be either mounting for a belly pod or aerial spray application.
I wondered about a belly pod but dismissed that idea as there is only 1 tab on the forward tube. But maybe? Does anyone else have these tabs or were they a custom mod by the builder or a previous owner?
-
I've had the plane just shy of a year and just barely noticed these:

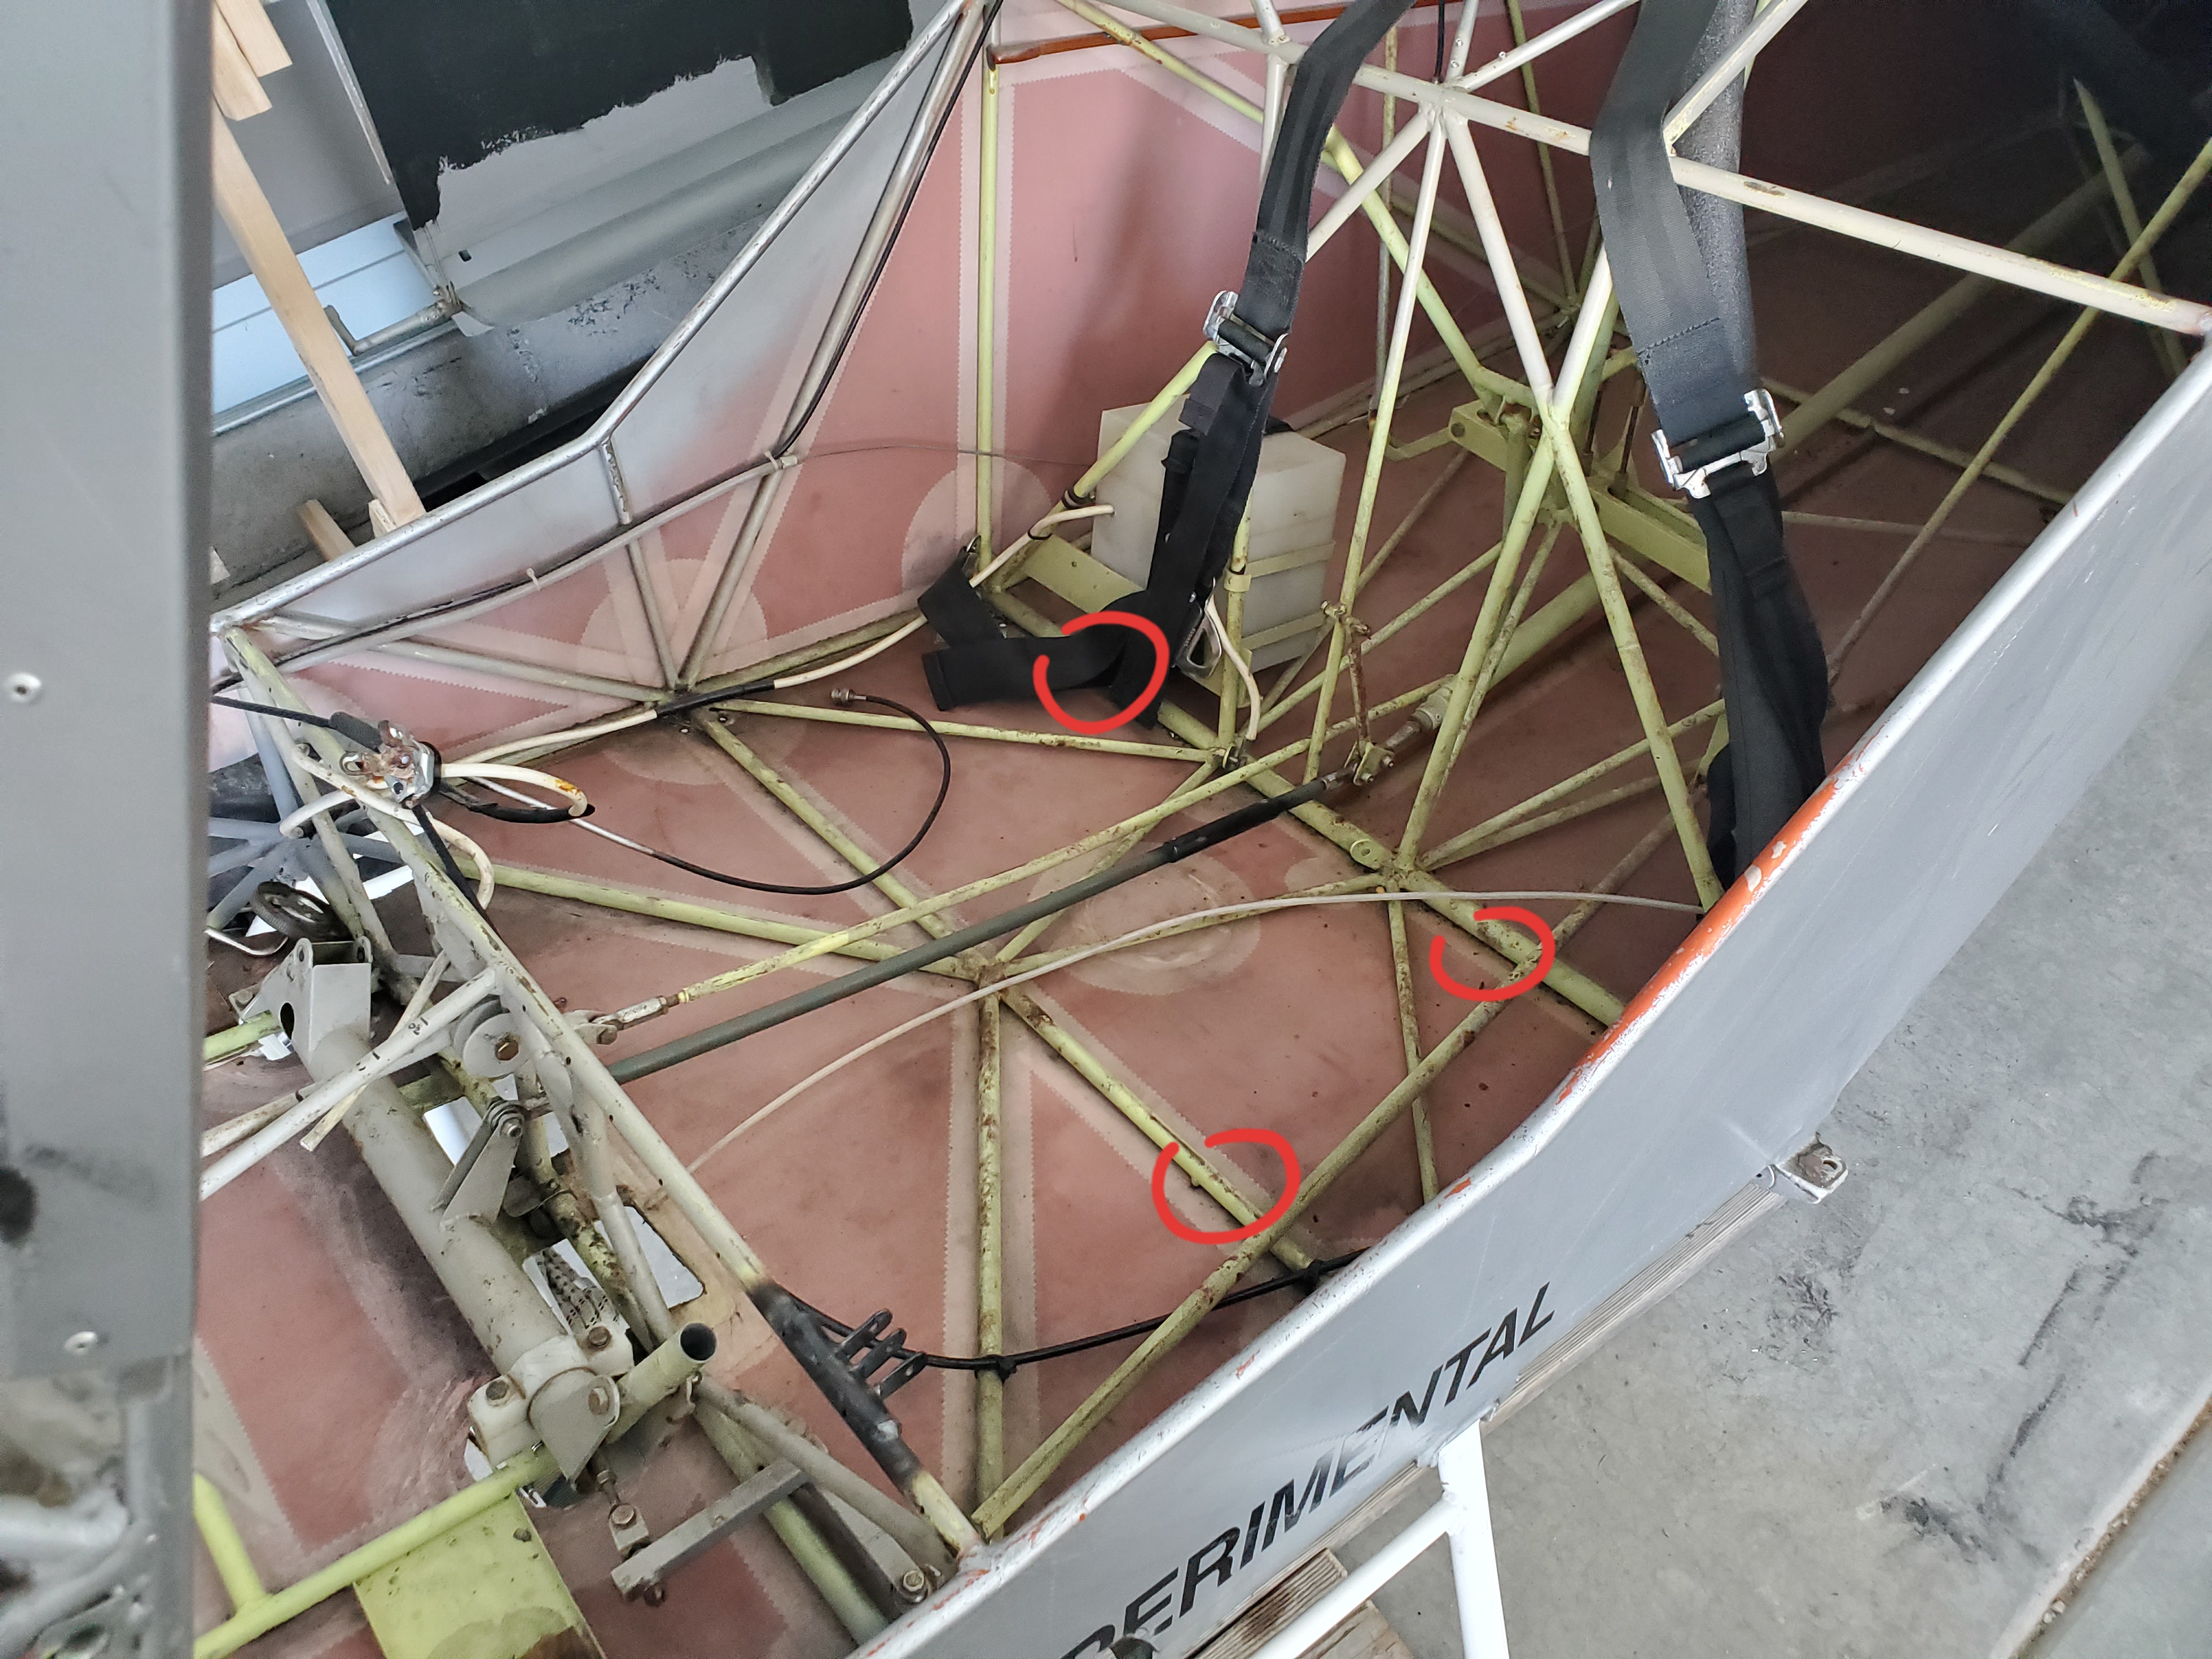
 there is one tab mounted on the cross tube between the aft gear attach points and 2 tabs on the lift strut cross tube. The cockpit view is just to give a better idea where they are in relation to everything else.
 -
I'm about to start enhancing the paint job on my plane. Right now it's just polyspray and I'm going to use latex over the top of it. What kind of surface prep do i need to do to get it to stick well?
-
Cargo area? I know the KF1 wasnt designed with a dedicated cargo area like later models but I figure some of you guys have used one to haul some stuff? So how did you do it?
I'm not looking to haul the kitchen sink around just maybe enough for a night or 2 camping trip to one of the nicer backcountry strips.
-
Interesting approach to saving weight, and providing greater legroom. Wouldn't the seat truss bar and the transverse bar the sling seat attaches to tend to dig into the backs of your knees and shoulder area of your back? I would also want to validate that this new minimist sling seat can take as many G's as the wing spars. A failure could have you sitting on the floor, with no forward visibility! Those fuselage-bottom truss tubes would be subjected to bending loads. Are they strong enough?
Just some musings...
As far as comfort I was thinking of using some balsa to create a rounded spot under the knees and behind the shoulders. One of the more comfortable chairs ive sat in had a wood back that was very nicely shaped. So long as the shape is right you don't need soft to be comfortable. Probably need some lumbar support as well
As far as strength is concerned I bet if you follow the overlap guidelines for the wings and maybe use the heavy fabric I bet it's plenty strong at least in tension. My biggest concern would be what would happen once a tear got started.
I wouldn't worry about sitting on the floor so much as sitting on the elevator push rod. I'm going to be sitting in the middle so if i get dropped on the pushrod 99% chance of a spectacular wreck.
-
I bought the Polyfiber practice kit at Aircraft Spruce for $59, it has everything, and in one place. Enough fabric to make a pretty big repair, too. maybe 3 ft square. Also all the fluids, and a thermometer and a great instruction manual
https://www.aircraftspruce.com/catalog/cspages/pfpracticekit.php
That sounds like an excellent value. Thanks
-
Hey if i was u id step up to med weight fabric, i was going to use light weight but when lookin, comparing, and thinking of off airport flyin, med is better i think, stronger longer lasting to i think. But light weight tapes r ok on the med fabric and depending on what ur covering the light weight will flex and lay down better, I did both my wings total job for $793.00 i think i wrote up info in my spread on that, time it took and materials list totals.
dont buy to cheap of a spraygun ull regret it down the road. harbor freight has some good cheap ones
Use only non died maskin tape if ur paint light colors. Tan/ brown tape
dont forget the Poly Fiber Users Book. Lots of good info
medium weight fabric is something that i may consider when it's time to recover. For now just patching a few holes.
As far as the spray gun HF has a surprisingly wide range of prices $20-150, so please recommend a specific one.
-
I'm about to start on some fuselagefabric repair and also reinforcing my rib tails and tearing into my wing tank, which means repairing more fabric and I'm making my order up for Aircraft Spruce. Ive never worked with polyfiber fabric before so if I'm missing anything please let me know. I do have the book and have been studying it.
Poly Tak
Poly Brush
Polyspray
The warm weather reducer (forgot part number)
Lightweight fabric
Reinforcing tape for rib stitching
Rib stitching thread
And lastly finishing tape
What else am I missing?
Non aircraft Spruce stuff i need to buy
Cheap spray gun (suggestions welcome)
Masking materials
MEK
?
-
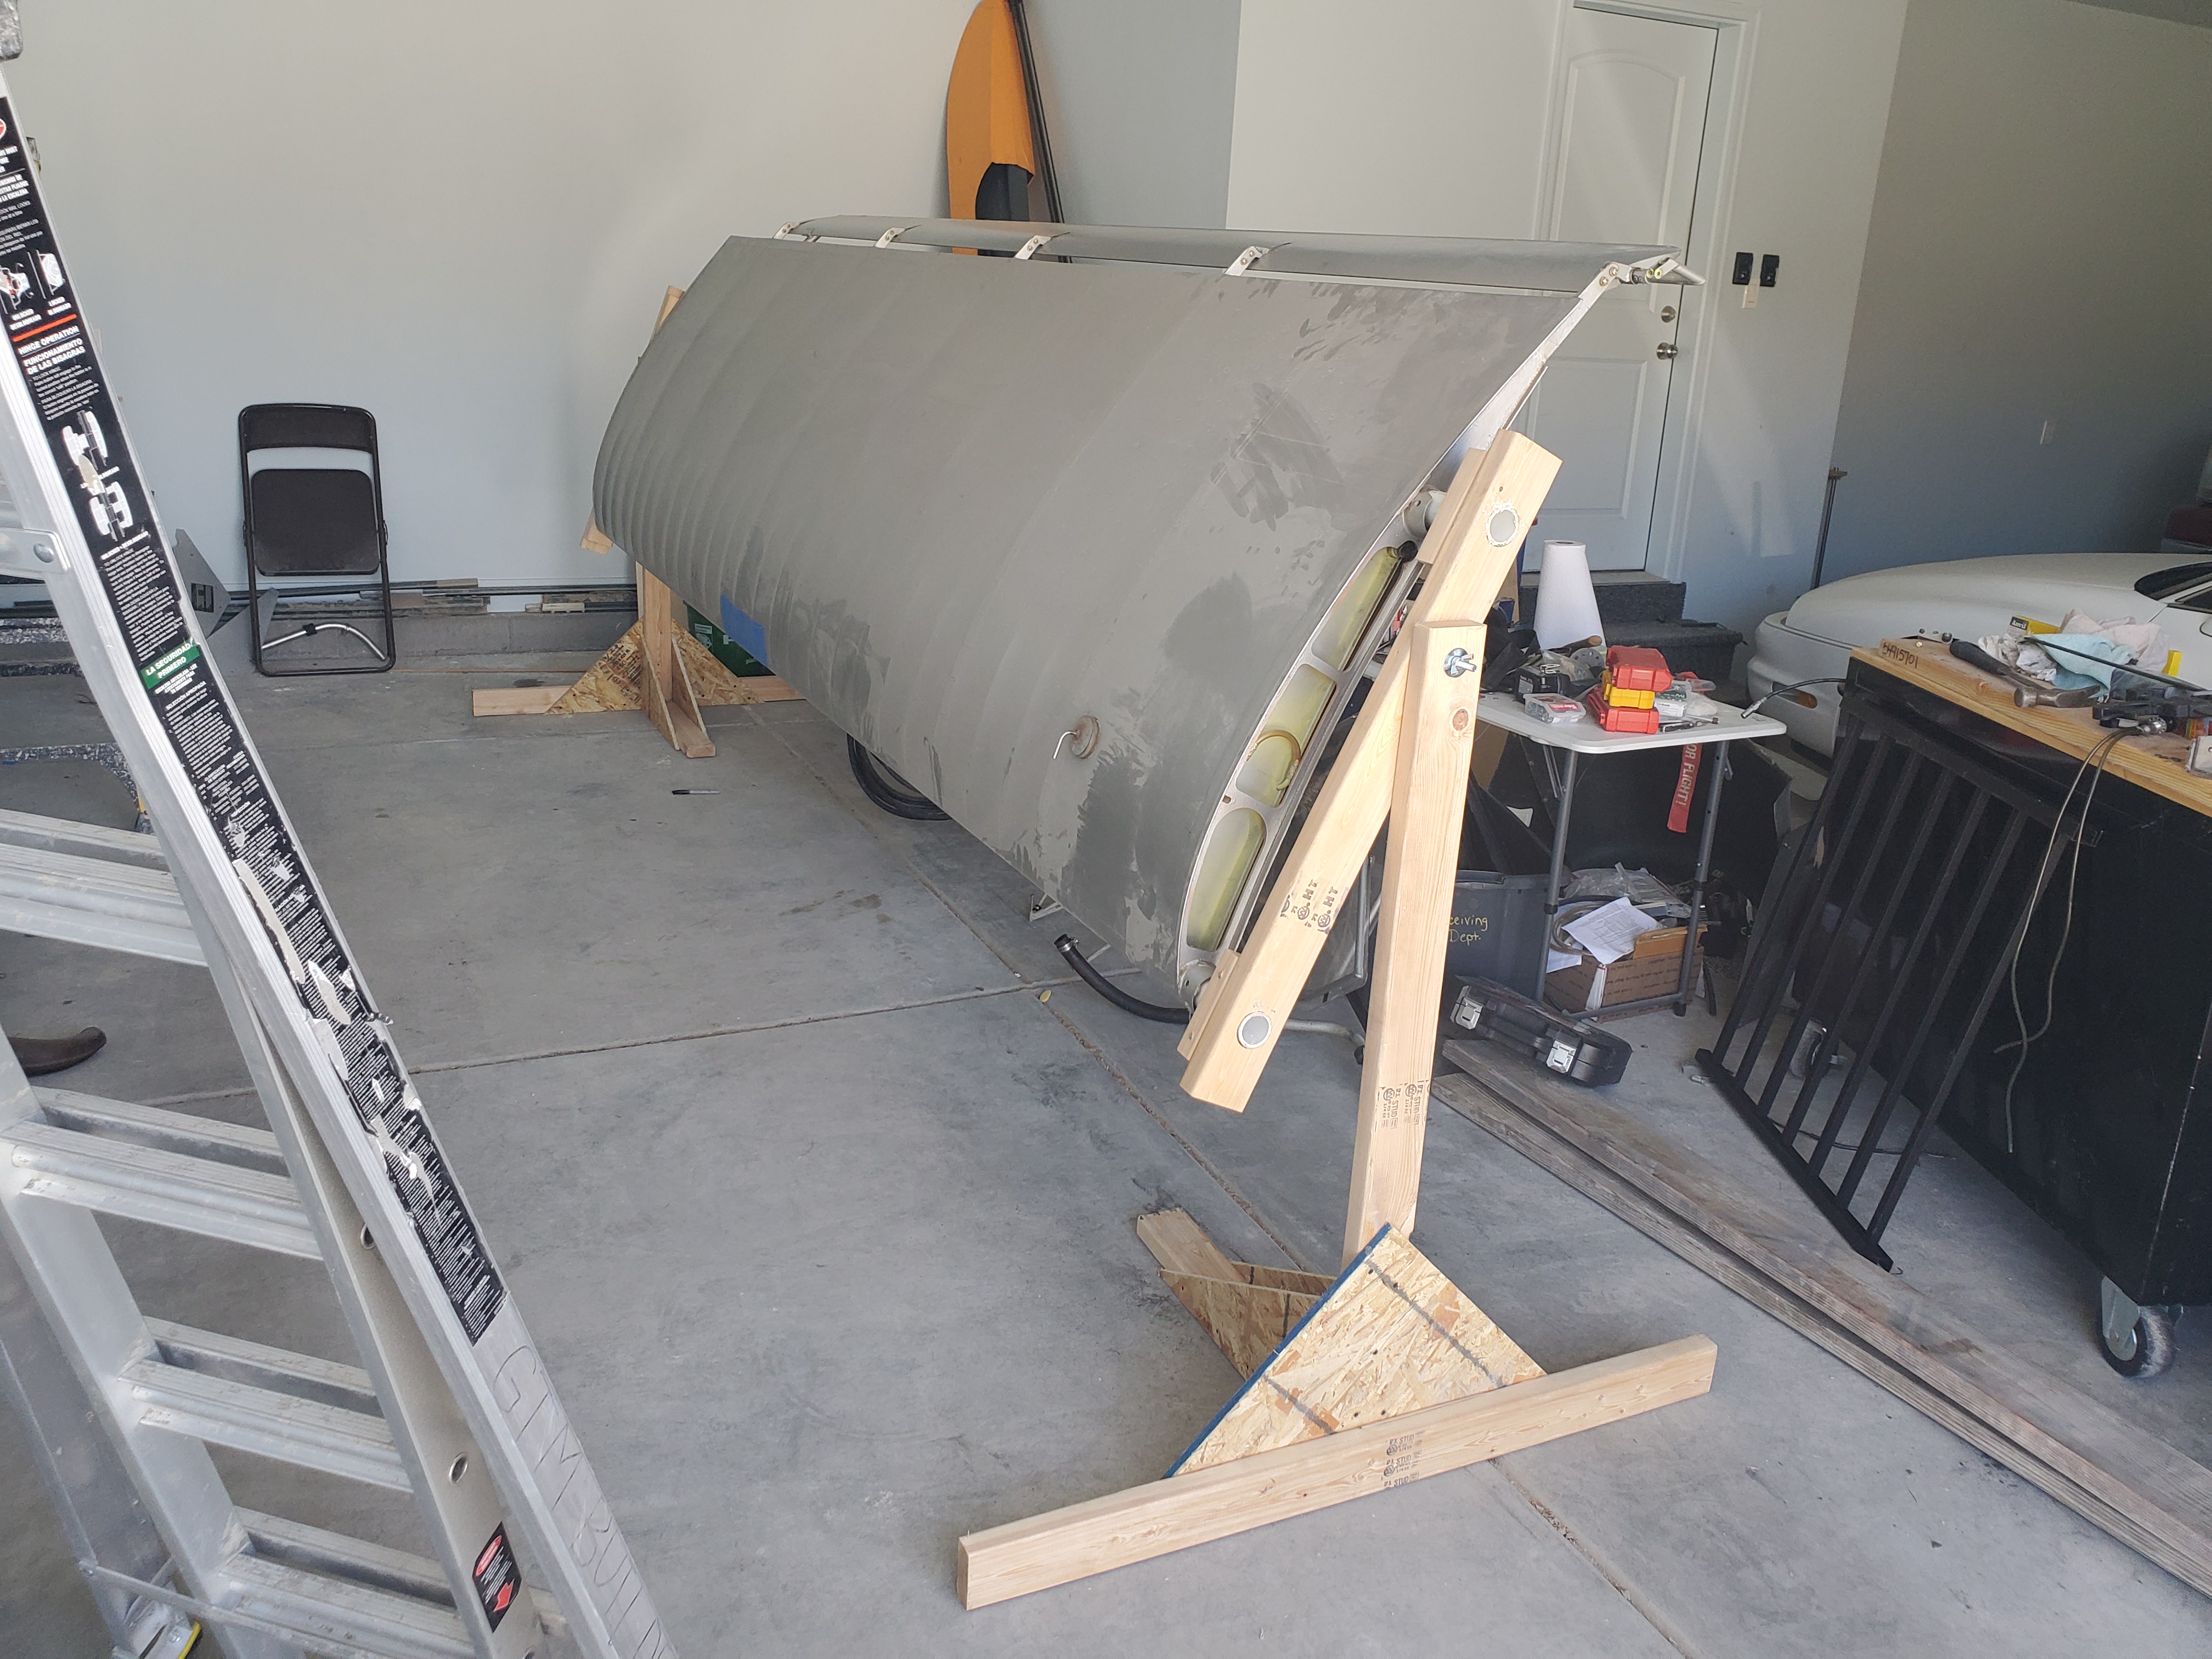
Ian's attempt at a modified airfoil is a little more permanent.
Well Trent's method has the advantage that it's not permanent. It didn't work so 10 minutes work returned the plane to the previous configuration. Hopefully Ian likes what he's doing when it's done because it's months more work if he doesn't or sell it off and let someone else deal with it.
-
Just had a perhaps brilliant, perhaps stupid certainly off the wall idea as indicated by the thread title.
Background for those who haven't read what I'm doing . Ive got a kitfox model 1 that I'm converting to a single seat with the pilot sitting in the middle using the original pilot's side left rudder pedal and the original passenger side right pedal. One of the main goals is to save weight.
An idea that ive been kicking around is to cover some of the floor in fabric, only those areas that i don't think I'd ever put my feet. Ive read a few comments about items dropped during flight being lost in the tail cone so the fabric is to block off that possibility. This would be an upgrade for this aircraft as the seat truss was open before.
While i was thinking about where and how to do that the idea came that maybe i could make a sling seat using the same polyfiber, perhaps the heaviest stuff there is for durability. Since it's only single seat and that'll be 18" wide on the bottom there would be access underneath if necessary. I can't imagine any tasks short of completely stripping the airframe that i couldn't do with the seat installed. Maybe slightly more difficult than with a seat that could be removed without destroying it but still doable.
I specified polyfiber just because that's what's already on the aircraft.
Ok shoot the idea full of holes. The rules for this exercise is that difficulty in making it doesn't matter(for now). What does matter is safety of flight and durability. If properly designed could it do the job? Design considerations are an allowable subject but saying that something is overly difficult therefore stupid idea why waste your time is not allowed.
I wouldn't expect it to stay perfectly taught but then I'm not sure it would need to. I've only got some limited experience with fabric from my plane would it be durable enough to not rip?
2 people like this -
Let's get this party started!
-
Well Trent's been looking at leaving edge cuffs as well. His execution didn't seem to do anything for his performance. It'd be interesting to see how they would do on the original airfoil


Weak point in the Kitfox tailwheel spring attachment design
in Avidfoxflyers General Hangar
Posted
Thanks.
Decided to go out and do some measuring just to explore my idea. So i hung the rudder back on the plane and the minimal distance between the tailwheel and the rudder has me worried.
1 3/4" seems awfully close for a rookie tailwheel pilot. Definitely going to have to think about this some more.