
Tom.338
Members-
Content count
15 -
Joined
-
Last visited
Posts posted by Tom.338
-
-
Thanks for the tip about watching for dust.
I am hoping the 3/8" pins will be enough to stop the wiggle but I will have to see. I think I will try to make a locating shoulder on the next one.
1 person likes this -
All looks good but, from what I’ve heard with the RK gearbox the alignments have to be spot on!!!
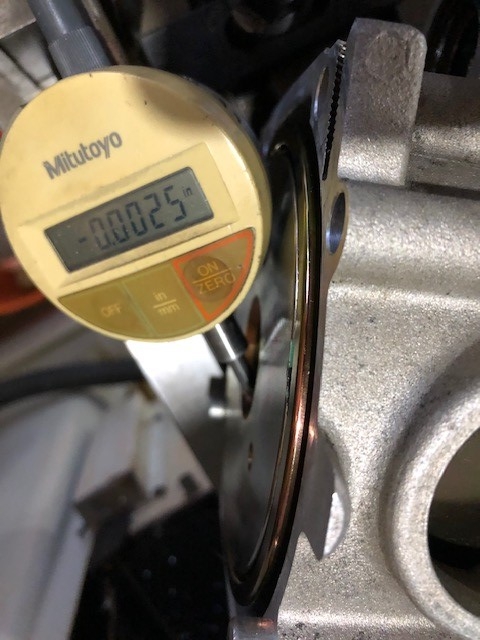
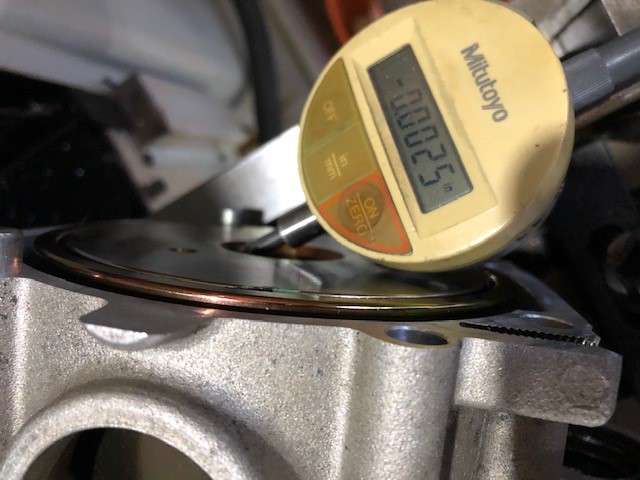
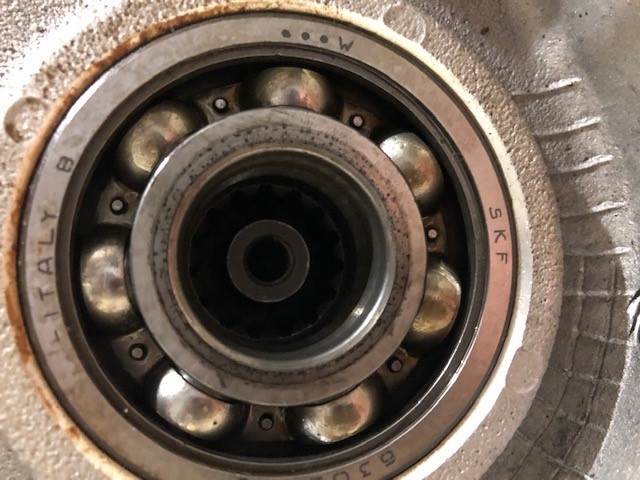
The alignment was a major concern for me. I took the shoes out of the clutch and put spacers on the 4 corners to center the taper on the inner part of the clutch in the outer drum. Then I put that in the gearbox on the splined shaft and measured the runout in the taper at 0.0025" I put the clutch on the tapered engine output shaft by itself. Then I put the gearbox on without the splined shaft to see, when everything was mounted, if the splines would engage and show me that everything is aligned. The splined shaft fit into the bearing and I rotated it until the splines lined up and it slid the rest of the way in. I think the alignment is within an acceptable tolerance but I will know for sure when I get it on a test stand.
I was thinking of how I could test the alignment and this was the best idea I could come up with. I would have liked to have zero runout with my spacers but 0.0025" is pretty good and the dial indicator was on an angle so it is actually a bit less than that. Any tolerance issues with the spline will be there in the final product so it seemed like an acceptable test.
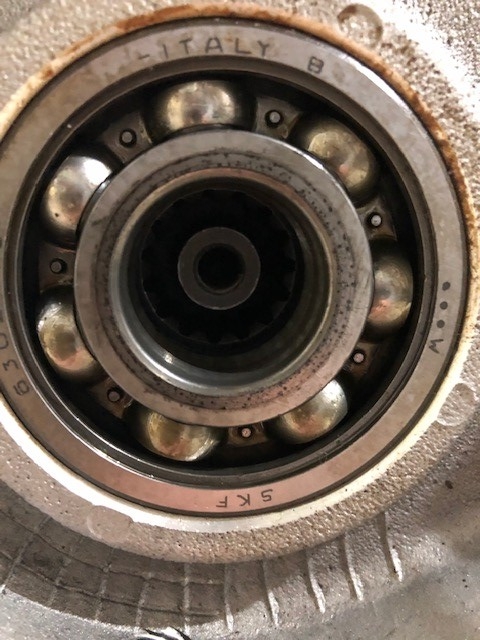 The splines don't look centered in the bearing because of the camera angle.
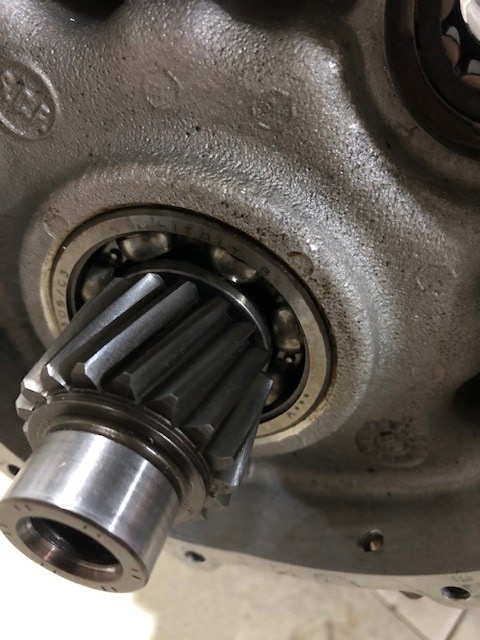 1 person likes this
 -
I have another piece of 3/8 plate that is longer so I will probably make another adapter that can reach the 2 engine cover bolts I missed with this one.
Thanks to 72chevy for leading the way.
Let me know what you guys think or if you have any questions.
1 person likes this -
The gearbox is tilted to align with the center of the engine and to allow the gearbox and engine cover bolts to have clearance.
.thumb.jpg.d745ebba68f372dc718f22d94639b18f.jpg)
.thumb.jpg.d217ee263dda537b356f6013959feea0.jpg)
.thumb.jpg.a995670473c8f68f03ad109355ee1613.jpg) 4 people like this
4 people like this -
The RK 400 fits in a pocket in the plate and 2 of the engine cover cap screws fit into counterbored holes so that the surface of the plate is flat where the gearbox mounts.
.thumb.jpg.3a9f600357d9d7df4fbab0ebf6295a42.jpg)
.thumb.jpg.45baace47012b6cb8a07f268c345b255.jpg)
.thumb.jpg.d960c7a8840ce38550ece4da37c3a7e8.jpg) 2 people like this
2 people like this -
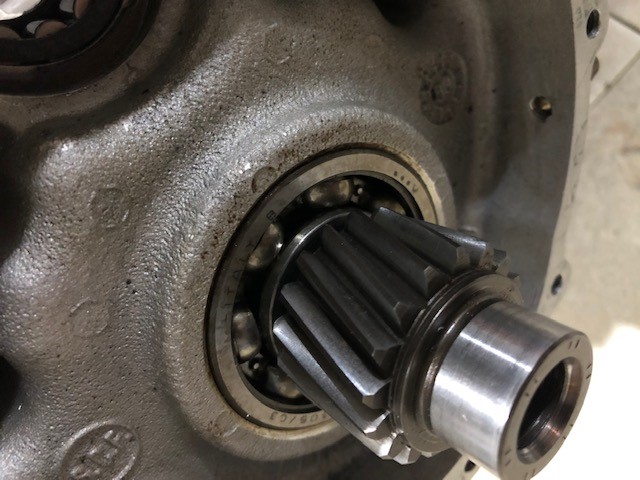
I am planning to use a RK400 clutch so I had to trim the engine output shaft and shorten the gearbox. There was no room for a locating ring like on the 582 so I located the gearbox with 2 dowels instead. I used two of the bolt holes that do not enter the gearbox for the alignment to avoid having any oil leaks.
.thumb.jpg.5a9ae7dfbbfa675857810b976de208a0.jpg)
.thumb.jpg.37003d82ce121aa0236985521f4e0f4f.jpg)
.thumb.jpg.177eed12e07b49957b3901dd3c0bb3d2.jpg) 2 people like this
2 people like this -
I see more guys using the Phazer engines but nobody seems to get into the details of making the adapter so I will take a shot at it. I have been collecting parts and working on the design for a while and I finally got my adapter setup. I still need to get shorter bolts to hold the gearbox to the adapter plate. I plan on eventually replacing my 582 with this Phazer engine.
I machined the engine cover so that all the tabs where the bolts go through are all the same height and replaced the bolts that hold the bearing with cap screws. The heads of the screws locate the plate and align the gearbox mounting holes with the output shaft.
I made spacers to compensate for the height difference between the output shaft and engine cover bolt tabs. Longer bolts were also needed.
Some 1/2 aluminum plate came from the cutoff pile at the local metal supply shop. Lots of time was spent adjusting the plate on Solidworks and printing it on paper to get it just right and then I milled a test piece out of wood and then one out of aluminum.
.thumb.jpg.9fce3551dadb5db588831a44dbf0a1d5.jpg)
.thumb.jpg.4cfc4c0de9289db99bd126cad0d10e6f.jpg)
.thumb.jpg.3b42914e1f7a04c08dbf4b9680098077.jpg)
You can see the uneven gap between the 4 bearing bolt holes and the large hole for the output shaft. I had an issue with the part moving between drilling all the small holes and milling the large holes. I am very confident in the position accuracy of the small holes. Although the large holes are slightly off, they still provide enough clearance to serve their purpose.
2 people like this -
It is a Phazer motor and he built his own adapter.
The PTO shaft is the same taper as the Rotax. After you trim a little off the end you can put a RK400 clutch on it. The C box looks like it was machined down because it was too long for everything to line up on the Phazer motor. I am working on the same thing but if you check the Yamaha conversion Facebook group, I think there may be an adapter coming soon that is similar to the Apex adapter.
1 person likes this -
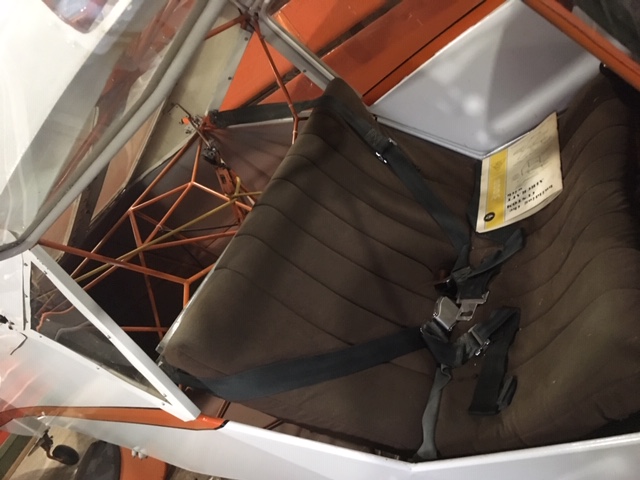
Did you make the seats? Is that some kind of heat formed material like Kydex?
-
Yes, for sure
-
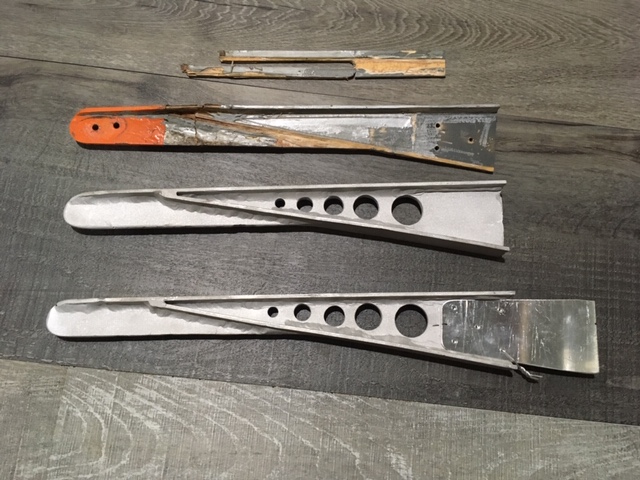
Yes they are all aluminum and look to be well made. I am sure the aluminum parts are strong but I am concerned with joining aluminum to wood. Like you said, Avid made them all wood from the factory so that is probably the best route. I totally agree with your point about extending the cap strips as far forward as possible to get the original strength back which is why I don't really like the aluminum parts in the picture.
Thanks for the link. That is exactly what I need to do.
-
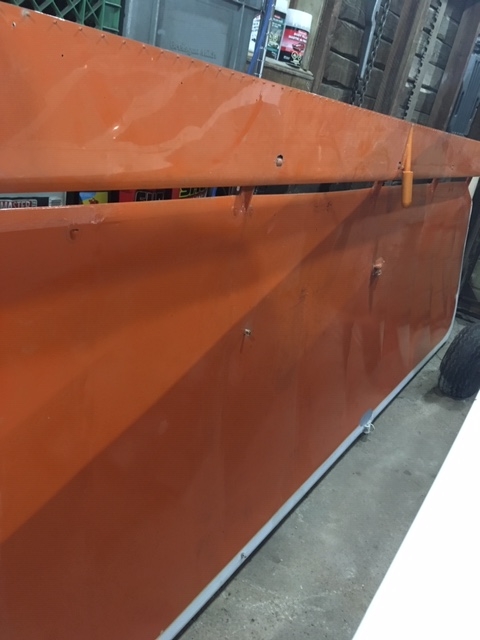
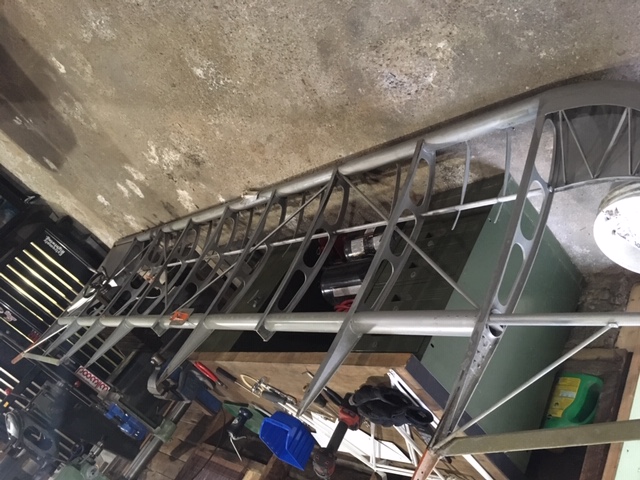
The previous owner was in the process of repairing the wings when he sold it to buy a different plane. He had some samples of Oratex which looks like great stuff and he made some aluminum rib tails. It looks like the plan was to sandwich the remaining sold plywood along both sides of the web. Has anyone done this type of repair before? It seems like a good idea but I am wondering about connecting the cap strip.

-
-
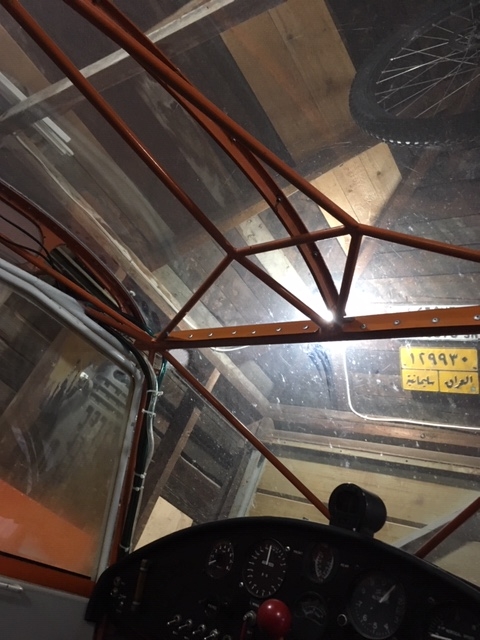
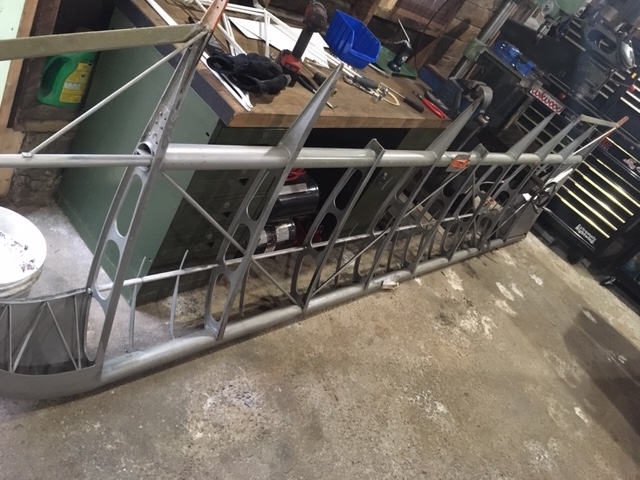
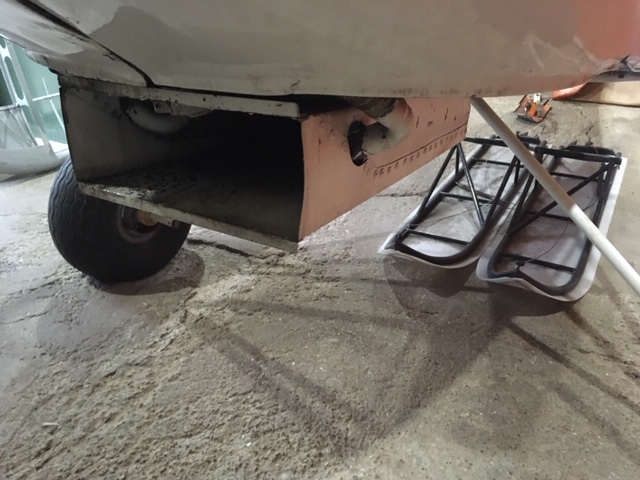
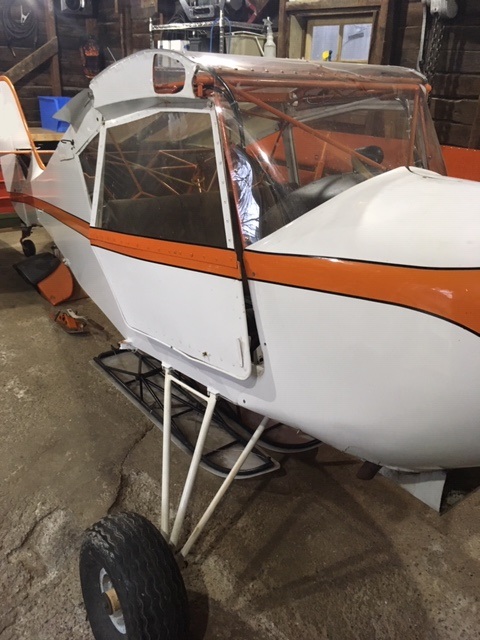
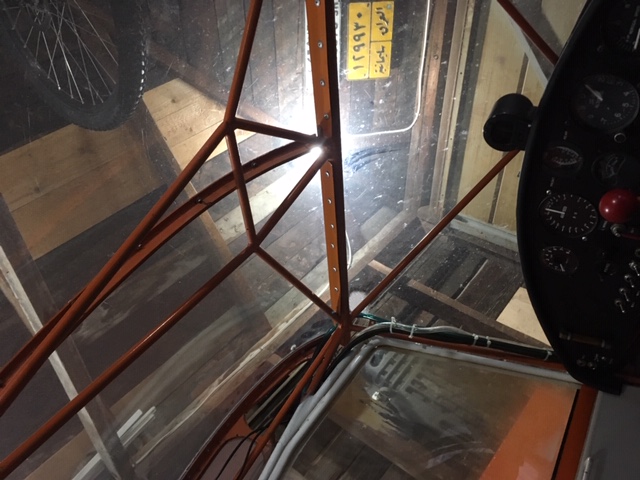
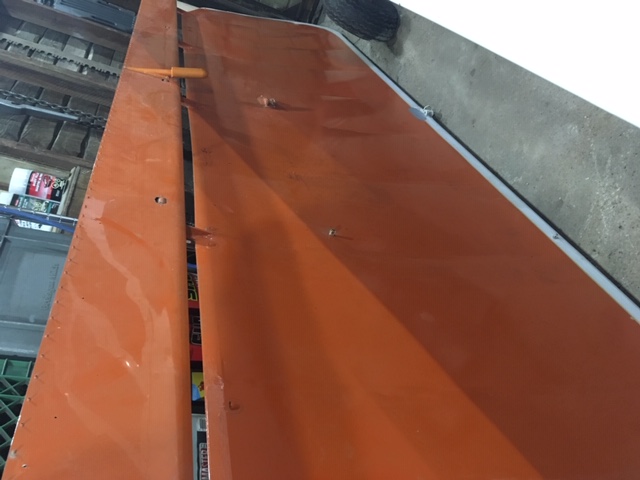
I just got it into my garage yesterday and it takes up more room than I was expecting but it's not terrible. It is registered as a Model B but it doesn't have the bulging cowl and it has the rounded tail so I am not totally sure about that. It has the STOL wing and a gross of 910 lbs / 413kg. The wheels & brakes need some attention because it was only ever flown on floats or skis. The spars were falling apart at the flaperon attach points so that will be the biggest job. It didn't come with floats but it came with wheels and skis and a big box of extra parts. It should be a fun project and even more fun when it's done.


.jpg.0be65658e55addeba805ec78f1ef91d3.jpg)
.jpg.e83a6f13bc8cdd4a5cbae68895f14a73.jpg)
.jpg.4373fac2a3fe536f16e847c34325d16f.jpg)
.jpg.e833a848a097fb35a91d46a7a9c3330d.jpg)
.jpg.082380e9a8606d0c7215a5e4132b2f97.jpg)
.jpg.b0eb07e545325528f1fe049f9a4220d6.jpg)
.jpg.dbdbd543edbad4442b5e5b3c615fa328.jpg)
.jpg.c90e1bb6efc56e813482068dc695776a.jpg)
.jpg.d57c07491e9b1dc9459ce3211b0dbca3.jpg)
.jpg.c3c3bc86c657d411c8e049cd8fce49ce.jpg)
.jpg.894142eff860190b2b17dd375ee4dd6f.jpg)
.jpg.13703e2558263bfe687301f6962c5a84.jpg)


Yamaha Phazer - Rotax Gearbox Adapter
in Rotax and other engines
Posted
Nice idea using the bearing to locate everything. I like that design and it looks like everything is working nicely in the videos.
Now I think I might have been better off machining on the engine side rather than the gearbox side of the plate to get the plate to sit lower like yours and have more room for a shoulder. My gearbox is too short to change it now but it's something to think about if someone is still coming up with a design.