
Barry Cole
Members-
Content count
201 -
Joined
-
Last visited
Posts posted by Barry Cole
-
-
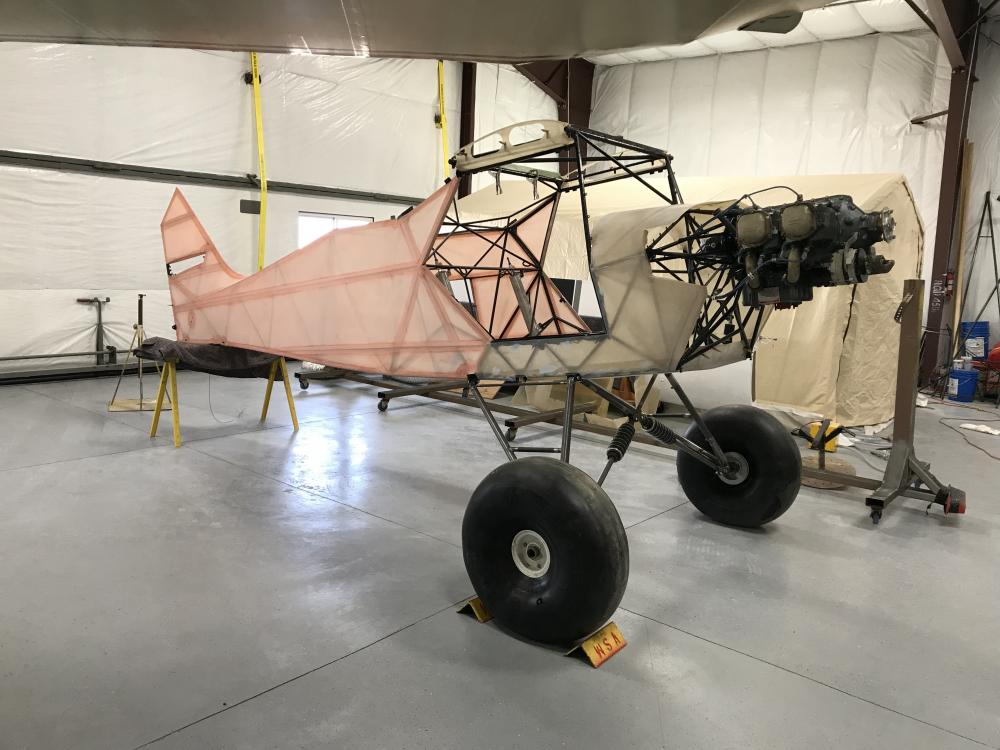
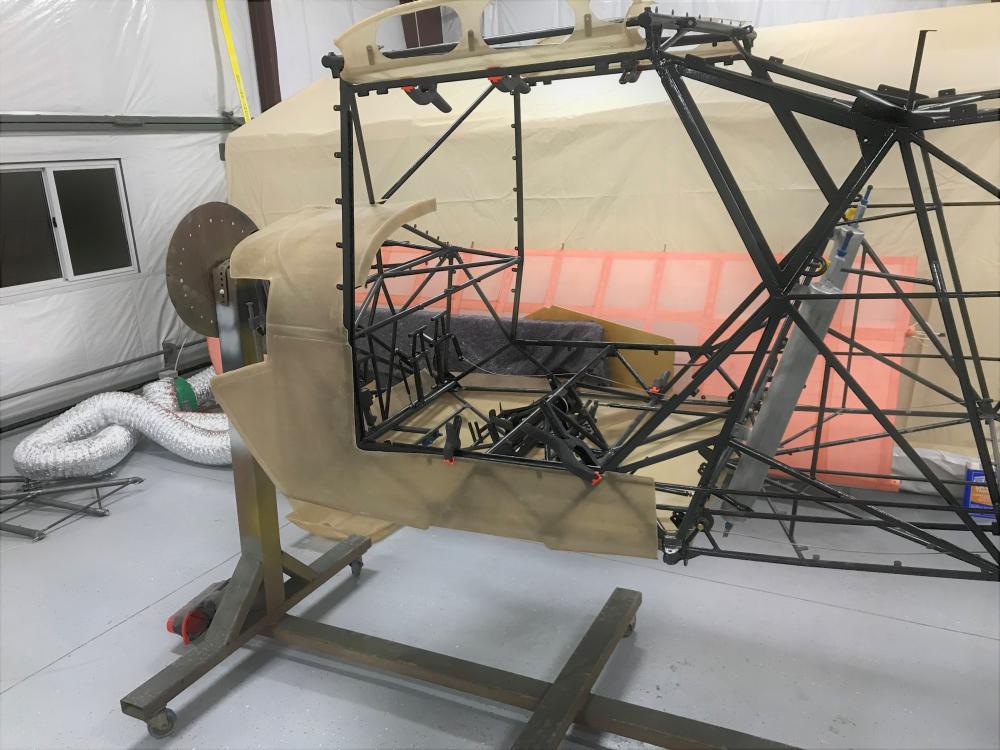
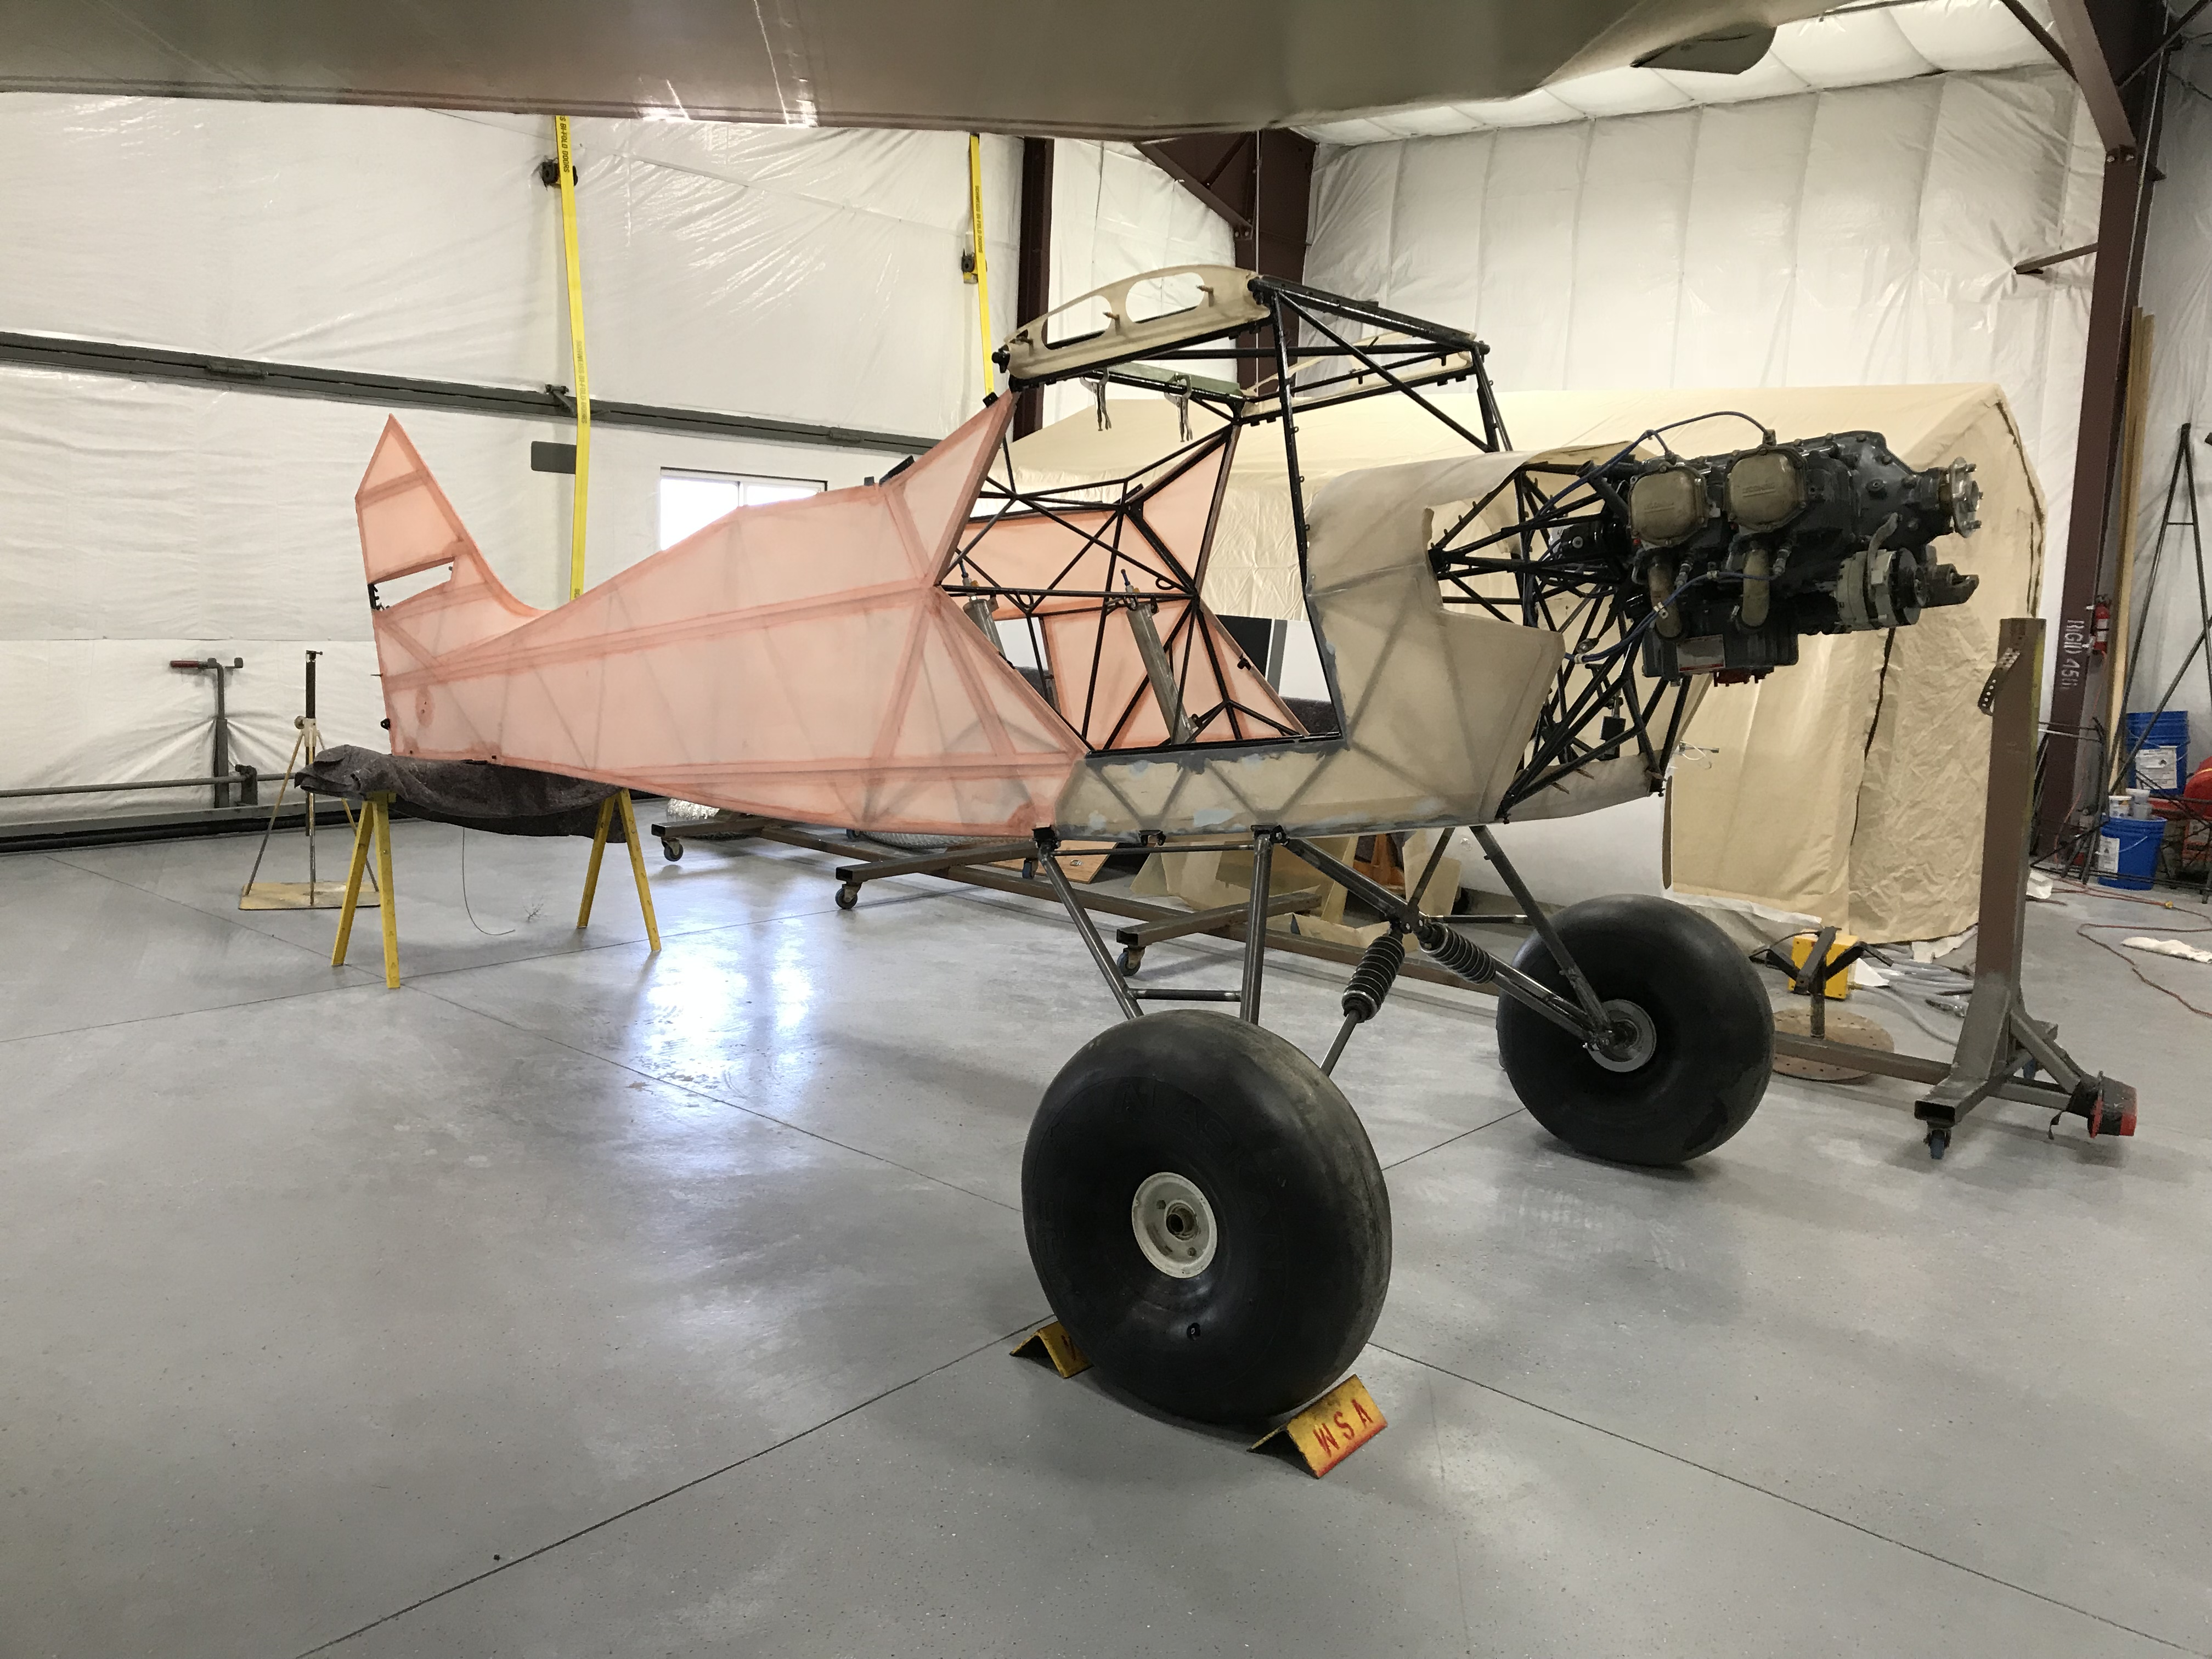
Today was engine and landing gear installation so I can fit the front cowling to the boot cowlings.
 3 people like this
 -
Thanks, it is a very labor intensive process for sure.
-
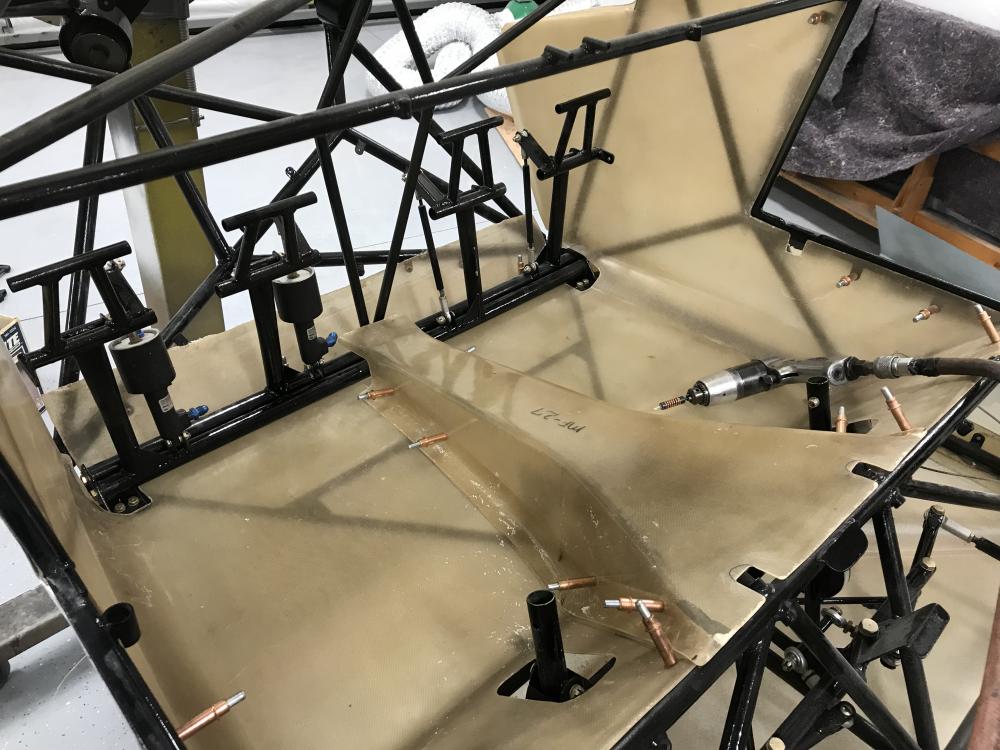
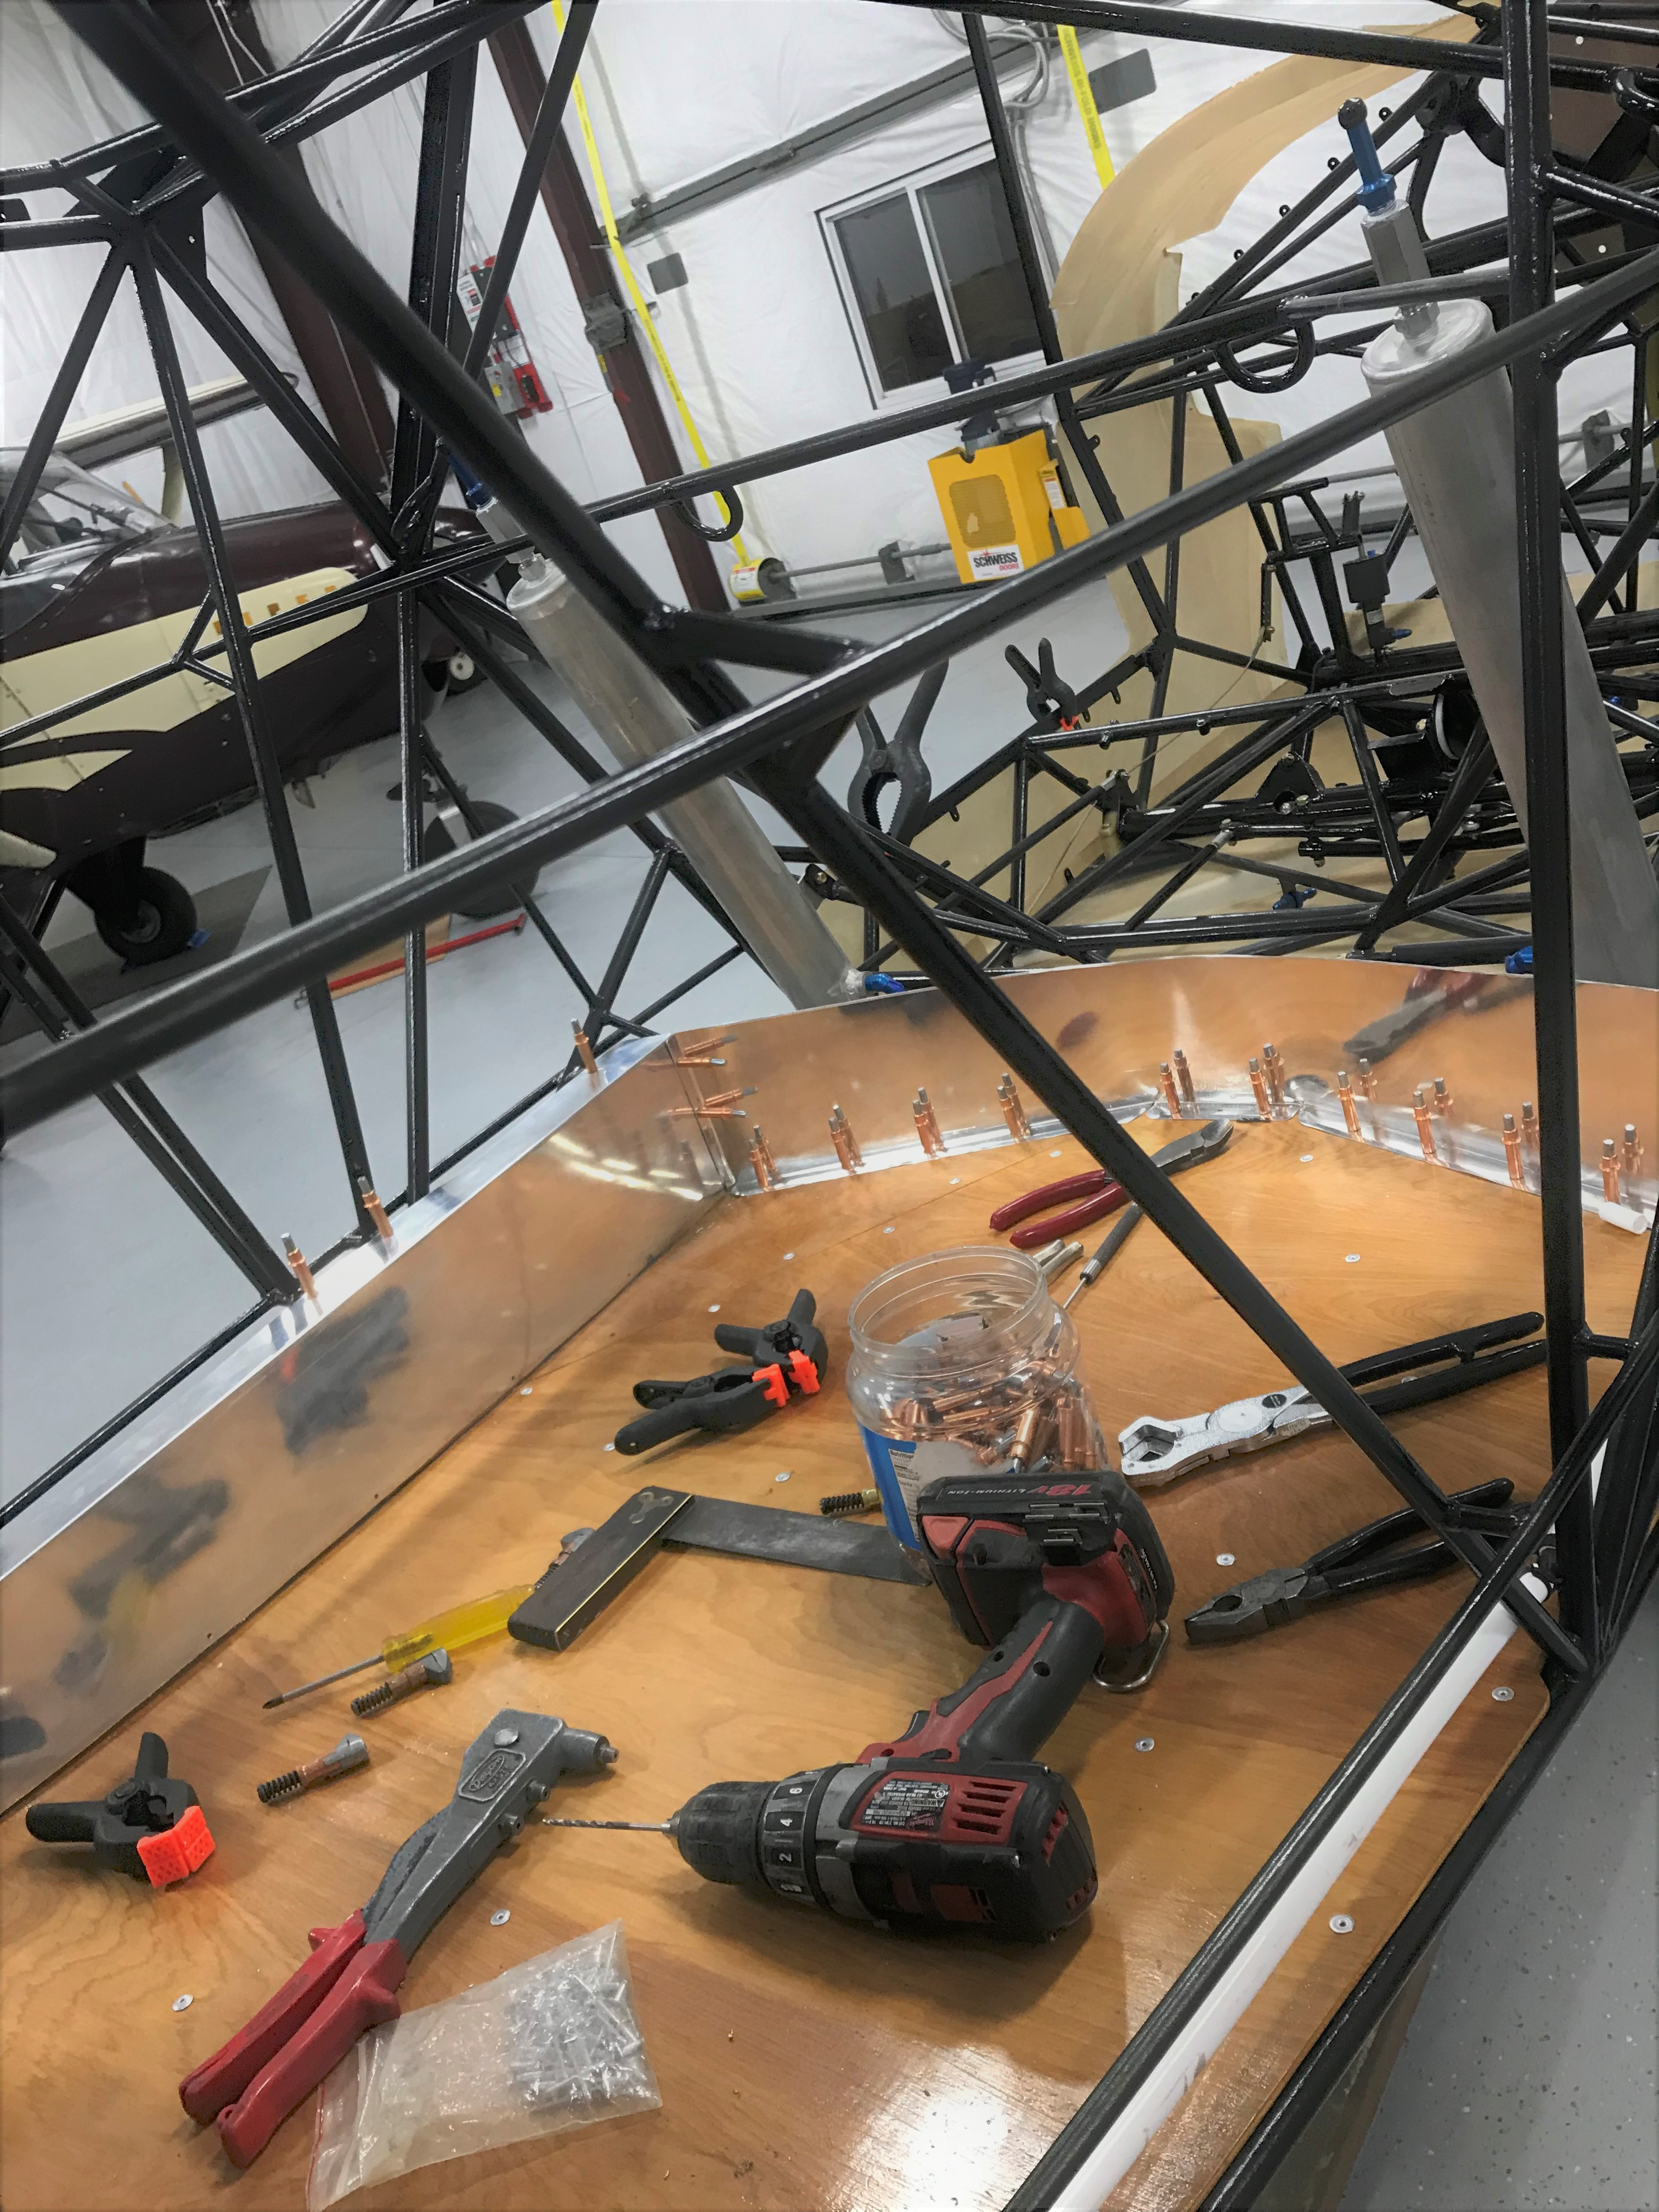
Fitted floor boards tonight, what a poor design.
-
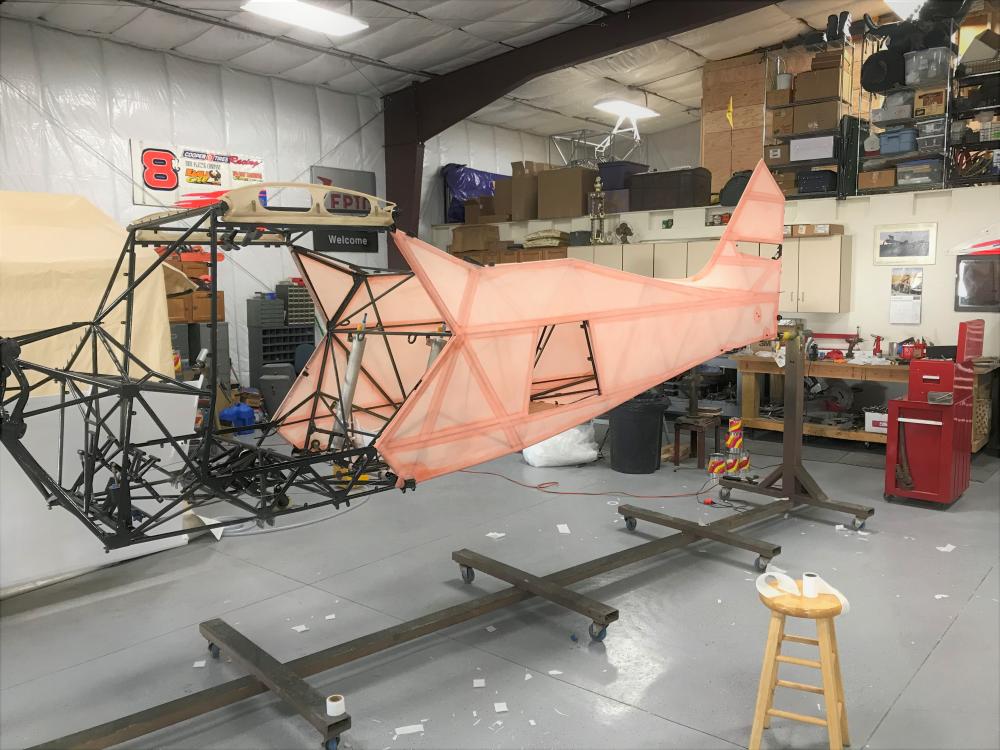
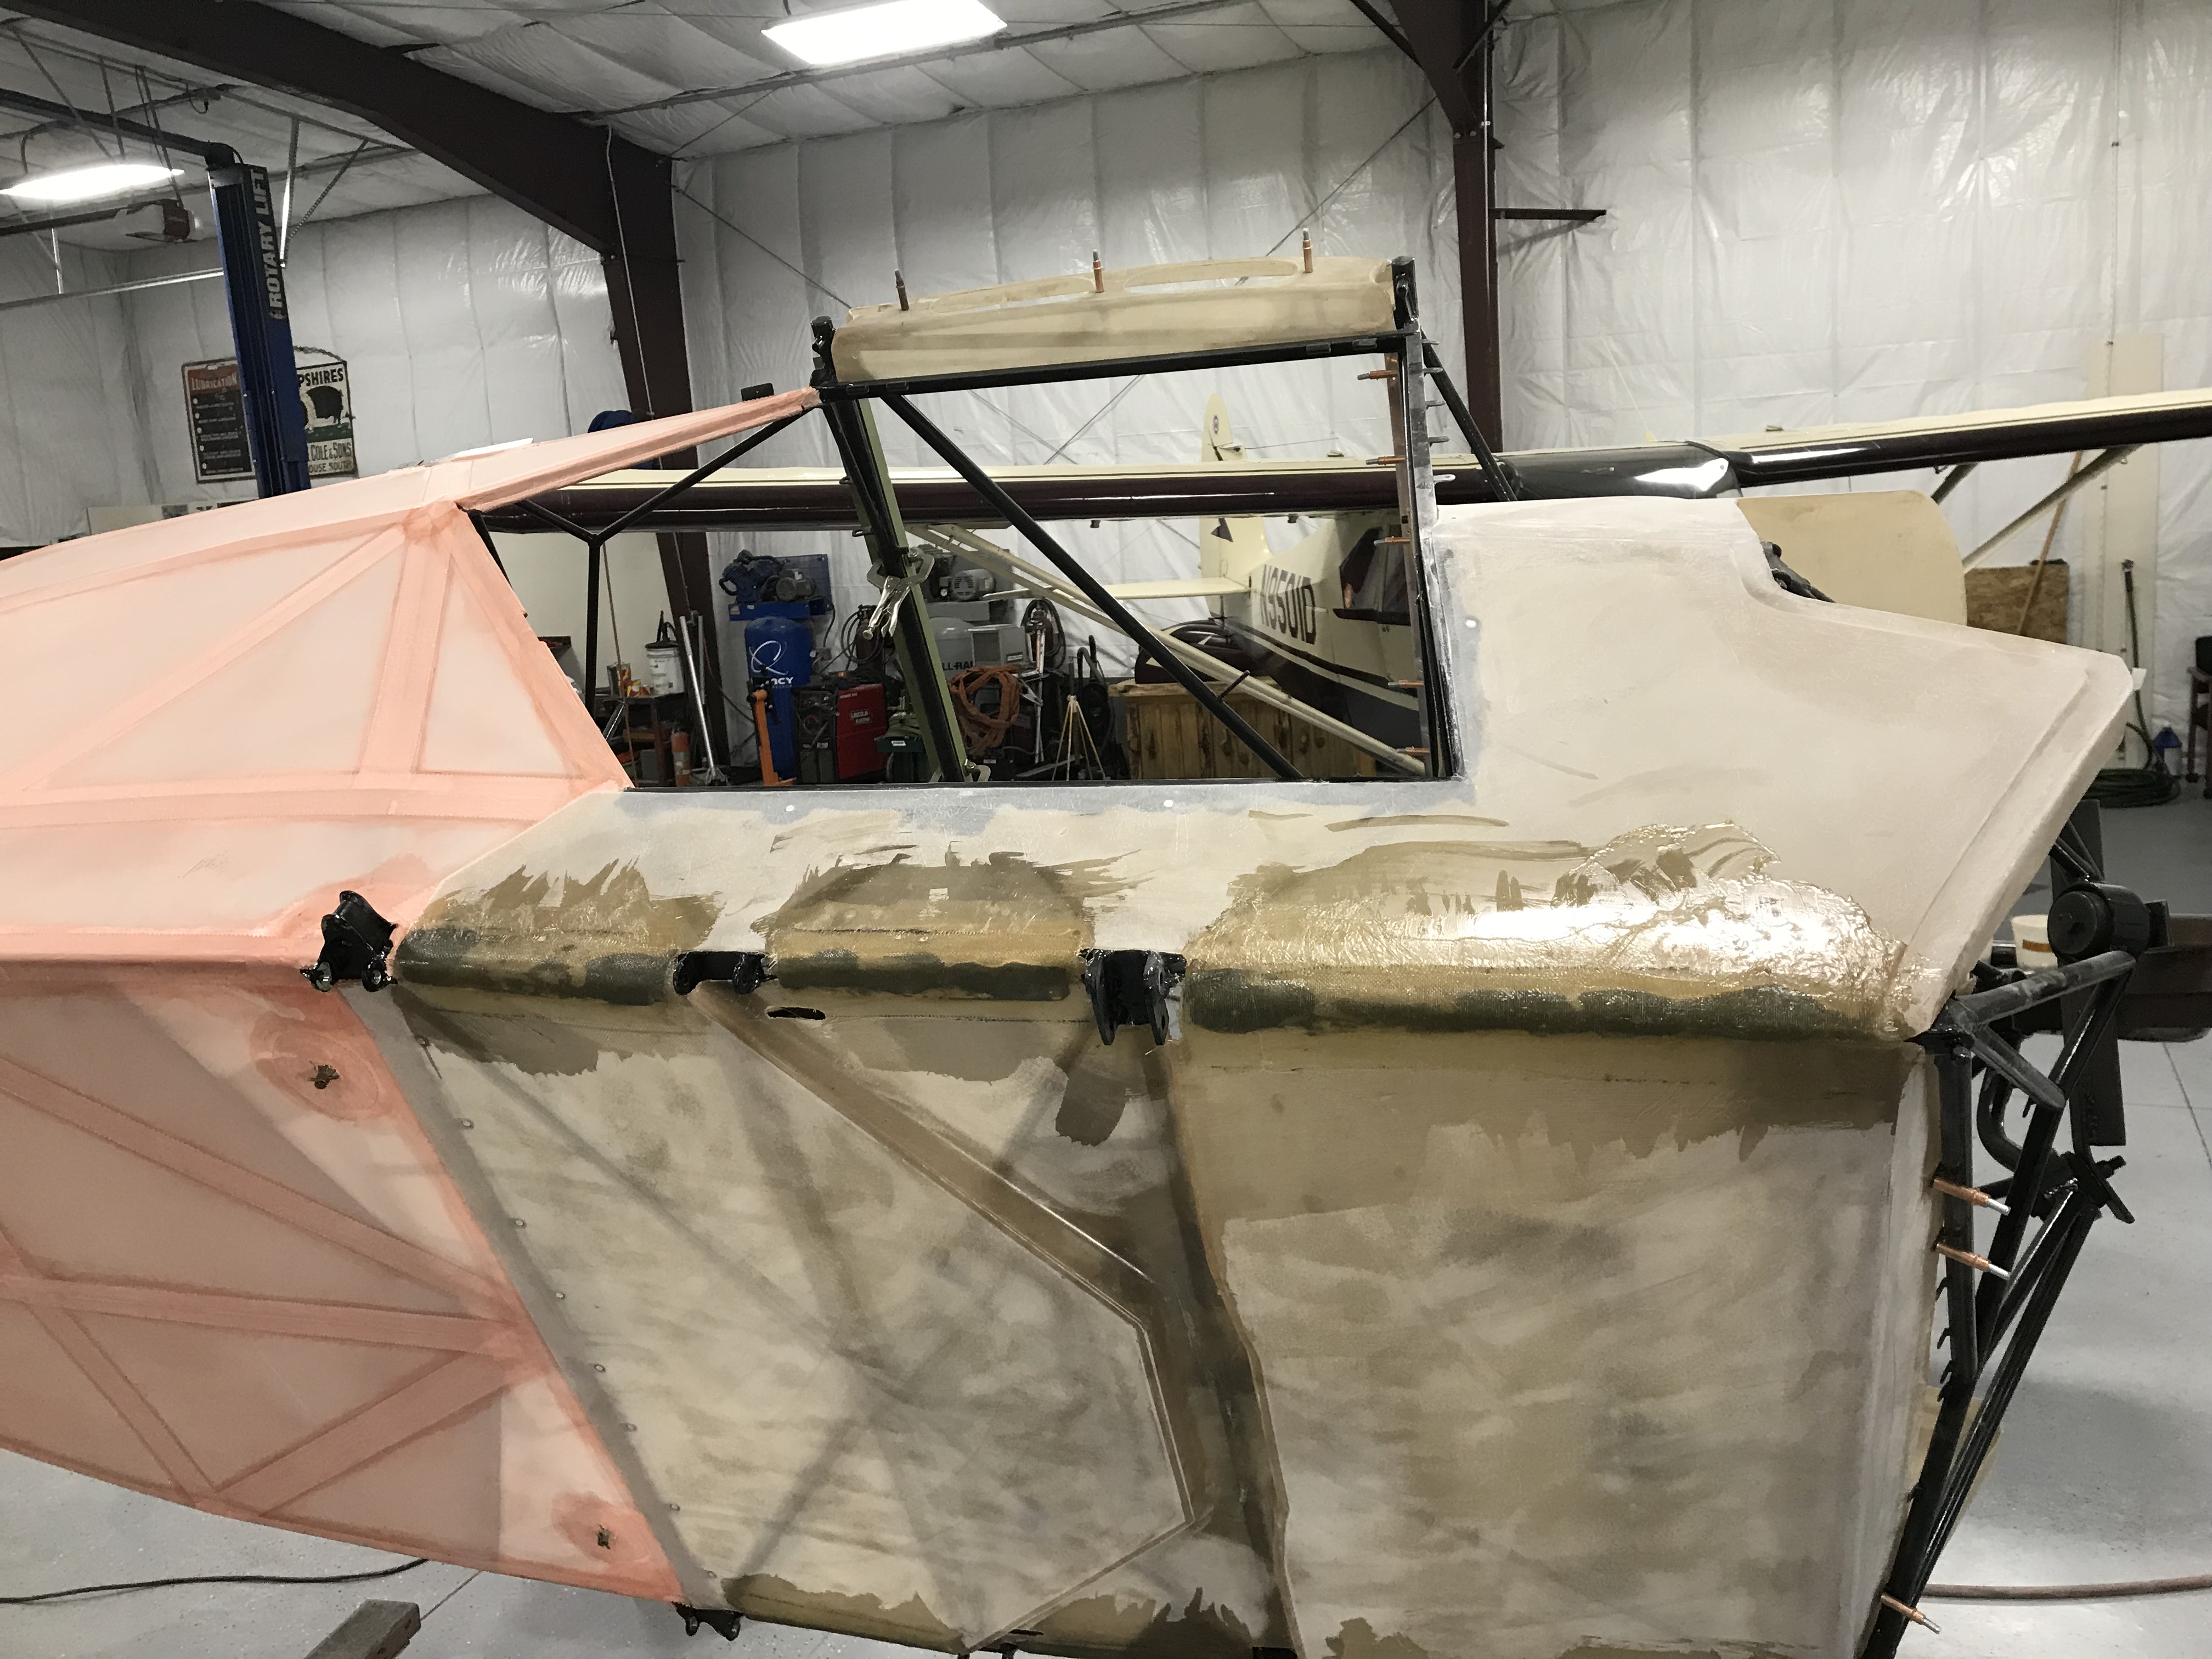
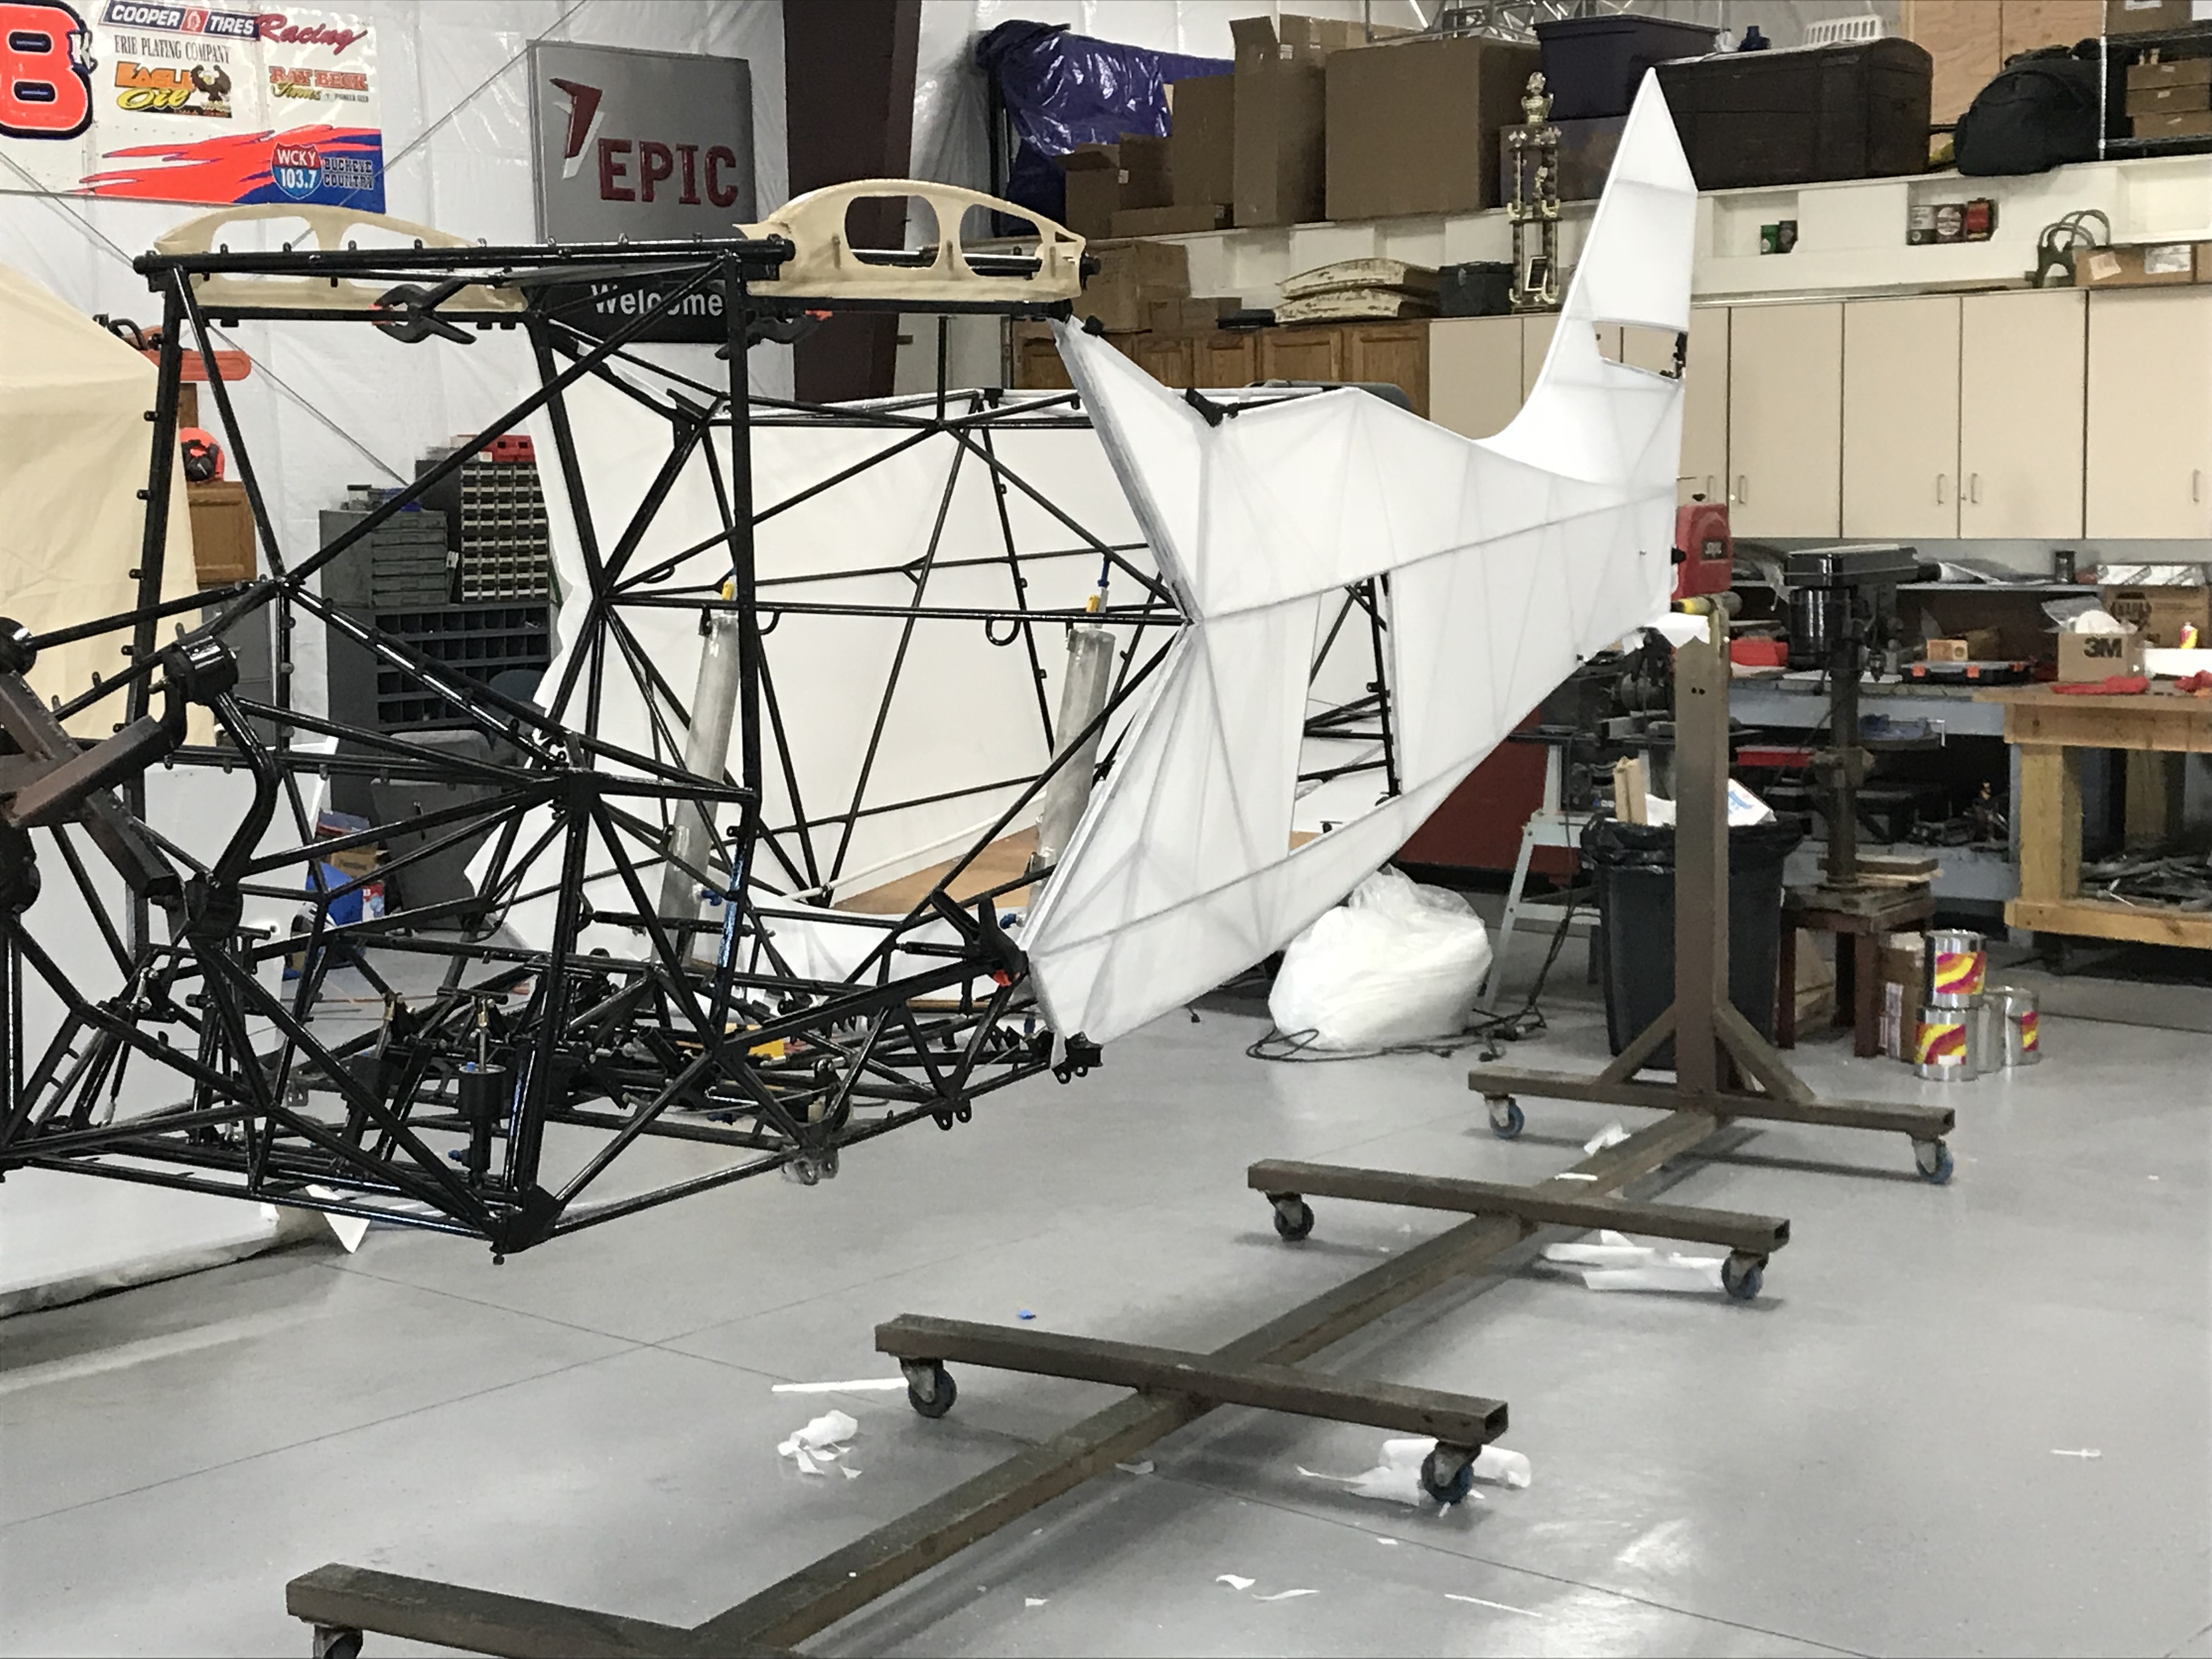
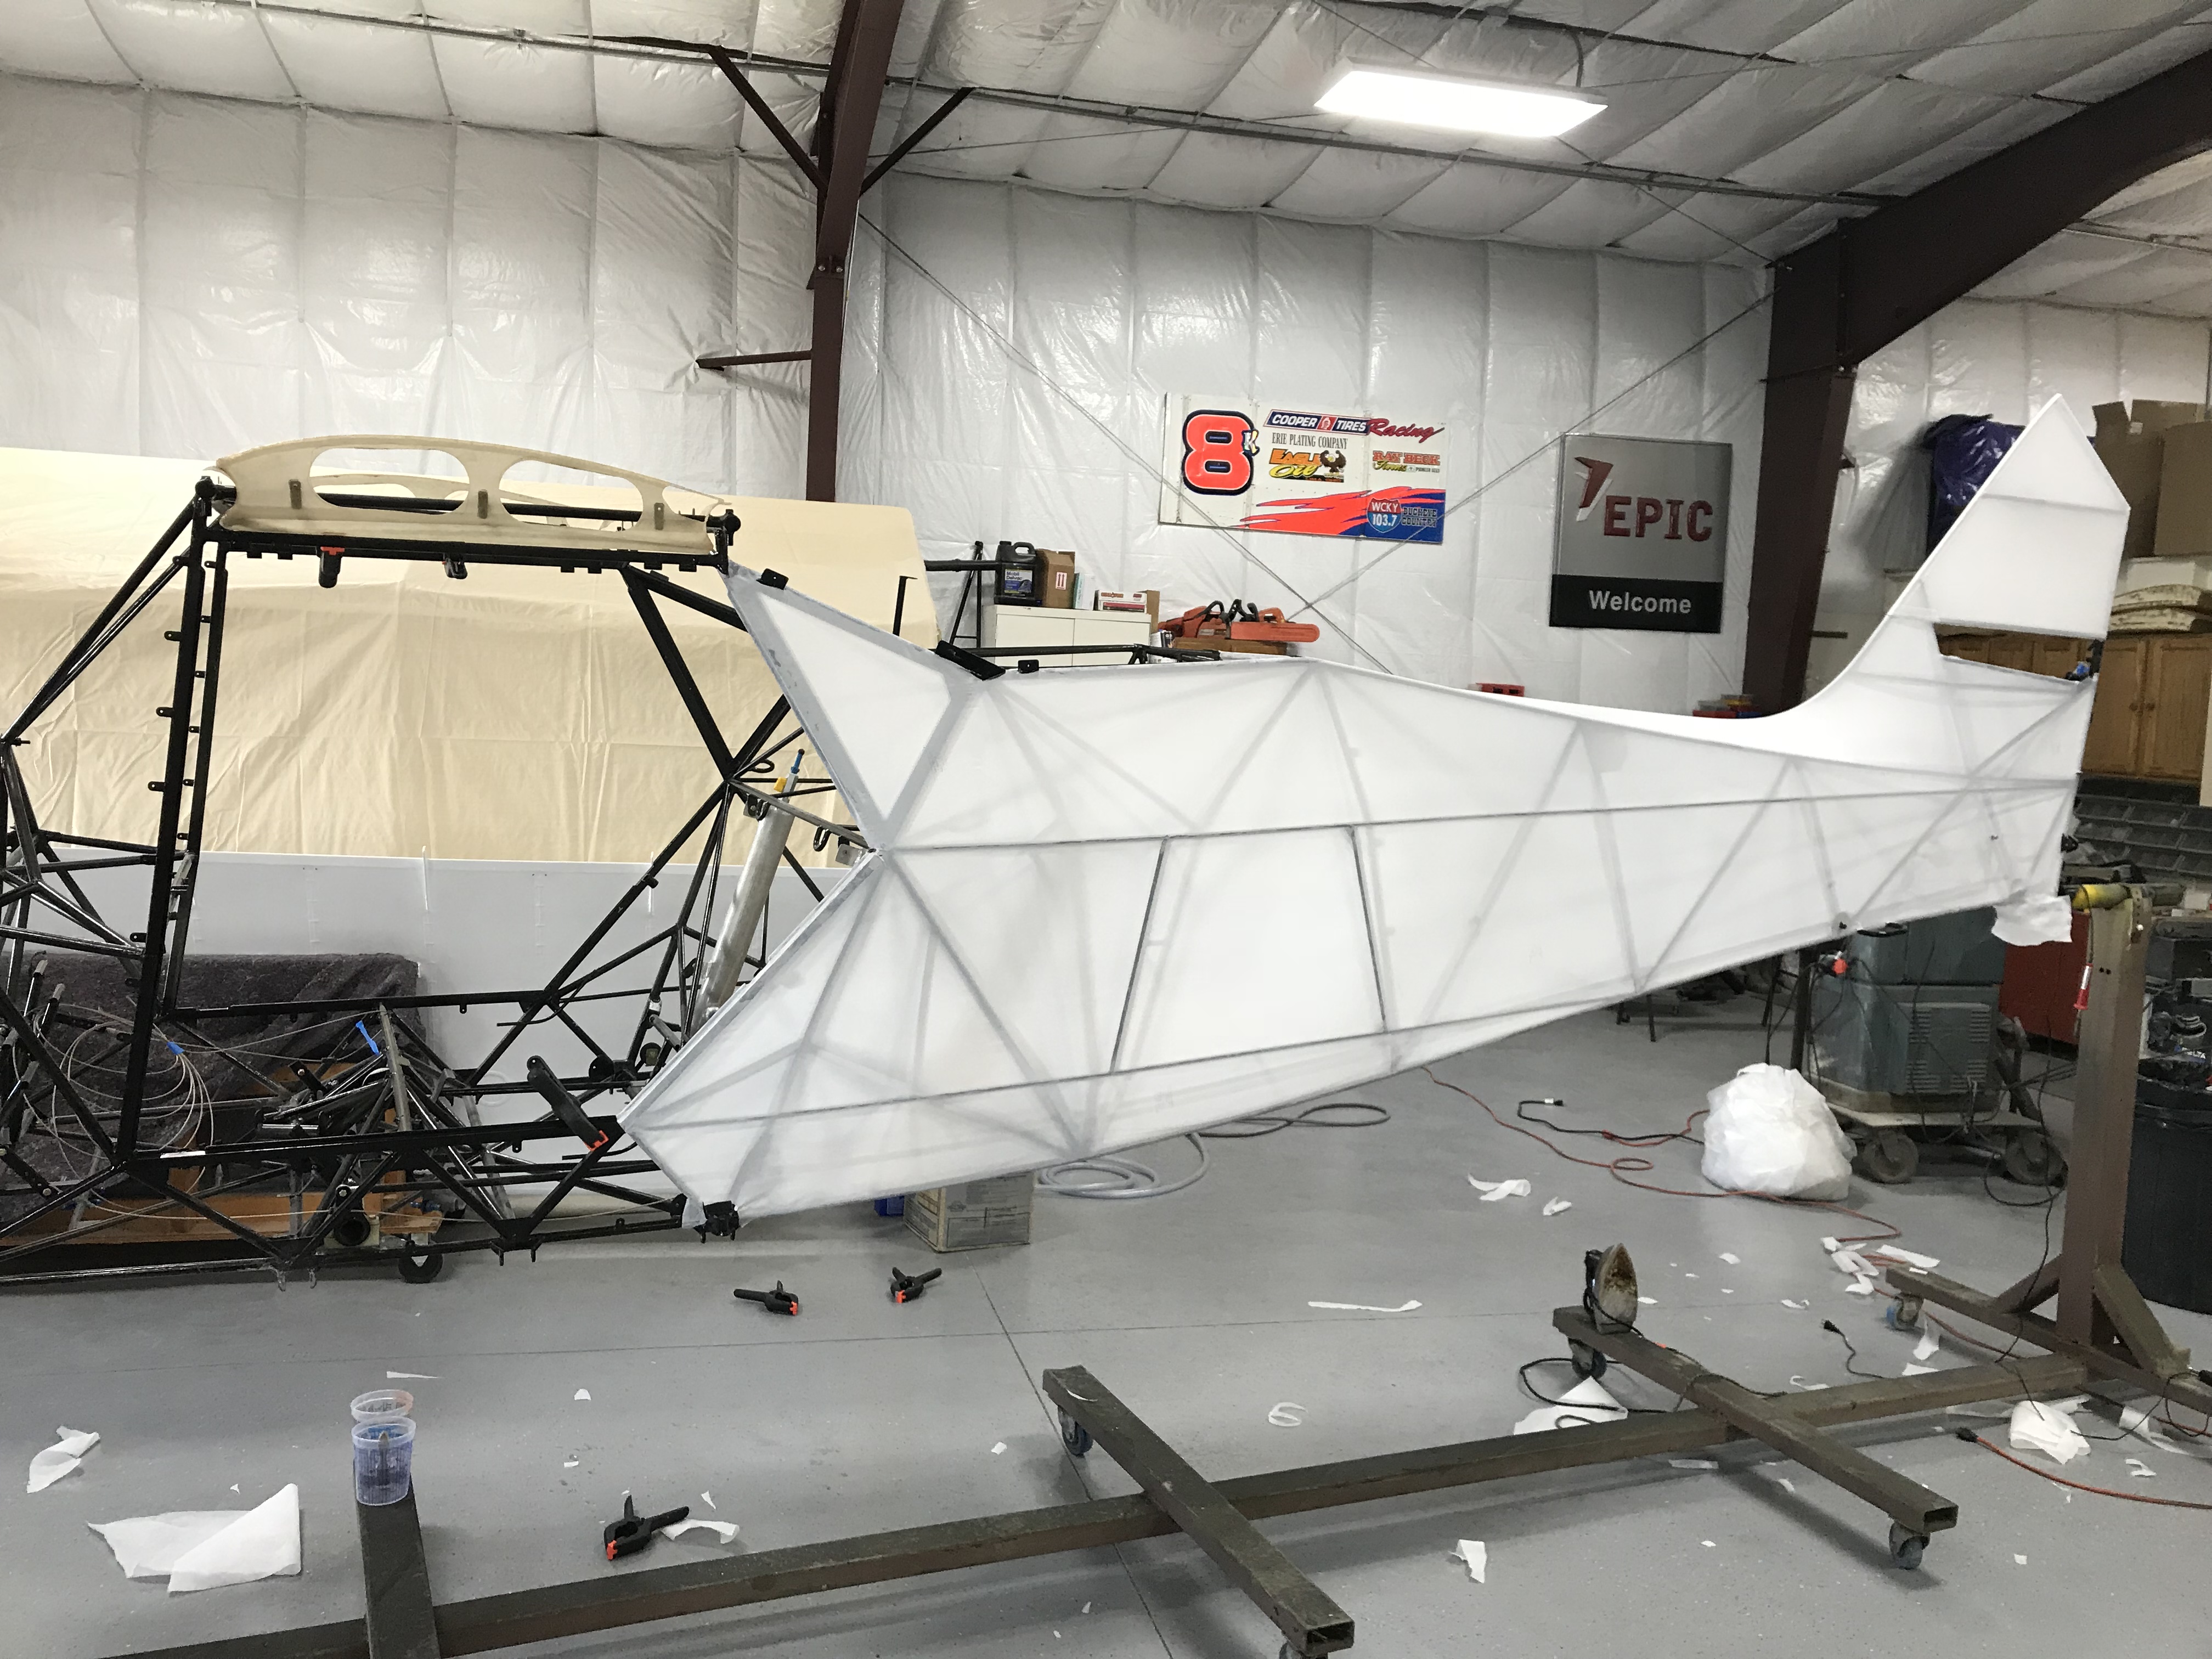
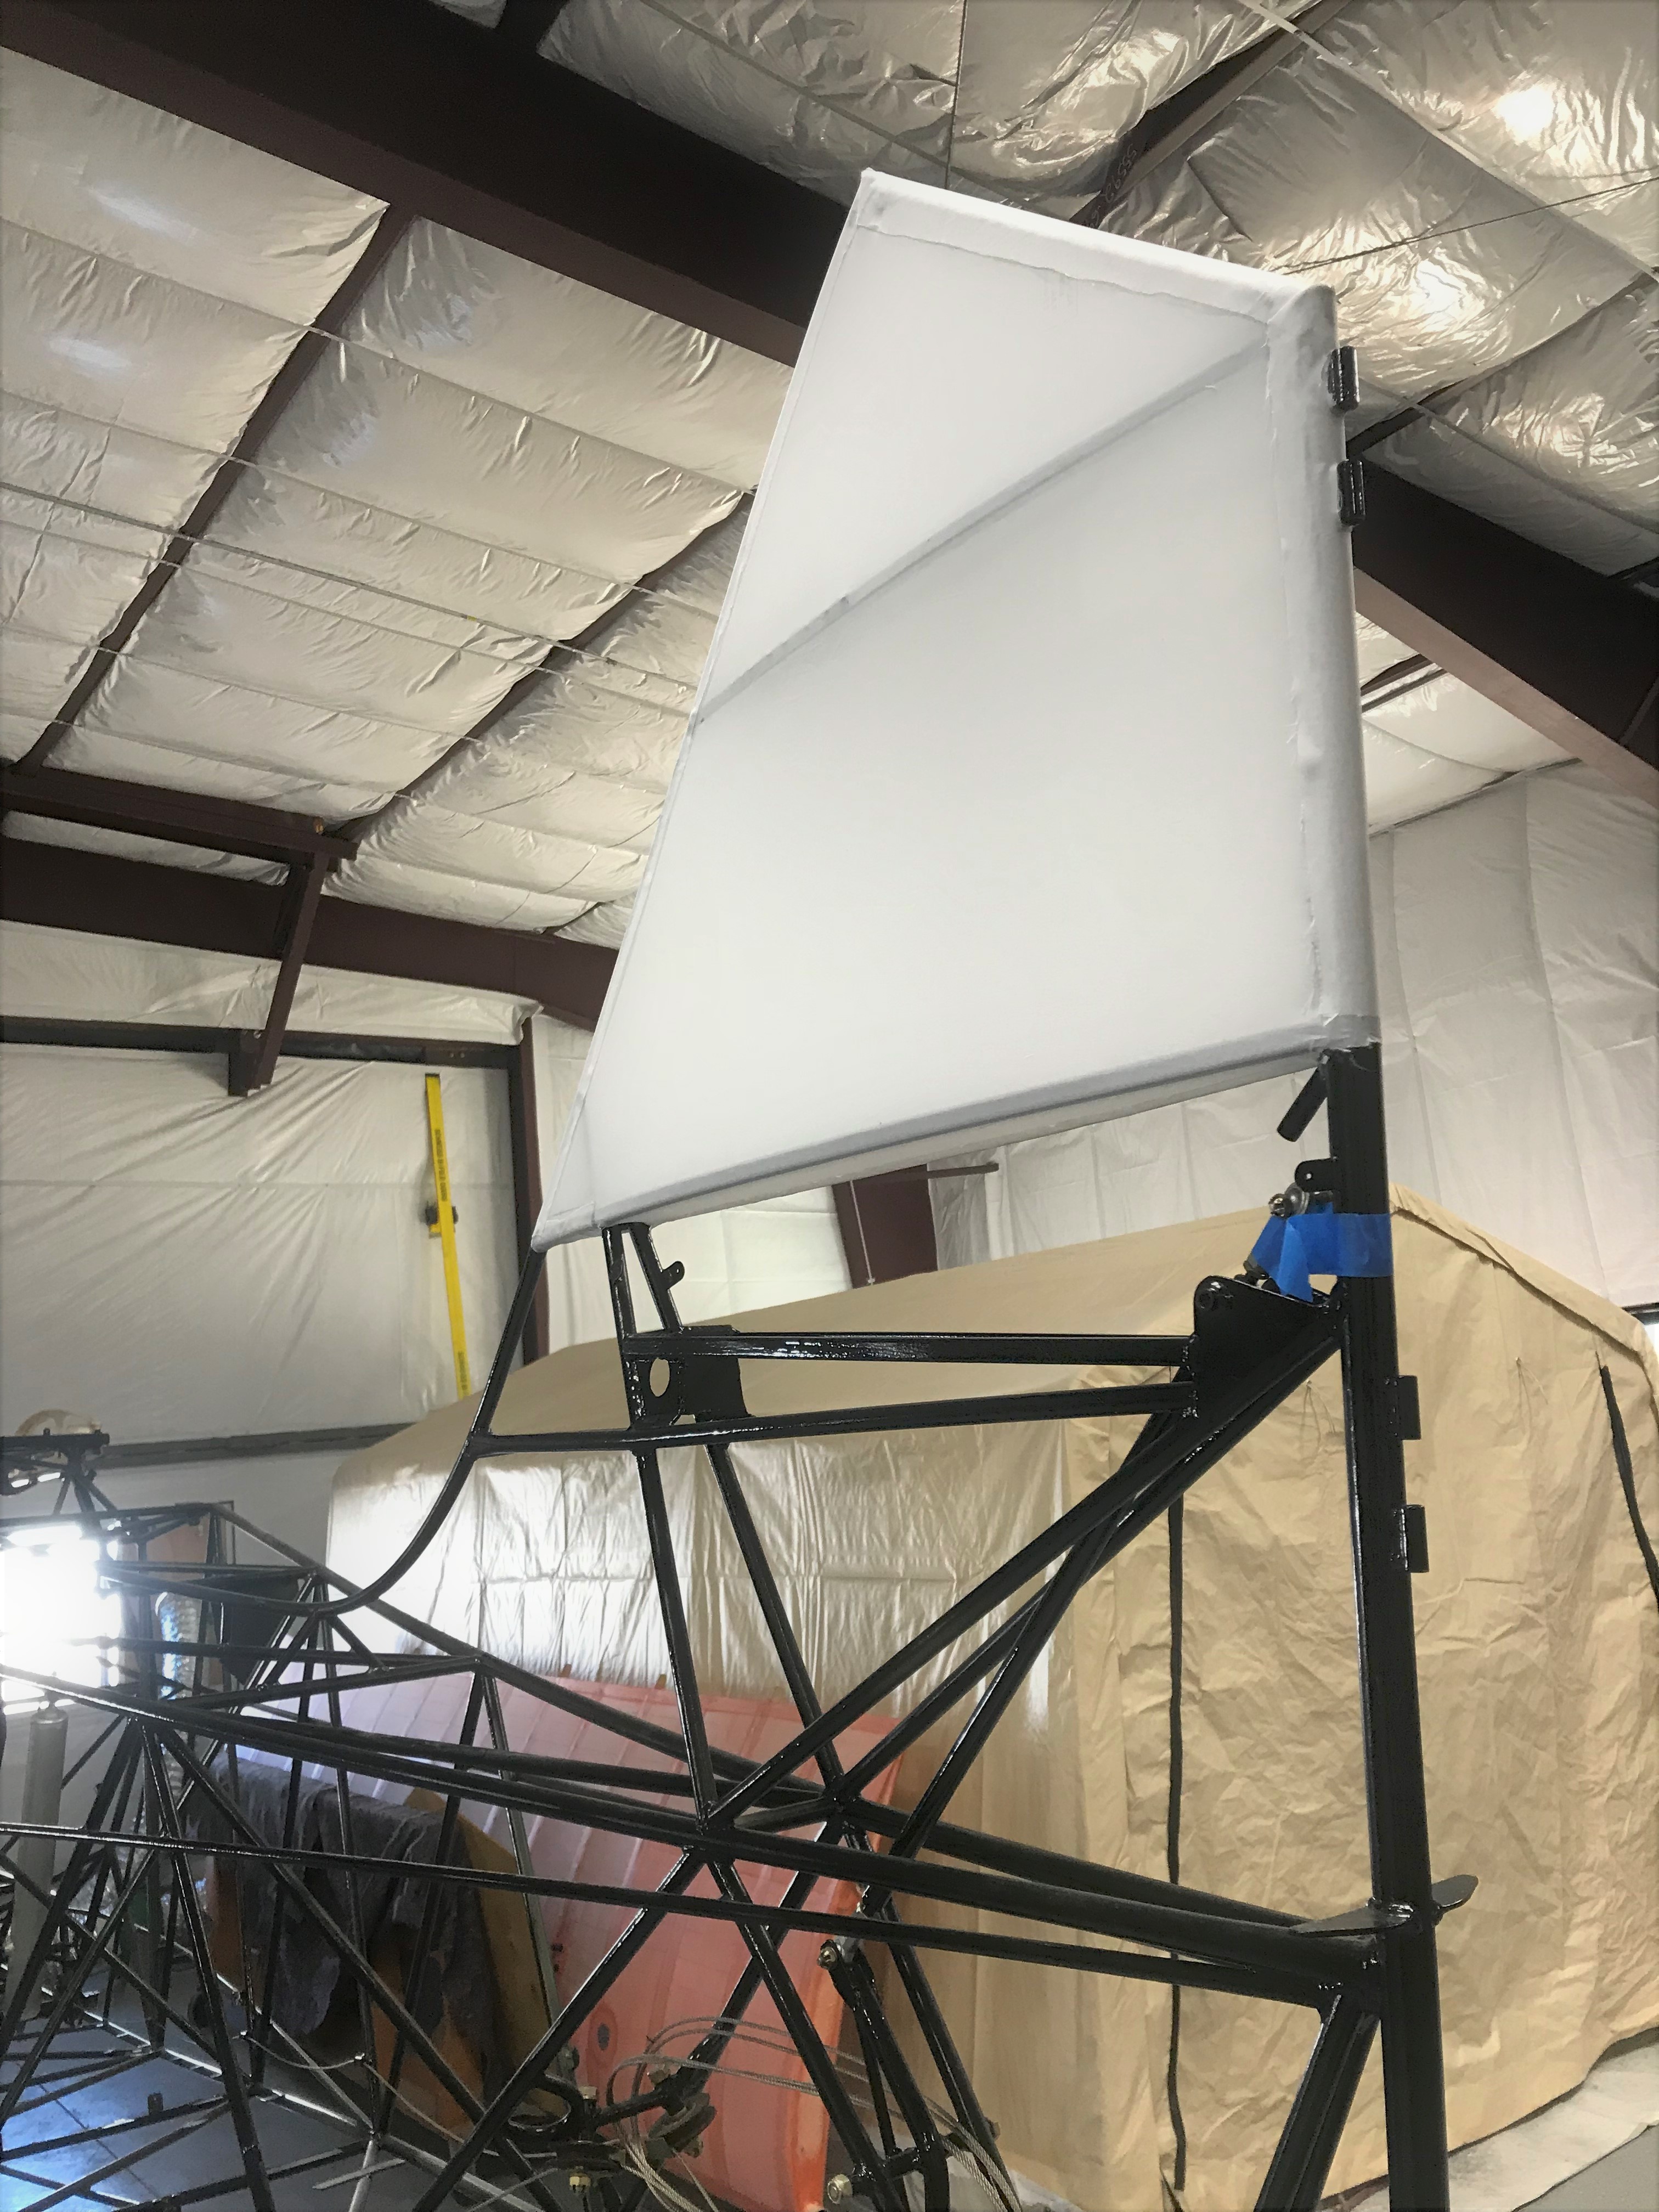
Been gluing and fiberglassing boot cowling on. Windshield is drilled. Put first stripe on a wing today.


-
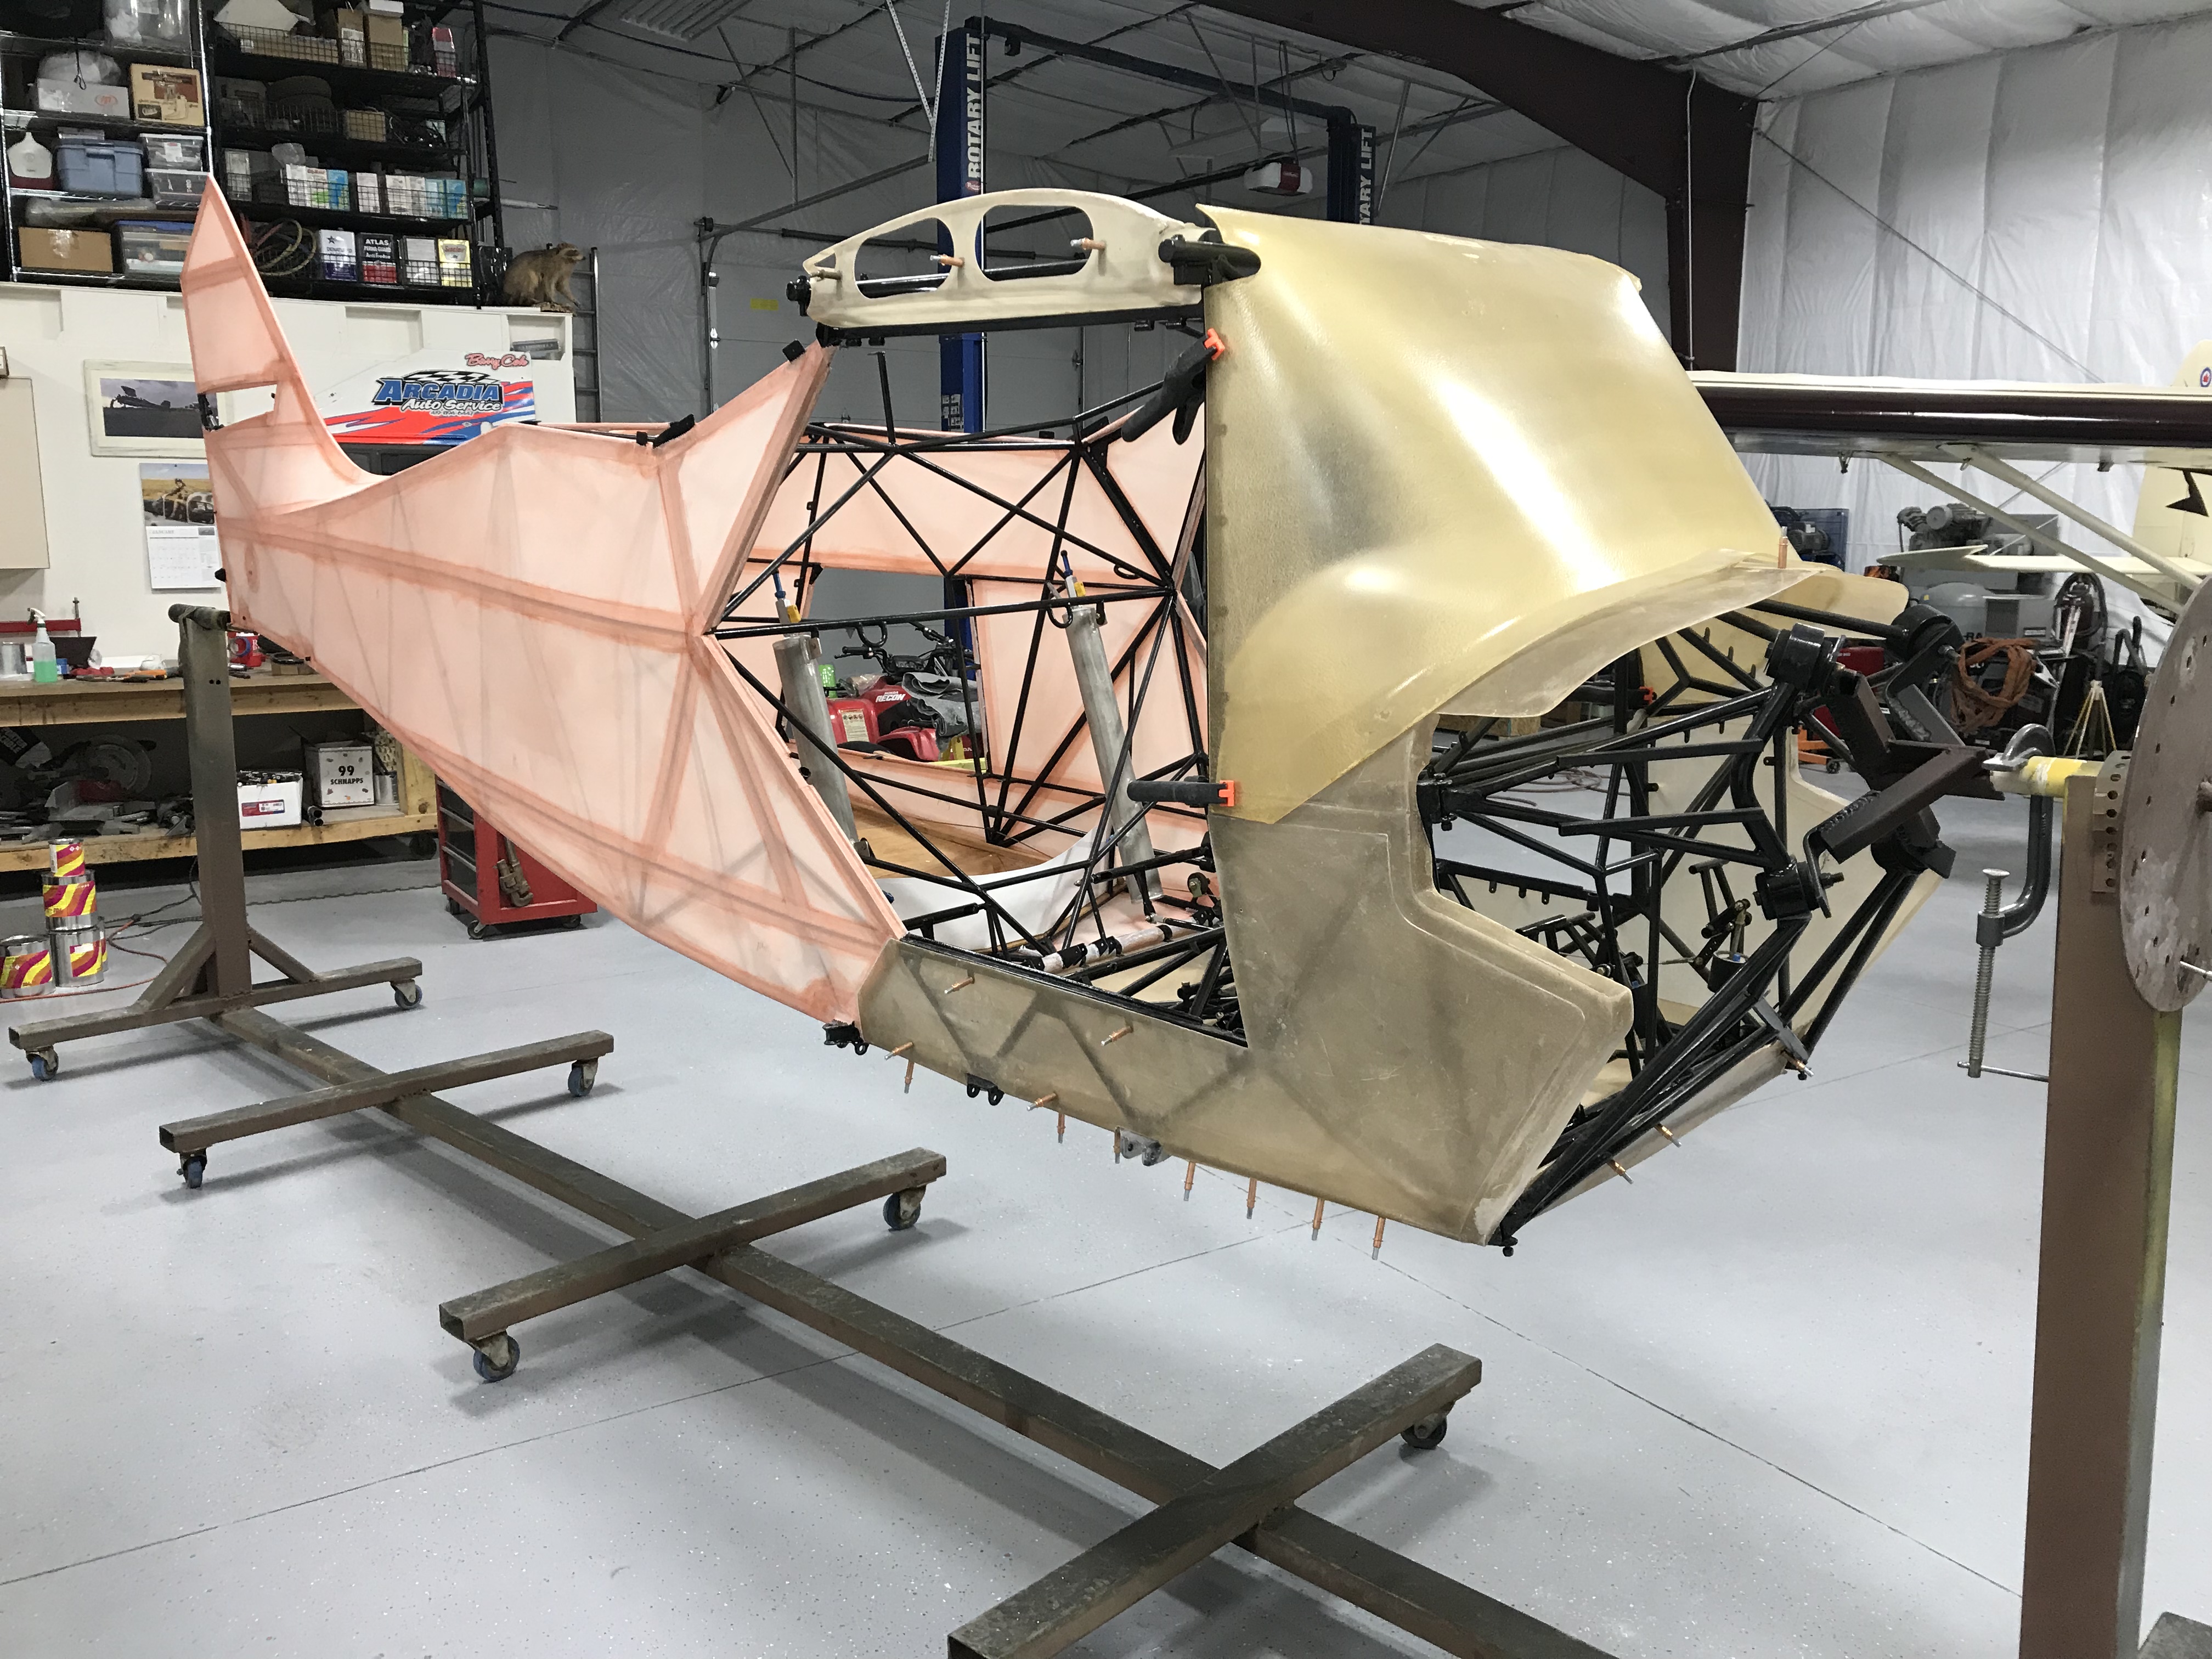
Fitting up boot cowling, floor pan and windshield.
 3 people like this
 -
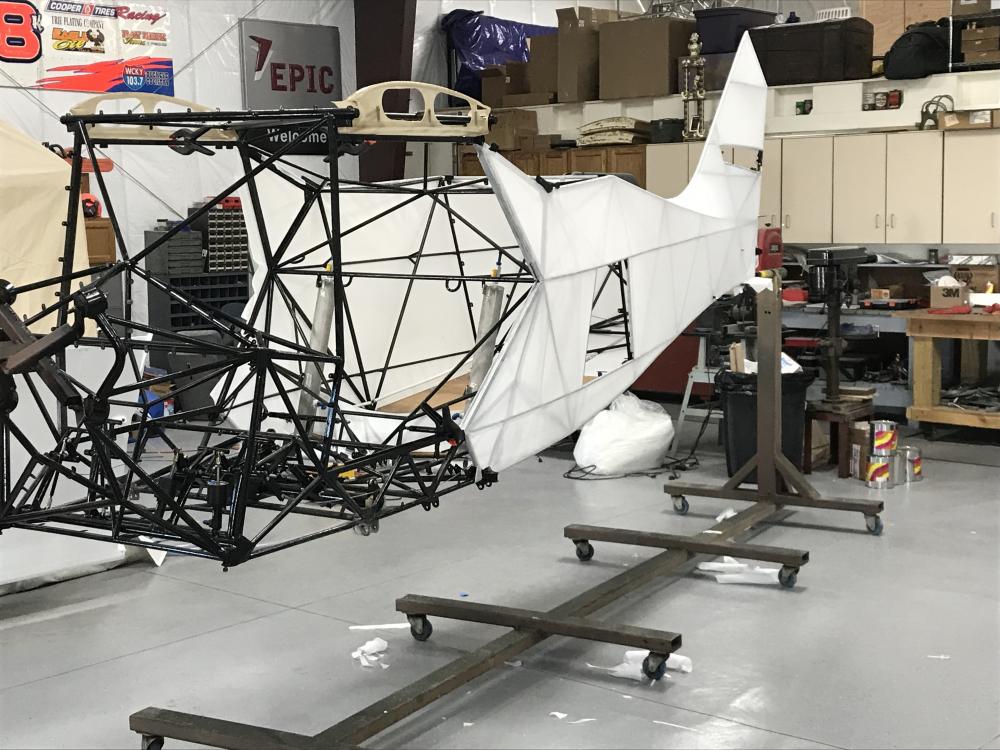
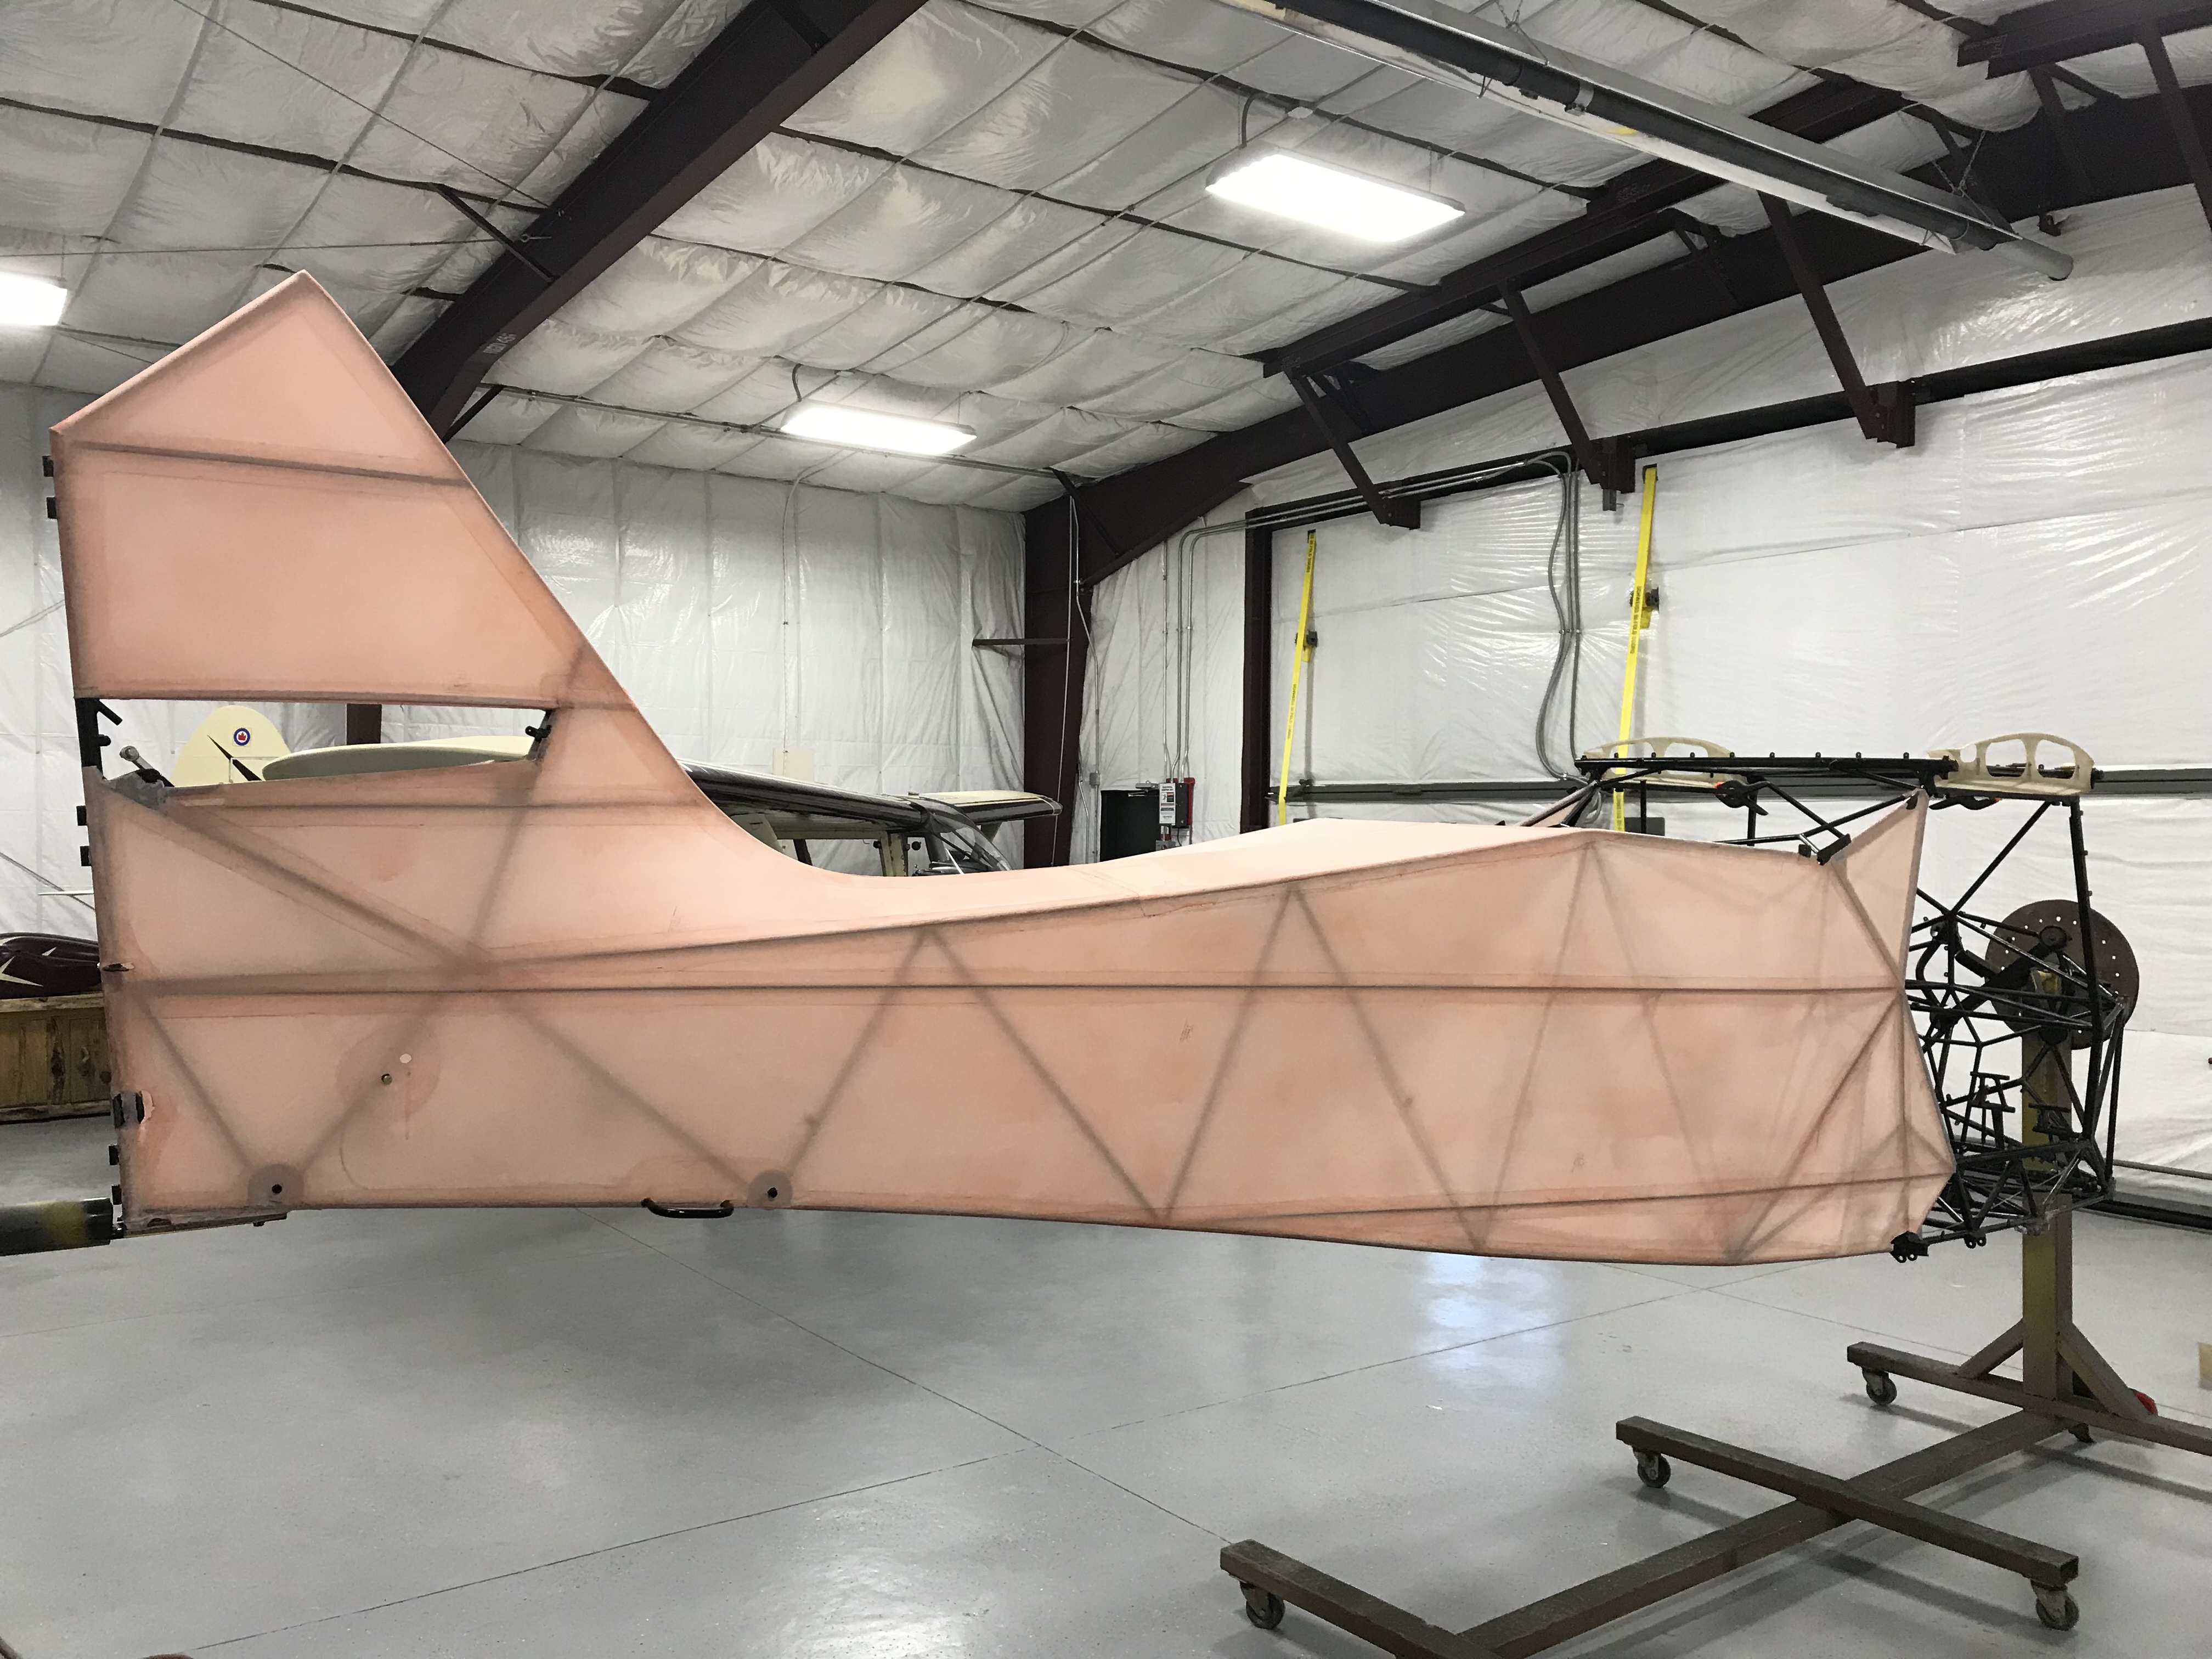
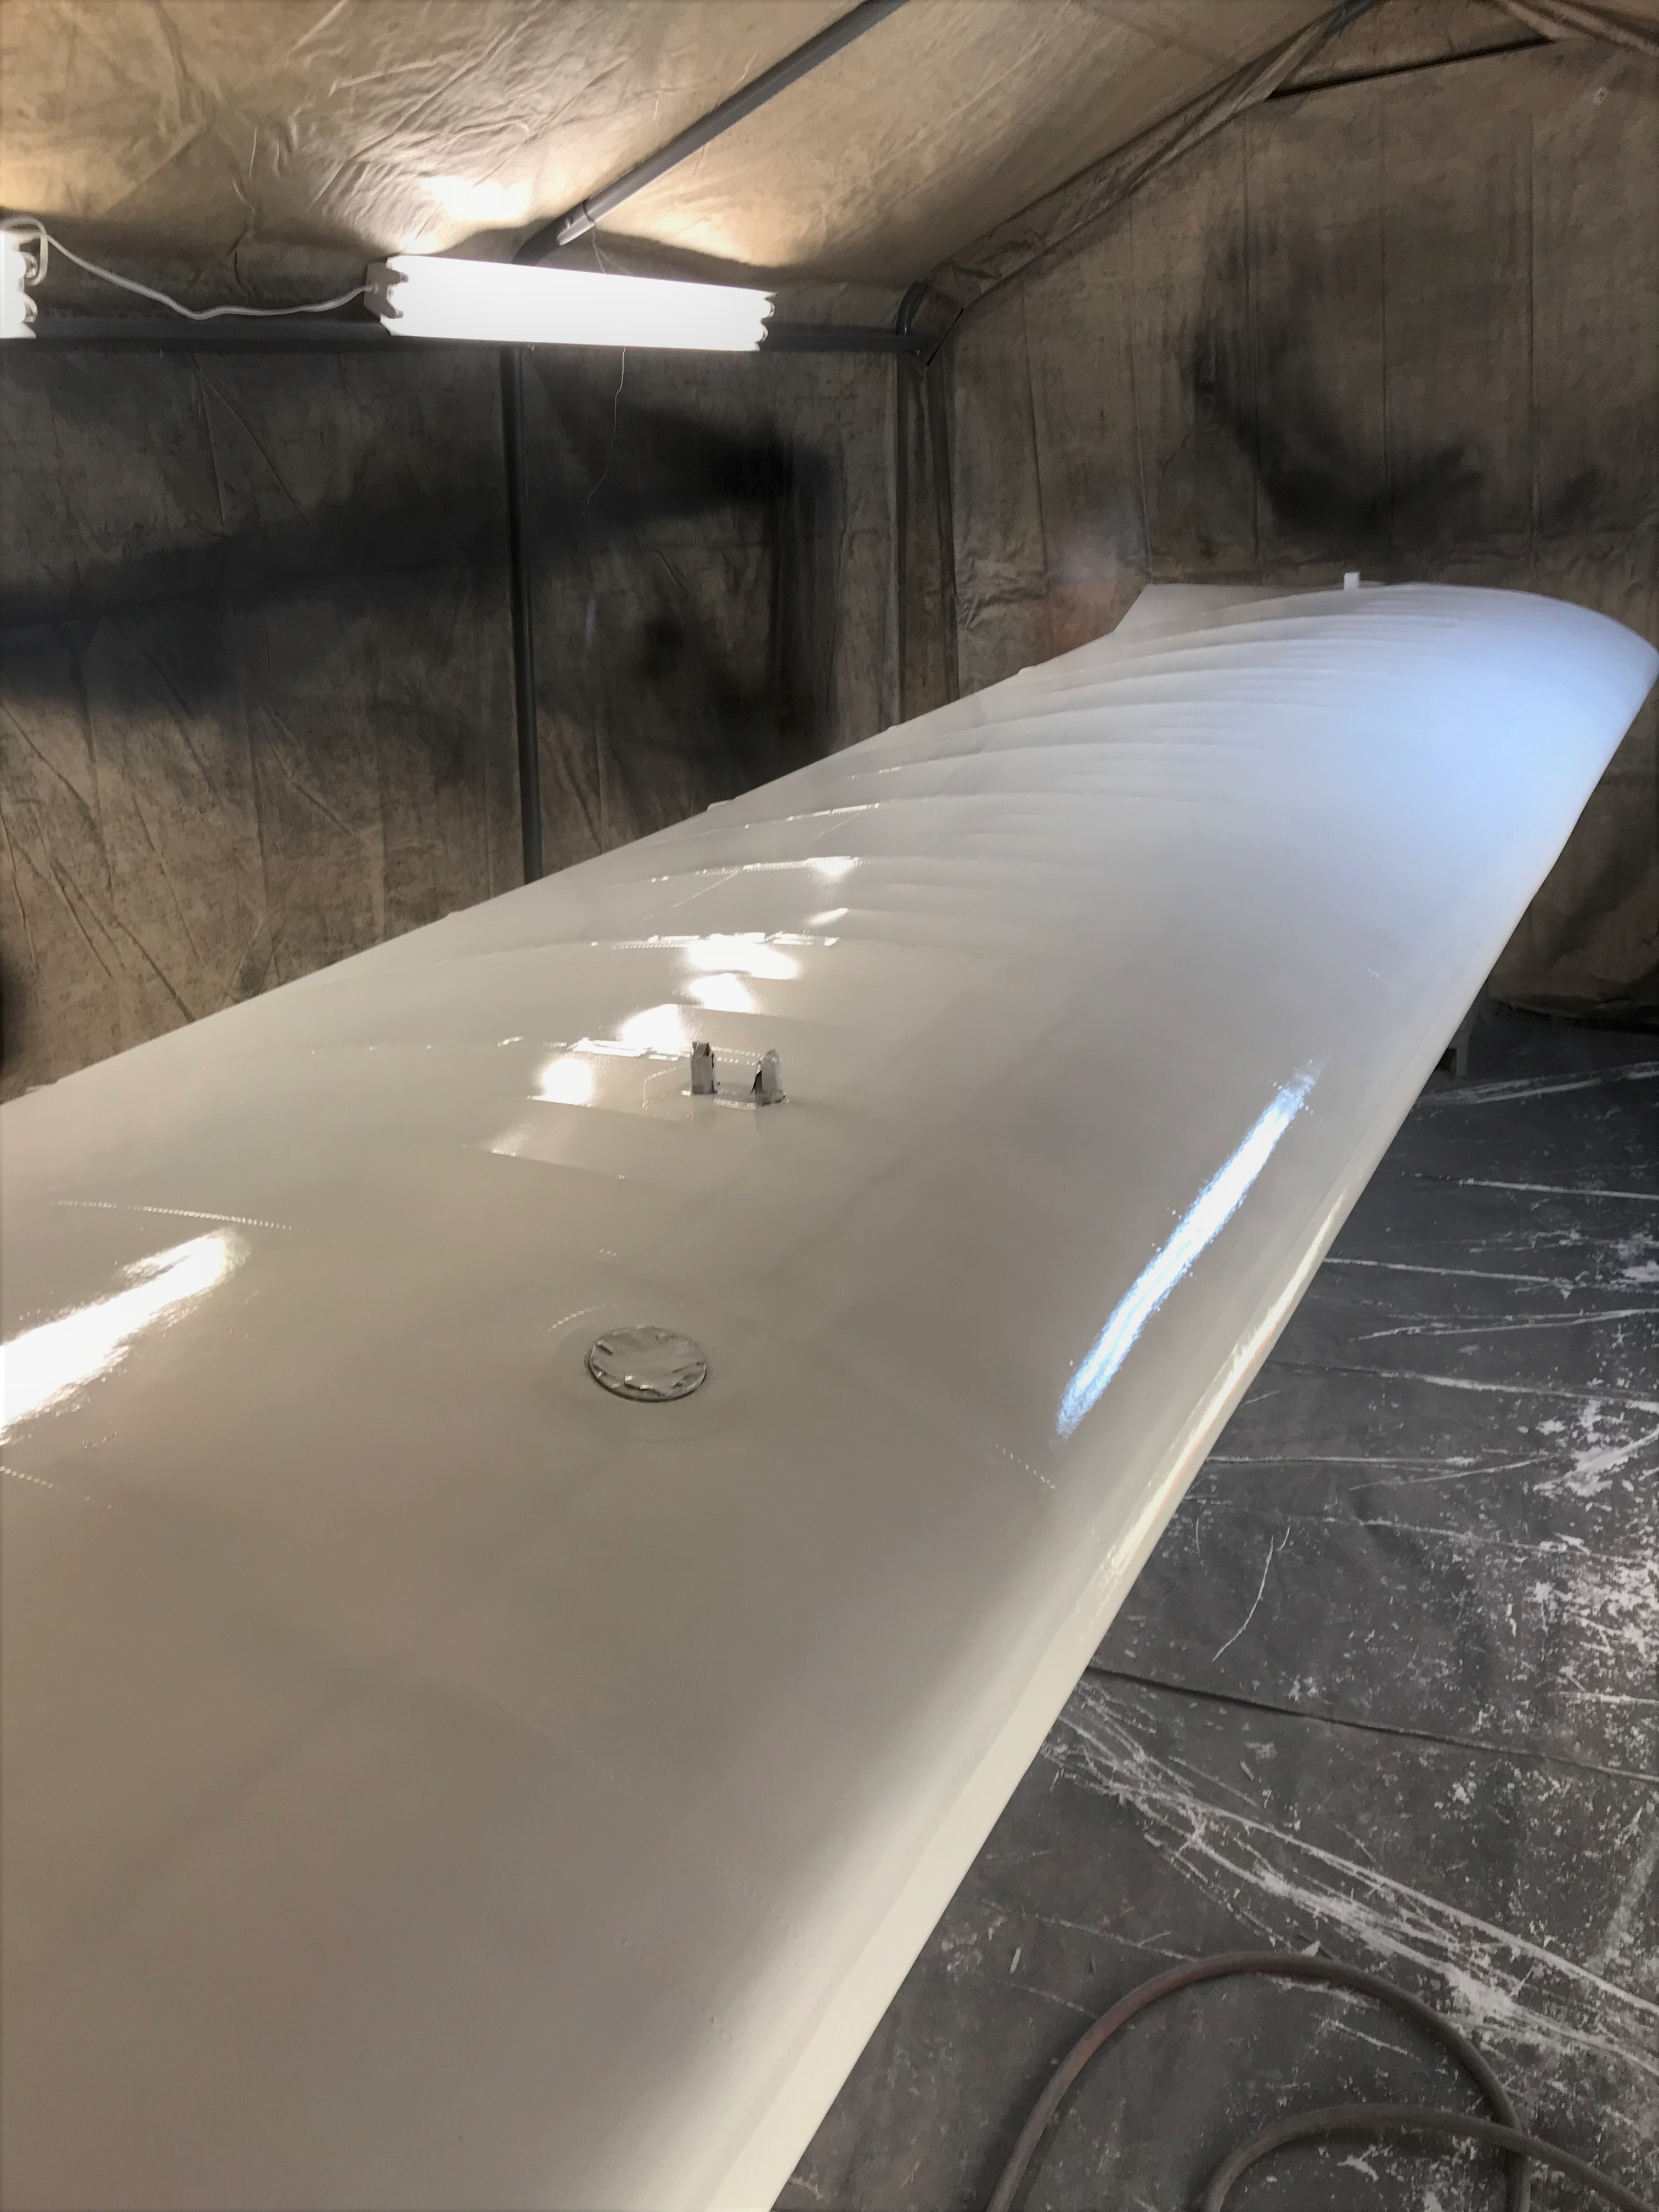
On to the paint booth for the fuselage! No more fabric or tape to install! Whew..........
 1 person likes this
 -
Ready for tape.....

-
Taco is wrapped.....
 1 person likes this
 -
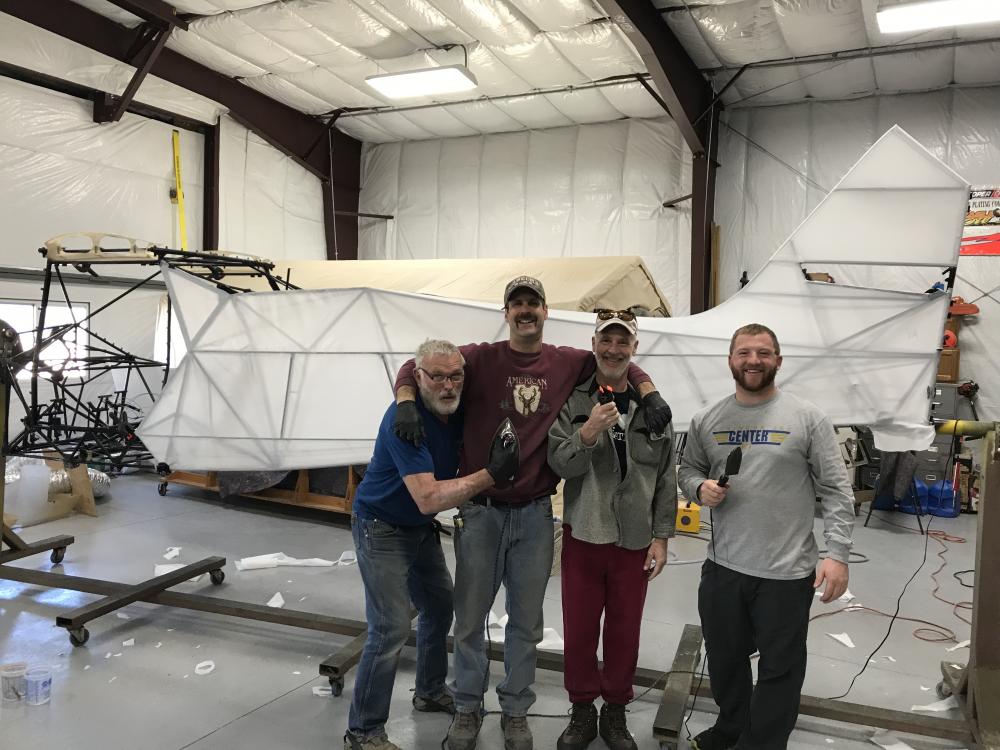
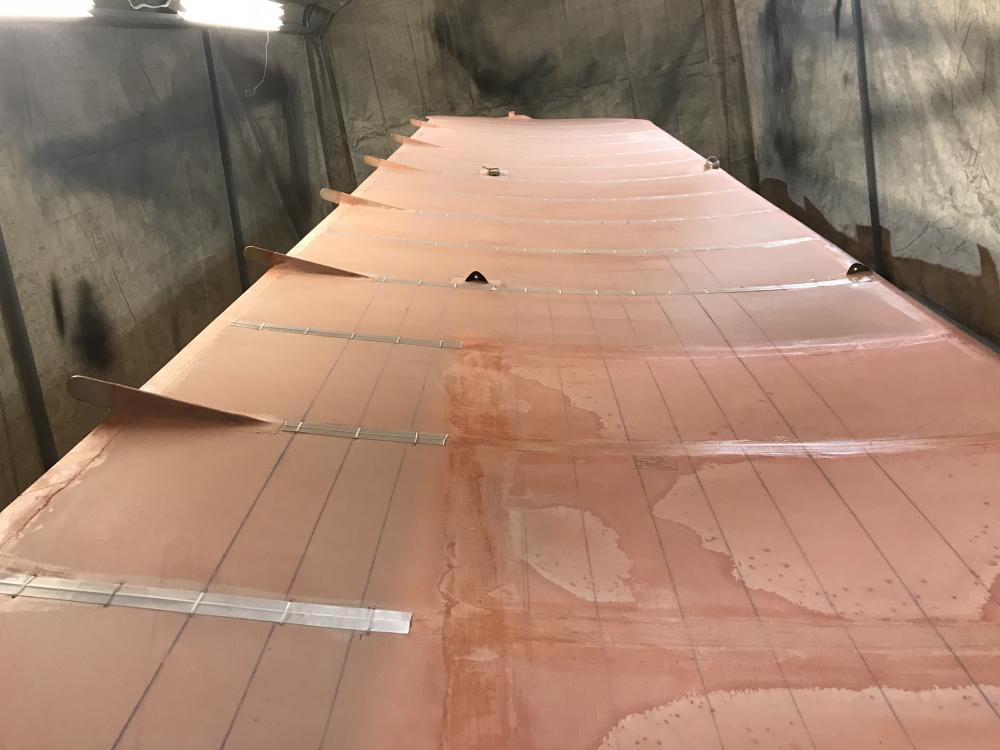
Great day yesterday with the help of friends. Got one side covered and more coats of Poly on the other wing.

-
Chief-
Please bare with me on silly questions, learning curve be mighty steEP! Lol
Im guessing these two cylinders are header tanks. Why 2? Thank

Yes, they are header tanks. One for each wing tank. These prevent getting air pockets in the fuel system from fuel sloshing in the main tanks. The reason for two are because you can swith tanks with the fuel valve. Search this site, I'm sure there is much discussion on this and other fuel related topics. Happy building!
-
Today was baggage day, I hate baggage!! Anyway, I am ready to wrap this taco.......
 3 people like this
 -
One wing under paint, working on fuselage covering and cowling while waiting for wings to dry between coats.


 1 person likes this
 -
RJG,
Welcome to the Magnum insanity!!!
1. My wings where already set up when I bought my kit, but I did double check everything before I covered them, and the previous builder did a great job. The manual explains in detail how to set up the wings, let me know if you need a copy. There is only one adjustment on the lift strut on the left side only. Others will most likely have more experience with this subject than me.
2. My wings where also built with tip tanks and I eliminated them by adding the 3 false ribs, no big deal. You can find it in this post back a few months. No need for bottom false ribs either.
3. Not sure what you mean about wing tips, are you talking about tip tanks? If so, I chose not to use them because my bladder only flies for 3 hours at a time ;))
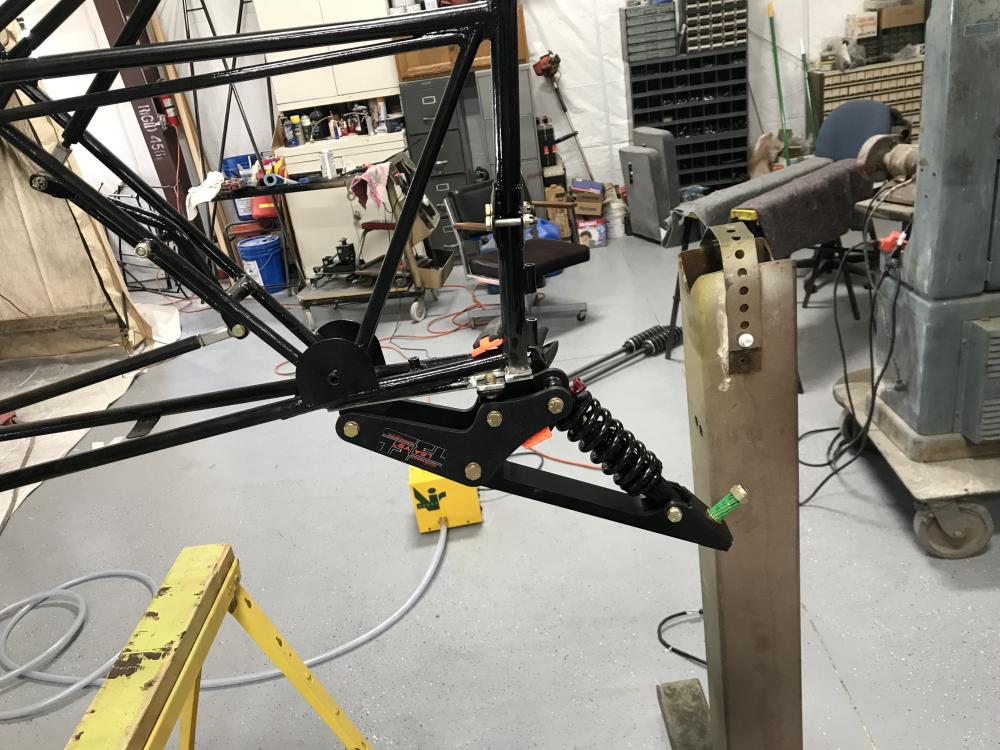
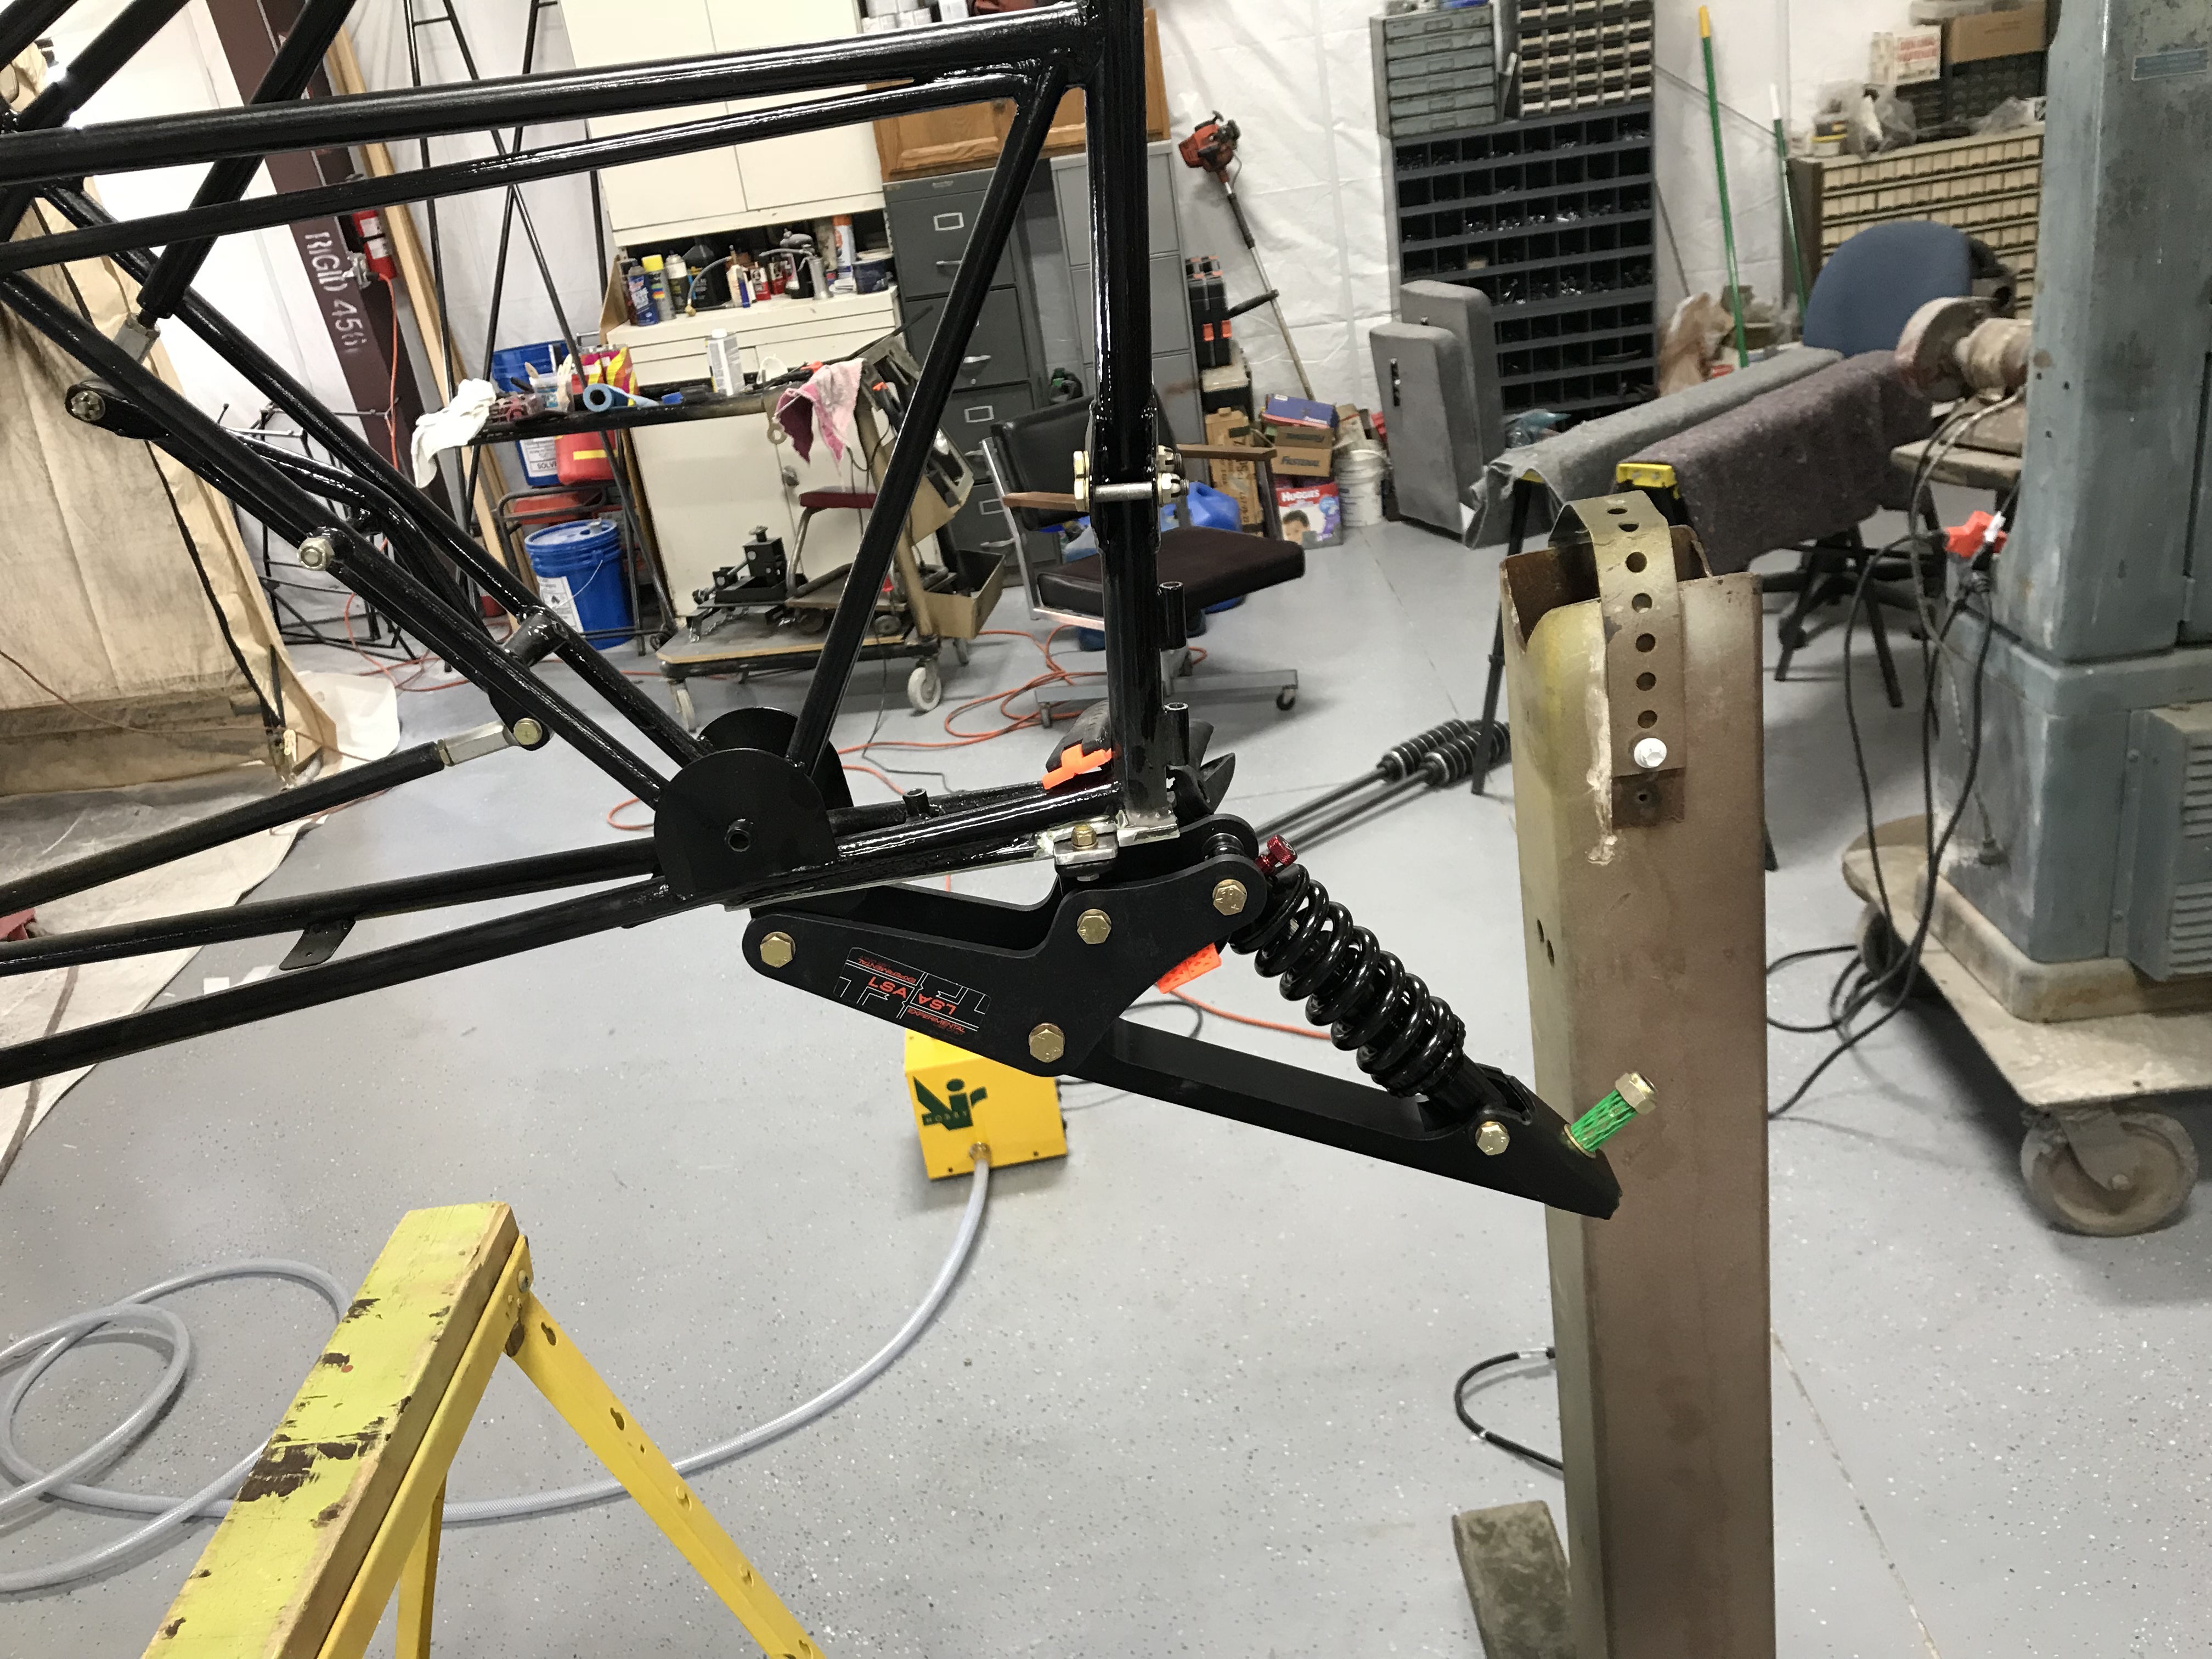
4. Check out the gear Ron and I used before going Grove, this is also documented on this forum in detail. Grove is good too, but our set up doesnt have near the recoil that a Grove will. IMO
Blue Skies,
Barry
-
Ed, I paid $650 and got free shipping.
1 person likes this -
Yes, the weight does NOT include the tail-wheel. My old spring and tail-wheel is 8.6 lbs. I will let you know the total weight after I get the right tail-wheel bolted on. I think it will be the same weight or a bit lighter.
-
Decided to take a break from MEK to let my brain cells recuperate. I fabricated mounts for the new T-3 tail spring I will be using, can't wait to land with this and ABW's!!!
 1 person likes this
 -
RJG,
In my opinion, the rudder is facing into the wind most of the time, so wind forces will not help balance in any way. Hope I am understanding you correctly.
-
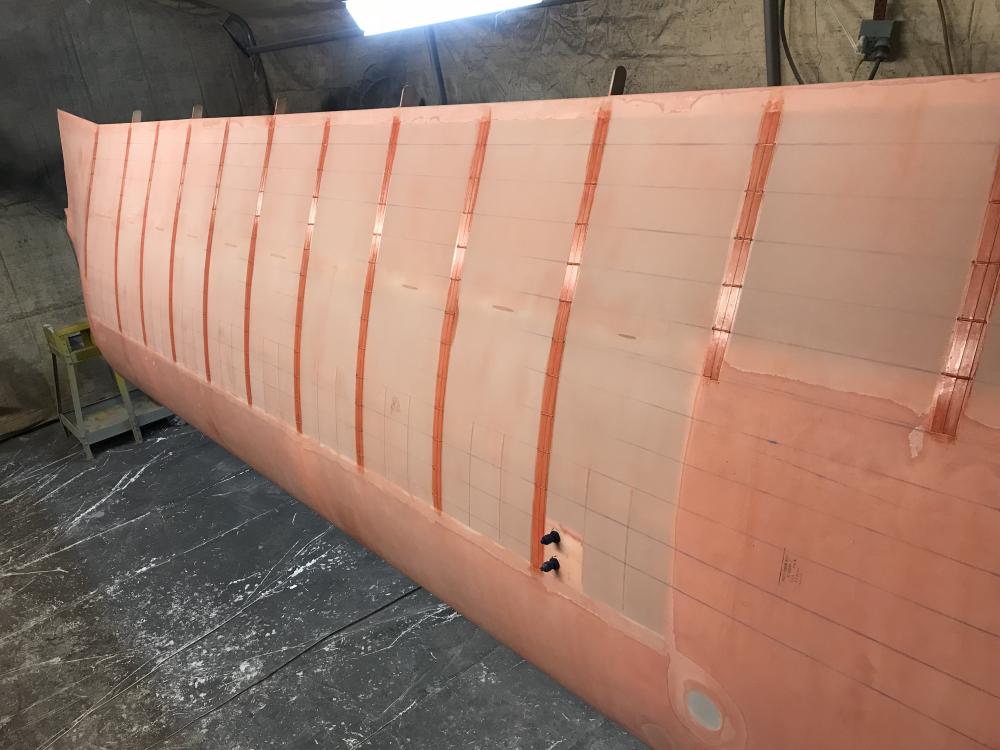
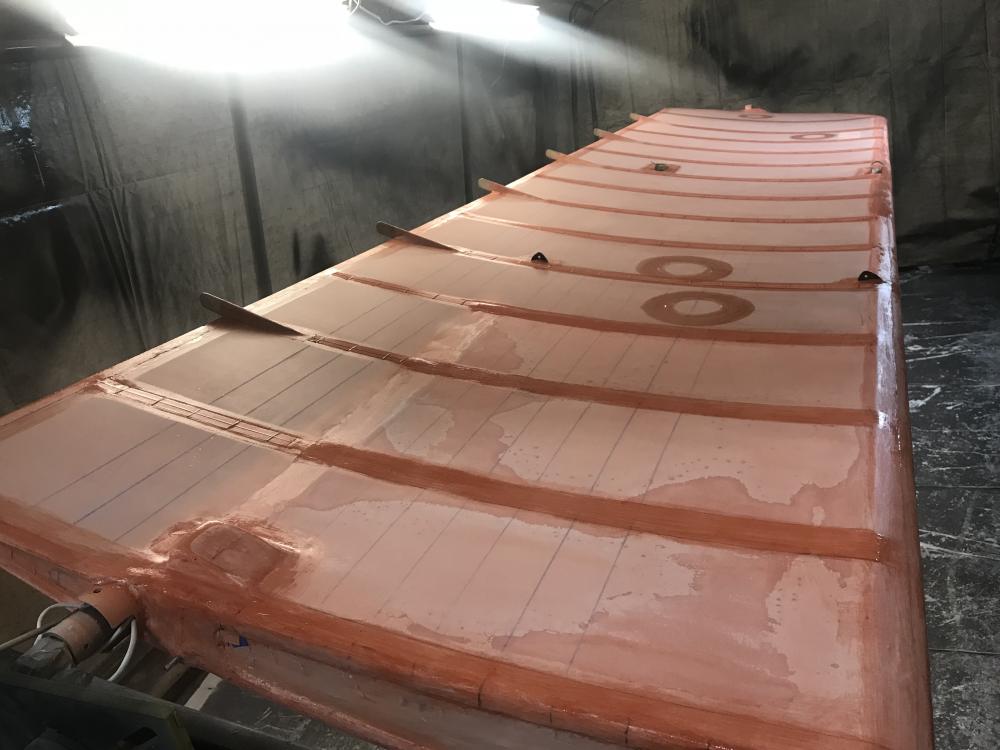
Yes, I ended up with 8 inspection rings. Thanks for that good advise!!
1 person likes this -
Ron,
Thanks, that is exactly what I had to do. I used some wire to make a needle with the right curve, once the curve is right it worked pretty good. I was hoping to come up with a quicker way, but I don't think there is one! I am sure I can do the next wing faster, I have had plenty of practice now!! Thanks again for your input!
1 person likes this -
Agreed, probably just have to spent the time and do it they way I did this one.
1 person likes this -
Nice idea, that may work as well. I will let you know what I come up with. I was planning on just a light shrink, not enough to warp the wing.
-
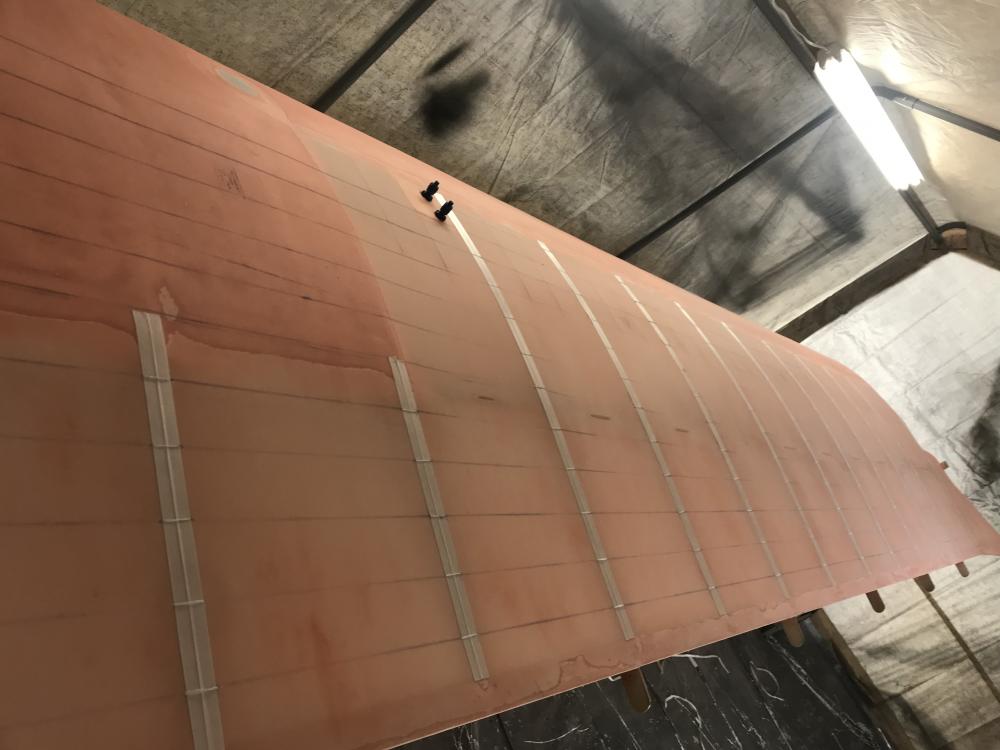
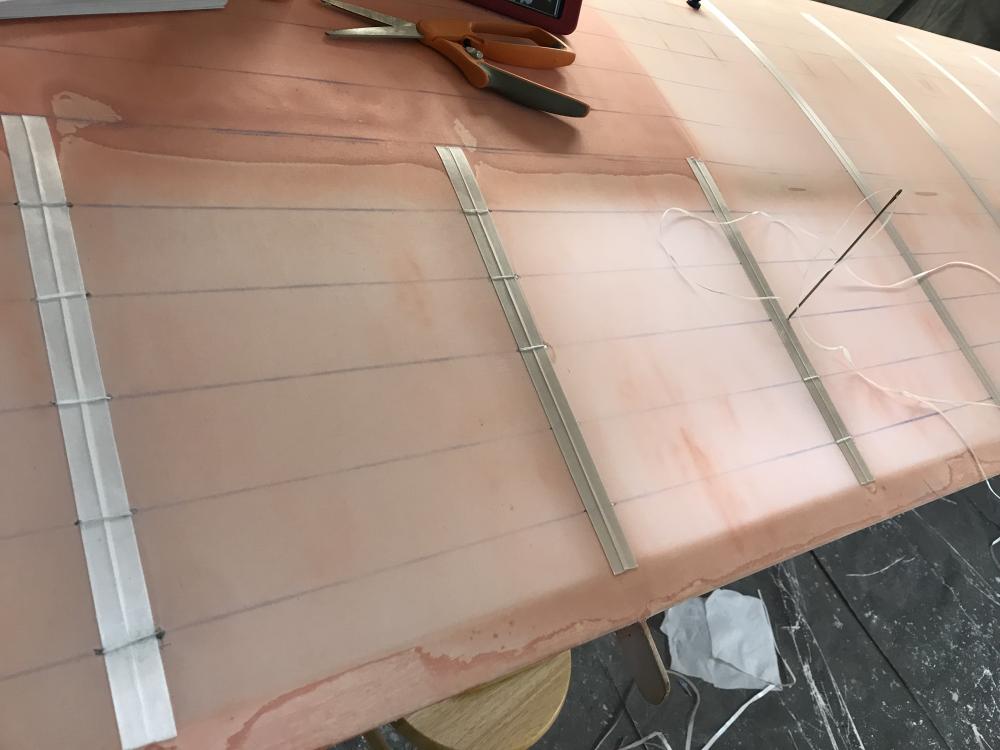
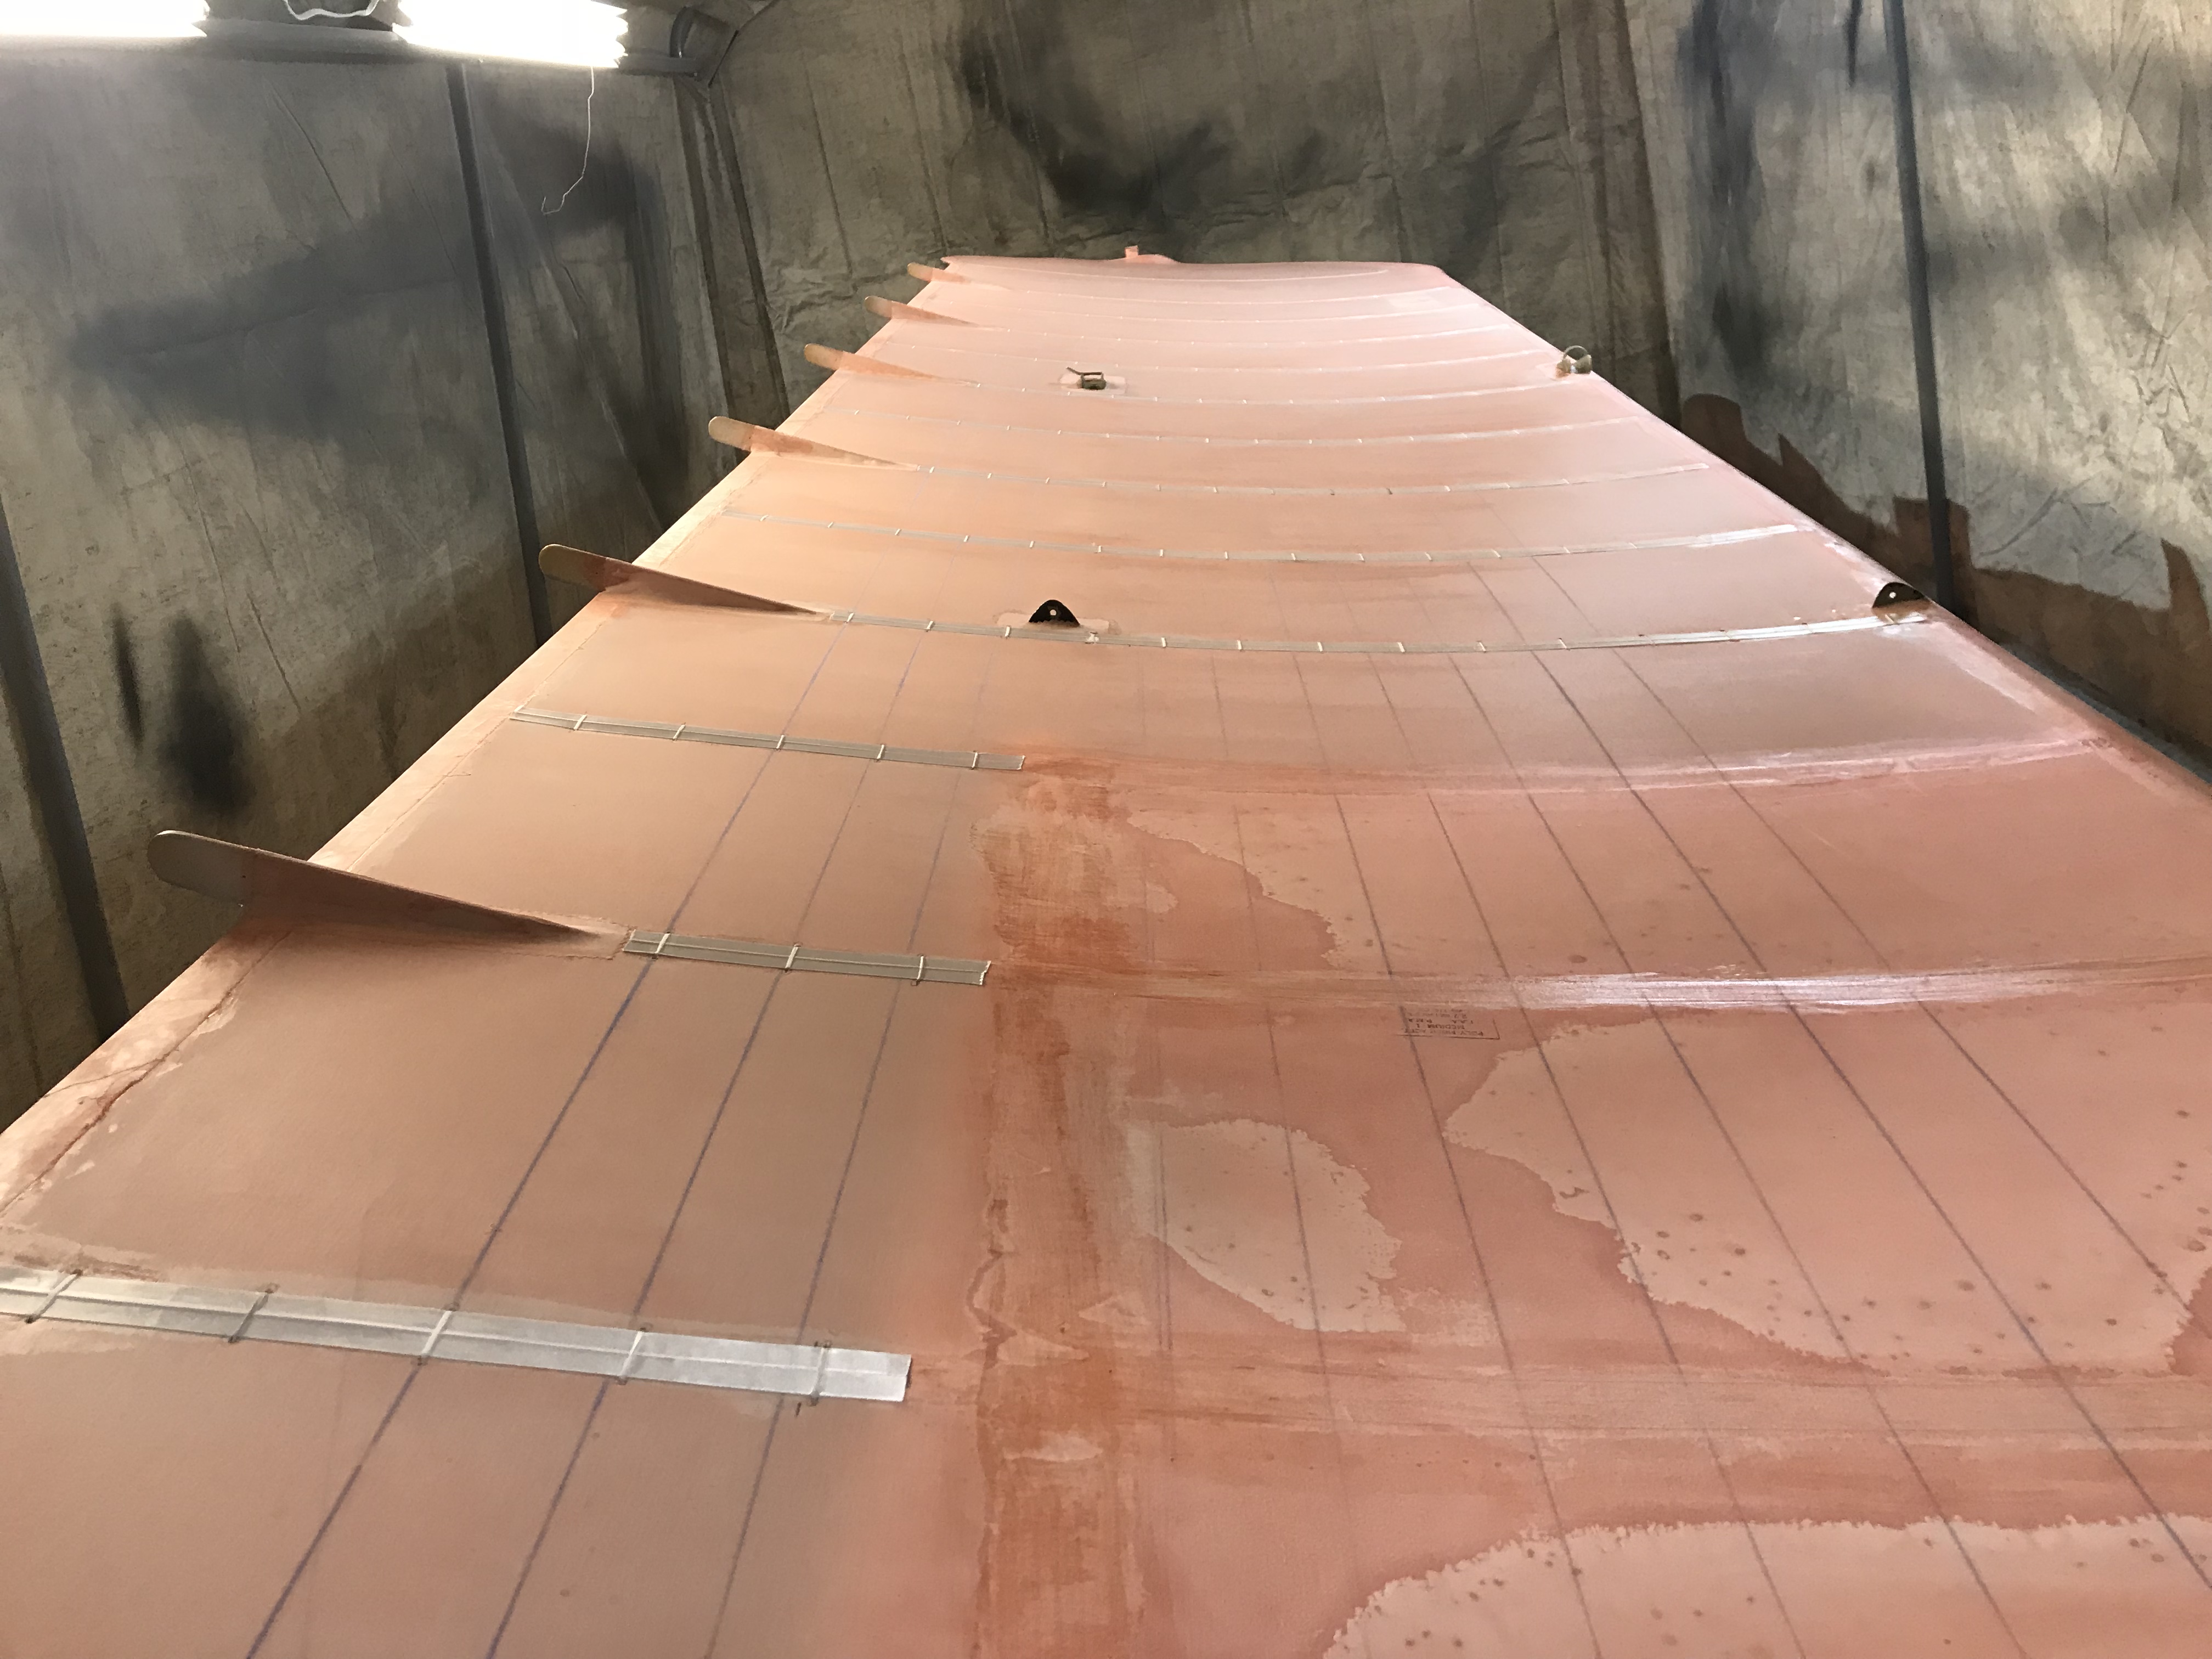
Today I finished stitching the left wing, poly brushed the stitch lines, marked for finish tapes and installed the inspection rings. Poly brushed the finish tape areas (2coats) and the stitching and reinforcement tapes got 4 coats of ply brush. I have also decided on the right wing to do the stitching before covering with the top fabric to make that process easier. That cost me about 3 -4 hours extra labor. With the plywood leading edge, there is no way to stitch except using a fish hook style needle made from flexible wire. Pain in the butt!!!! This will be my last post for a while as I will be repeating this process on the right wing for the next week or two.
-
Today I learned stitching, all I can say is wow........lots of holes...........
 1 person likes this
 -
It make your control inputs "balanced" or in other words, the weight that you feel on the control stick as you move it will not have a heavy or harder input in any direction. Also in higher speed aircraft, it helps prevent flutter, but this will not be an issue with a Magnum. I am sure there is more out there on this subject, this is just my understanding.
Barry


Step 2, Build Magnum!!
in Avid Magnum
Posted
Thanks Paul.